Nissan Sentra (2019 year). Instruction - part 6
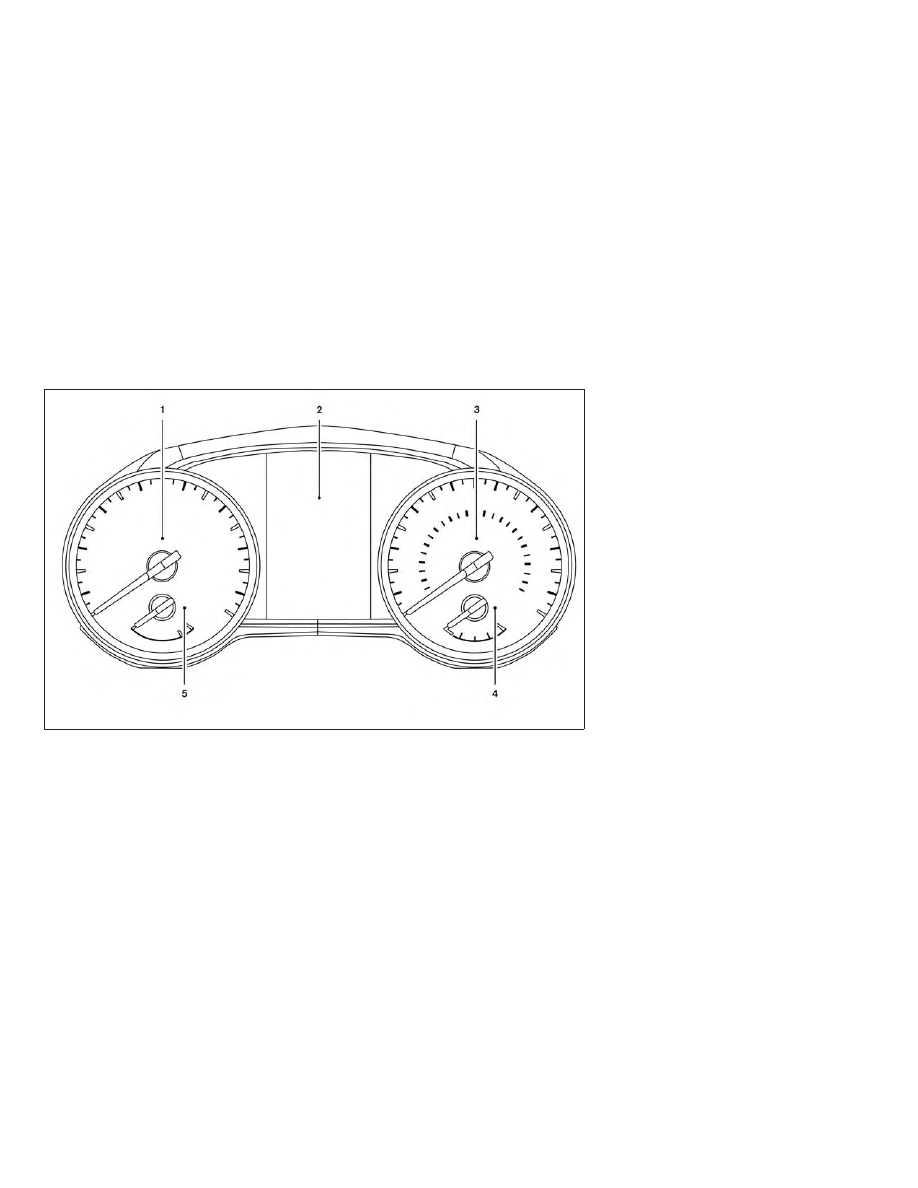
1.
Tachometer
Warning and indicator lights
2.
Vehicle information display
Odometer
Twin trip odometer
Outside temperature display
3.
Speedometer
Warning and indicator lights
4.
Fuel gauge
5.
Engine coolant temperature gauge
SPEEDOMETER AND ODOMETER
This vehicle is equipped with a speedom-
eter and odometer. The speedometer is
located on the right side the meter cluster.
The odometer is located within the vehicle
information display (Type A — if so
equipped) or the trip computer (Type B —
if so equipped) to the left of the speedom-
eter.
Type B (if so equipped)
LIC3416
2-4
Instruments and controls