Nissan Cube (2014 year). Instruction - part 18
8-14
Maintenance and do-it-yourself
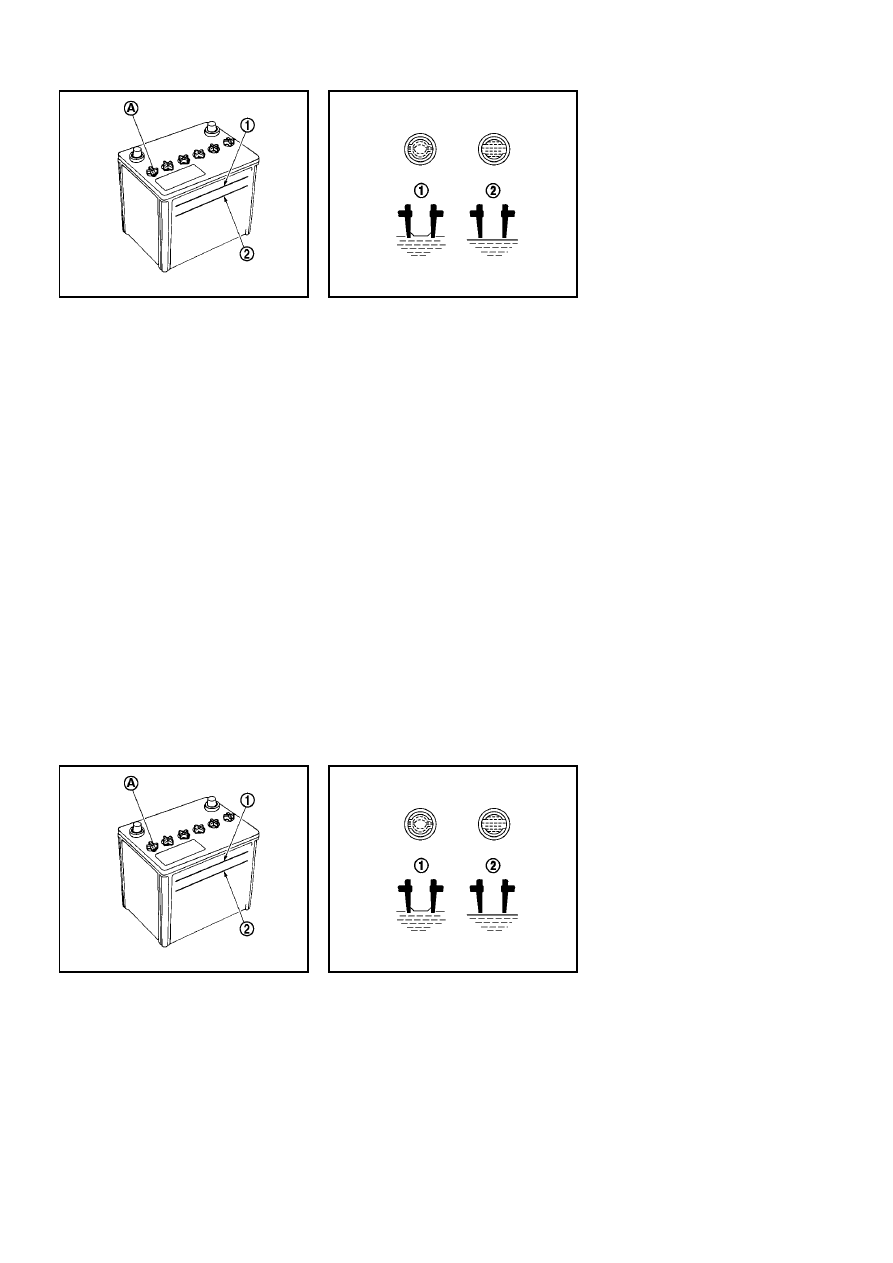
DI0137MA
Check the fluid level in each cell. It should be
between the UPPER LEVEL
*
1
and LOWER
LEVEL
*
2
lines.
If it is necessary to add fluid, add only distilled
water to bring the level to the indicator in each
filler opening. Do not overfill.
SDI1480C
1. Remove the cell plugs
*
A
.
2. Add distilled water up to the UPPER LEVEL
*
1
line.
If the side of the battery is not clear, check
the distilled water level by looking directly
above the cell; the condition
*
1
indicates
OK and the condition
*
2
needs more to be
added.
3. Tighten cell plugs
*
A
.
Vehicles operated in high temperatures or under
severe conditions require frequent checks of the
battery fluid level.
JUMP STARTING
If jump starting is necessary, see “Jump starting”
(P.6-10). If the engine does not start by jump
starting, the battery may have to be replaced.
Contact a NISSAN dealer.
8-14
Maintenance and do-it-yourself
DI0137MA
Check the fluid level in each cell. It should be
between the UPPER LEVEL
*
1
and LOWER
LEVEL
*
2
lines.
If it is necessary to add fluid, add only distilled
water to bring the level to the indicator in each
filler opening. Do not overfill.
SDI1480C
1. Remove the cell plugs
*
A
.
2. Add distilled water up to the UPPER LEVEL
*
1
line.
If the side of the battery is not clear, check
the distilled water level by looking directly
above the cell; the condition
*
1
indicates
OK and the condition
*
2
needs more to be
added.
3. Tighten cell plugs
*
A
.
Vehicles operated in high temperatures or under
severe conditions require frequent checks of the
battery fluid level.
JUMP STARTING
If jump starting is necessary, see “Jump starting”
(P.6-10). If the engine does not start by jump
starting, the battery may have to be replaced.
Contact a NISSAN dealer.