Nissan Altima Hybrid (2010 year). Instruction - part 15
DISC·AUX button:
When the DISC·AUX button is pressed with the
system off and the iPod
姞 connected, the system
will turn on. If another audio source is playing and
the iPod
姞 is connected, press the DISC·AUX
button repeatedly until the center display
changes to the iPod
姞 mode.
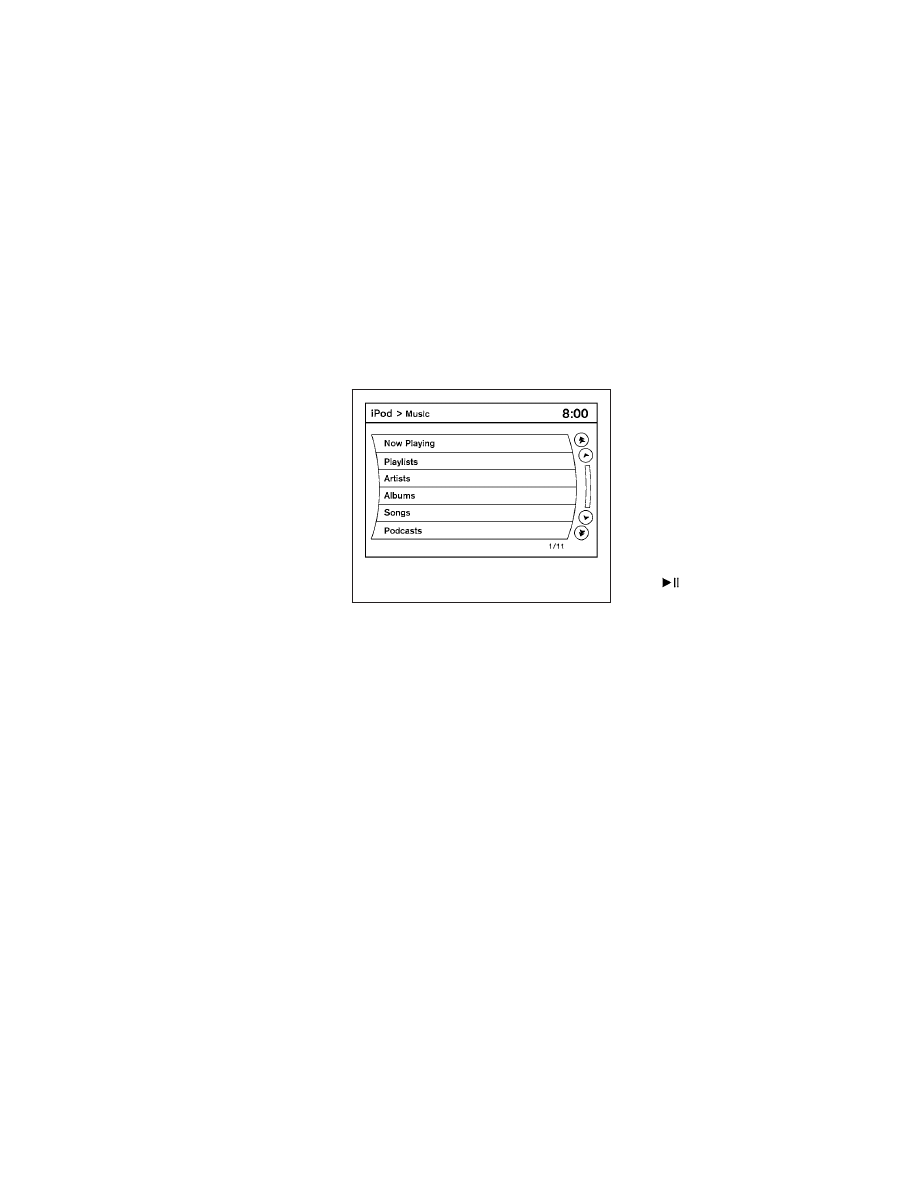
Interface:
The interface for iPod
姞 operation shown on the
vehicle center display is similar to the iPod
姞 in-
terface. Use the touchscreen to control your fa-
vorite settings.
The following items can be chosen from the menu
list screen. For further information about each
item, see the iPod
姞 Owner’s Manual.
● Now Playing
● Playlists
● Artists
● Albums
● Songs
● Podcasts
● Genres
● Composers
● Audiobooks
● Shuffle Songs
The following keys shown on the screen are also
available:
● Menu: returns to the previous screen.
●
: plays/pauses the music selected.
LHA1398
Monitor, climate, audio, phone and voice recognition systems
4-69