Nissan Frontier D40. Manual - part 837
ENGINE MAINTENANCE (QR25DE ENGINE)
MA-29
< ON-VEHICLE MAINTENANCE >
C
D
E
F
G
H
I
J
K
L
M
B
MA
N
O
A
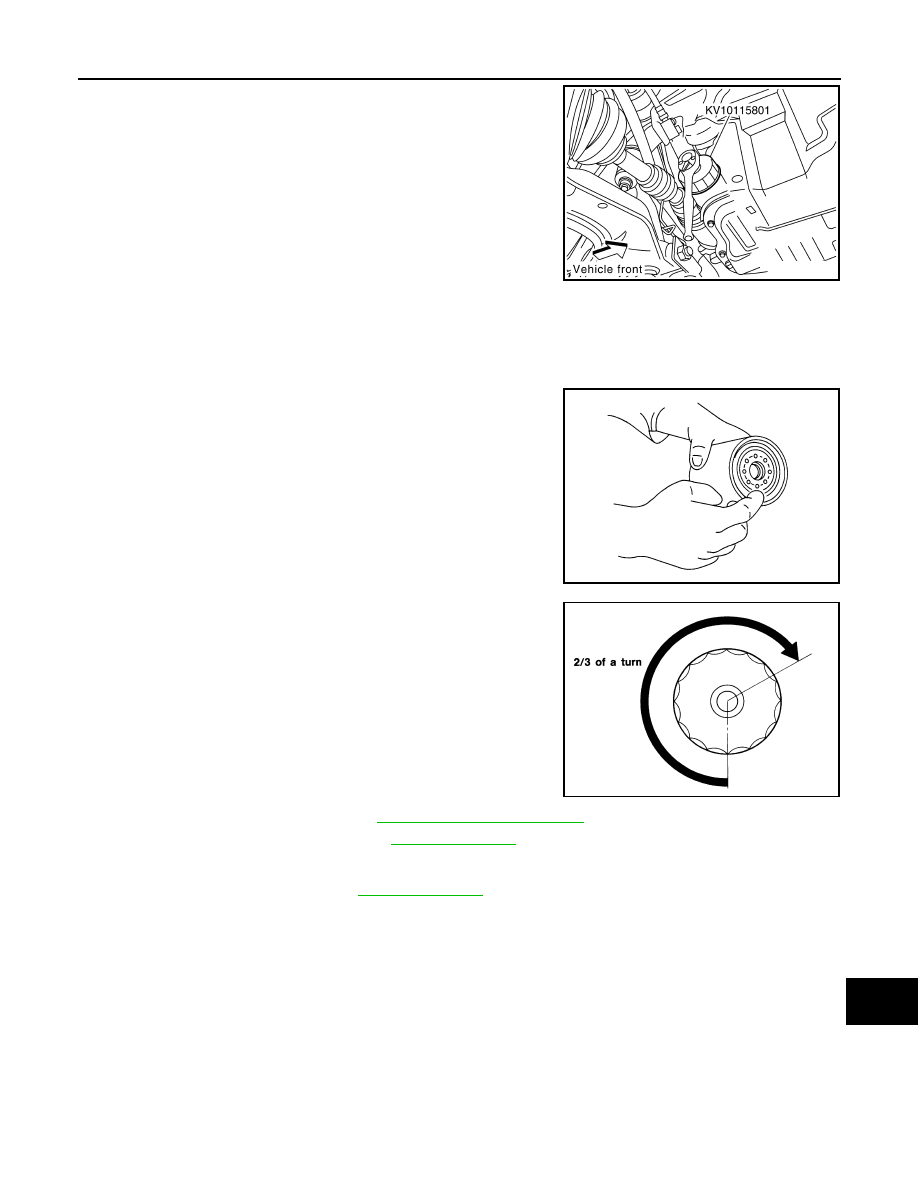
2.
Remove the oil filter using Tool as shown.
WARNING:
Be careful not to burn yourself, as the engine and engine oil
may be hot.
CAUTION:
• Oil filter is equipped with a pressure relief valve.
• Use Genuine NISSAN Oil Filter or equivalent.
• When removing, position a shop cloth to absorb any
engine oil leaks or spills.
• Do not allow engine oil to adhere to drive belts.
• Completely wipe off any engine oil that adheres to the engine and the vehicle.
INSTALLATION
1.
Remove foreign materials adhering to the oil filter seal mating surface.
2.
Apply clean engine oil to the oil filter seal circumference of the
new oil filter as shown.
3.
Screw on the oil filter manually until it touches the installation
surface, then tighten it by 2/3 turn as shown. Or tighten to speci-
fication.
4.
Refill the engine with new oil. Refer to
5.
Inspect the engine for oil leaks. Refer to
.
INSPECTION AFTER INSTALLATION
1.
Check the engine oil level. Refer to
.
2.
Start the engine and check for engine oil leaks.
3.
Stop the engine and wait for 10 minutes.
4.
Check the engine oil level and add engine oil as required.
SPARK PLUG
Tool number
: KV10115801 (J-38956)
KBIA0303E
SMA010
Oil filter
: 17.7 N·m (1.8 kg-m, 13 ft-lb)
SMA702C