Nissan Frontier D40. Manual - part 299
NOISE, VIBRATION AND HARSHNESS (NVH) TROUBLESHOOTING
DLN-217
< FUNCTION DIAGNOSIS >
[C200]
C
E
F
G
H
I
J
K
L
M
A
B
DLN
N
O
P
FUNCTION DIAGNOSIS
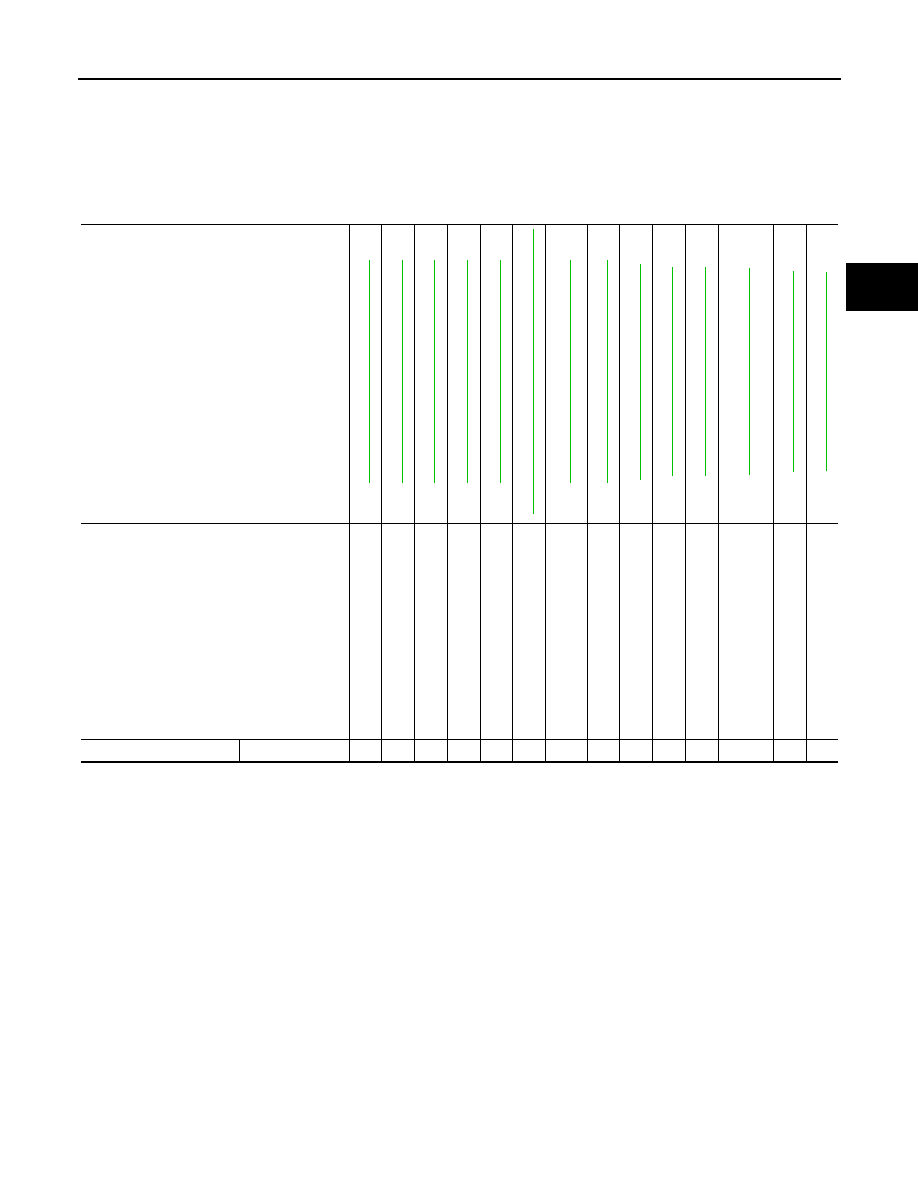
NOISE, VIBRATION AND HARSHNESS (NVH) TROUBLESHOOTING
NVH Troubleshooting Chart
INFOID:0000000005275556
Use the chart below to help you find the cause of the symptom. If necessary, repair or replace these parts.
×
: Applicable
Reference page
Possible cause and SUSPECTED PARTS
Ge
ar t
o
o
th
rou
g
h
Gea
r co
nt
ac
t
imp
rop
er
T
o
ot
h s
u
rf
ac
es
w
o
rn
Ba
ck
la
sh
in
co
rrec
t
Co
mp
an
io
n f
lan
ge
e
x
c
e
s
s
iv
e
run
o
u
t
Gea
r oi
l i
mp
rop
er
PR
OP
EL
LE
R
S
H
A
F
T
REA
R
AXLE
REA
R
SUSPENSI
ON
TI
RE
S
ROAD W
H
EEL
DRIV
E SHAFT
BR
AK
E
S
S
T
EERING
Symptom
Noise
×
×
×
×
×
×
×
×
×
×
×
×
×