Nissan Titan. Manual - part 440


  Index      Nissan     Nissan Titan (2014 year) - Service and Repair Manual


Search            


Content   ..  438  439  440  441   ..


Nissan Titan. Manual - part 440


PREPARATION

INT-9

< PREPARATION >

C

D

E

F

G

H

I

K

L

M

A

B

INT

N

O

P

PREPARATION

PREPARATION

Special Service Tool

INFOID:0000000009881971

The actual shapes of Kent-Moore tools may differ from those of special service tools illustrated here.

Commercial Service Tool

INFOID:0000000009881972
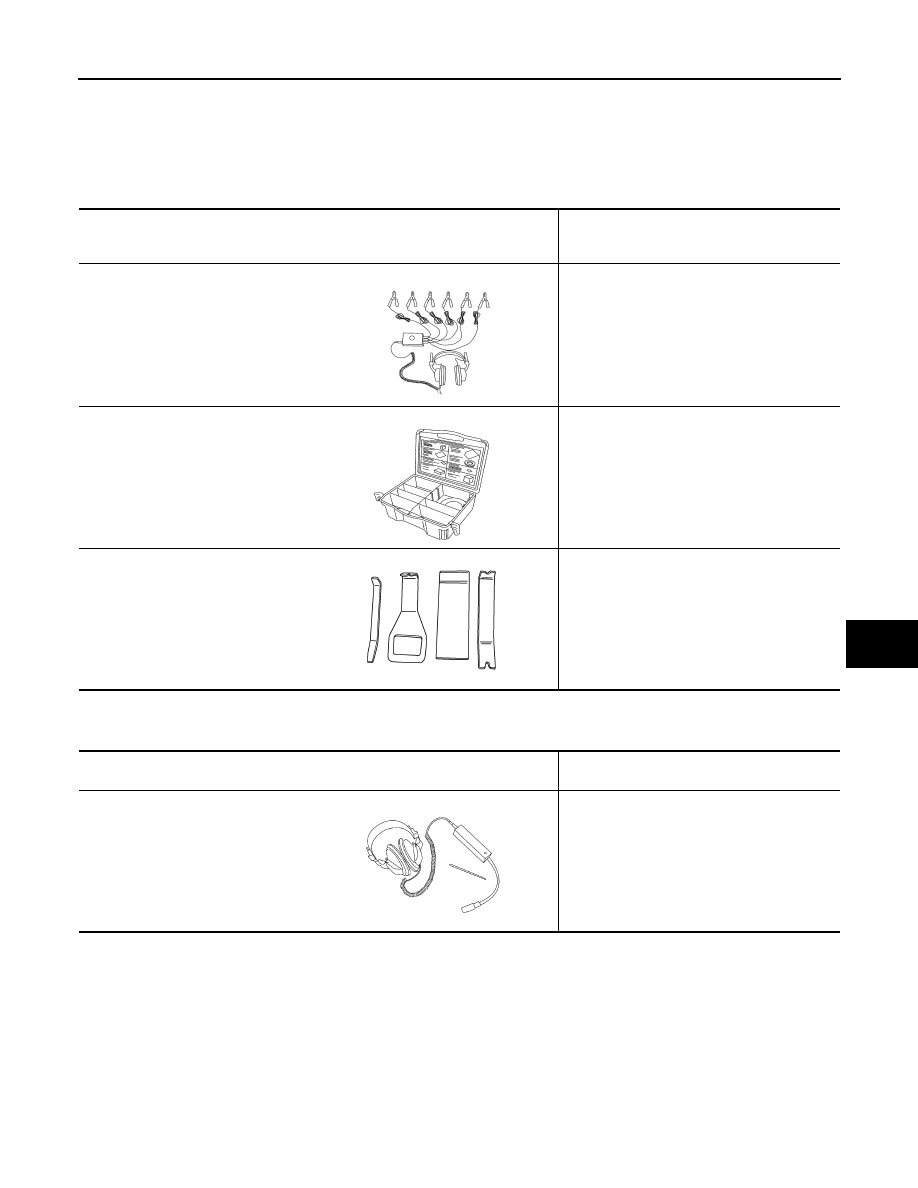
Tool number
(Kent-Moore No.)
Tool name

Description

(J-39570)
Chassis ear

Locating the noise

(J-43980)
NISSAN Squeak and Rattle kit

Repairing the cause of noise

(J-46534)
Trim tool set

Removing trim components

SBT839

SBT840

AWJIA0483ZZ

(Kent-Moore No.)
Tool name

Description

(J-39565)
Engine ear

Locating the noise

SIIA0995E

INT-10

< REMOVAL AND INSTALLATION >

DOOR FINISHER

REMOVAL AND INSTALLATION

DOOR FINISHER

Removal and Installation

INFOID:0000000009881973

FRONT DOOR

Removal

1. Remove the power window switch assembly (if equipped).

• Disconnect the harness connectors.

2. Remove the pull handle cover.

• Remove the screws behind pull handle cover.

3. Remove the cap from pull handle escutcheon and remove the screw.
4. Remove the pull handle escutcheon.

1.

Power window switch assembly (if equipped) 2.

Armrest

3.

Front door finisher LH

4.

Pull handle cover

5.

Pull handle escutcheon

6.

Cap

7.

Door lock knob

8.

Step lamp 

9.

Window crank handle (if equipped)

10. Window crank handle lock clip (if equipped)

11. Window crank handle escutcheon 

(if equipped)

12. Seat memory switch (if equipped)

13. Inside door handle assembly

AWJIA0017ZZ

DOOR FINISHER

INT-11

< REMOVAL AND INSTALLATION >

C

D

E

F

G

H

I

K

L

M

A

B

INT

N

O

P

• Remove the screws behind pull handle escutcheon.

5. Remove the armrest.

• Remove the screw behind armrest.

6. Remove the window crank handle, using a suitable tool (if equipped).
7. Remove the memory seat switch (if equipped).

• Disconnect the harness connector.

8. Remove the step lamp. Refer to 

INL-71, "Removal and Installation"

.

9. Remove the door finisher and disconnect the lock cable and handle cable from the inside door handle

assembly. 

10. Remove the door lock knob.
11. Remove the inside door handle assembly screws and remove the inside door handle assembly.

Installation

Installation is in the reverse order of removal.

REAR DOOR - CREW CAB

Removal

1.

Power window switch assembly 

2.

Armrest

3.

Rear door finisher LH

4.

Pull handle cover

5.

Cap

6.

Pull handle escutcheon

7.

Door lock knob

8.

Step lamp (if equipped)

9.

Rear door tweeter

10. Inside door handle assembly

AWJIA0545GB

INT-12

< REMOVAL AND INSTALLATION >

DOOR FINISHER

1. Remove the power window switch assembly.

• Disconnect the harness connector.

2. Remove the pull handle cover.

• Remove the screws behind pull handle cover.

3. Remove the cap from pull handle escutcheon and remove screw.
4. Remove the pull handle escutcheon.

• Remove the screws behind pull handle escutcheon.

5. Remove the armrest.

• Remove the screws behind armrest.

6. Remove the step lamp (if equipped). Refer to 

INL-71, "Removal and Installation"

.

7. Remove the door finisher and disconnect lock cable and handle cable from the door handle assembly.

• Disconnect the rear door tweeter speaker connector.

8. Remove the door lock knob.
9. Remove the rear door tweeter speaker.

Installation

Installation is in the reverse order of removal.

REAR DOOR - KING CAB

1.

Rear door LH

2.

Rear door finisher

3.

Armrest

4.

Seat belt retractor cover

AWJIA0546GB


Content   ..  438  439  440  441   ..