Nissan Rogue. Manual - part 684
FRONT DRIVE SHAFT
FAX-29
< UNIT DISASSEMBLY AND ASSEMBLY >
[FWD]
C
E
F
G
H
I
J
K
L
M
A
B
FAX
N
O
P
• Make sure there are no compression scars, cracks, fractures or unusual wear.
Inner Race
• Check ball sliding surface for compression scars, cracks or fractures.
• Make sure there is no damage to serrated part.
CAUTION:
If there are any irregular conditions in the component, replace the entire drive shaft.
ASSEMBLY
Transaxle Assembly Side
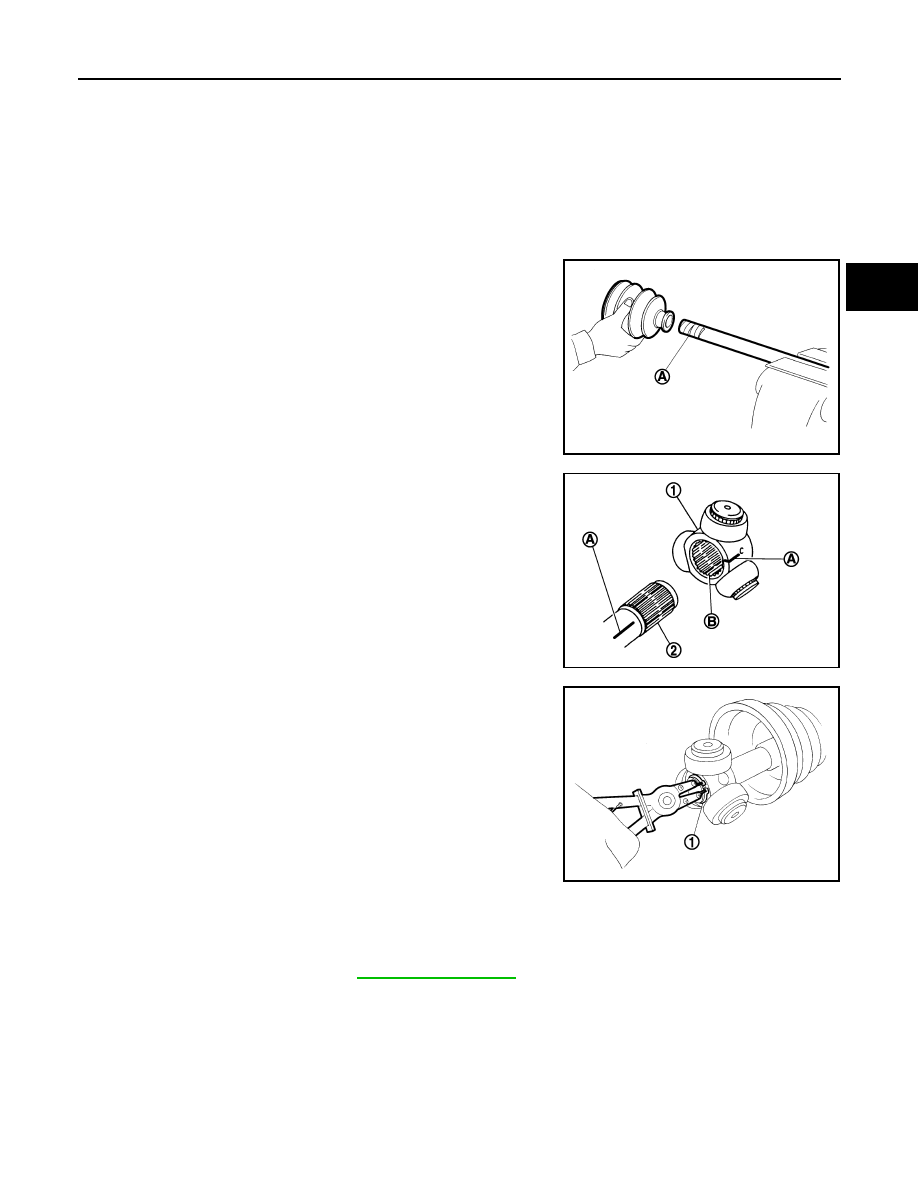
1. Install new boot and new small boot band on shaft.
CAUTION:
• Do not reuse boot and boot bands.
• Cover drive shaft serration with protective tape (A) to pre-
vent damage to boot during installation.
2. Remove the tape wrapped around the serration on shaft.
3. Align the matching mark (A) on the spider assembly (1) with the
matching mark on the shaft (2). Install the spider assembly to
the shaft with the chamfer (B) facing the shaft.
4. Secure spider assembly onto shaft with snap ring (1).
CAUTION:
Do not reuse snap ring.
5. Apply the appropriate amount of Genuine NISSAN Grease to spider assembly and sliding surface.
6. Assemble the housing onto spider assembly, and apply the specified amount of grease.
NOTE:
Always check with the Parts Department for the latest parts information.
7. Align matching marks put during the removal of housing.
8. Install stopper ring.
CAUTION:
Do not reuse stopper ring.
JPDIF0009ZZ
JPDIF0017ZZ
JPDIF0014ZZ
Grease Quantity