Nissan Sentra. Manual - part 266


  Index      Nissan     Nissan Sentra (2014 year) - Service and Repair Manual


Search            


Content   ..  264  265  266  267   ..


Nissan Sentra. Manual - part 266


DLK-180

< REMOVAL AND INSTALLATION >

[WITH INTELLIGENT KEY SYSTEM]

DOOR LOCK

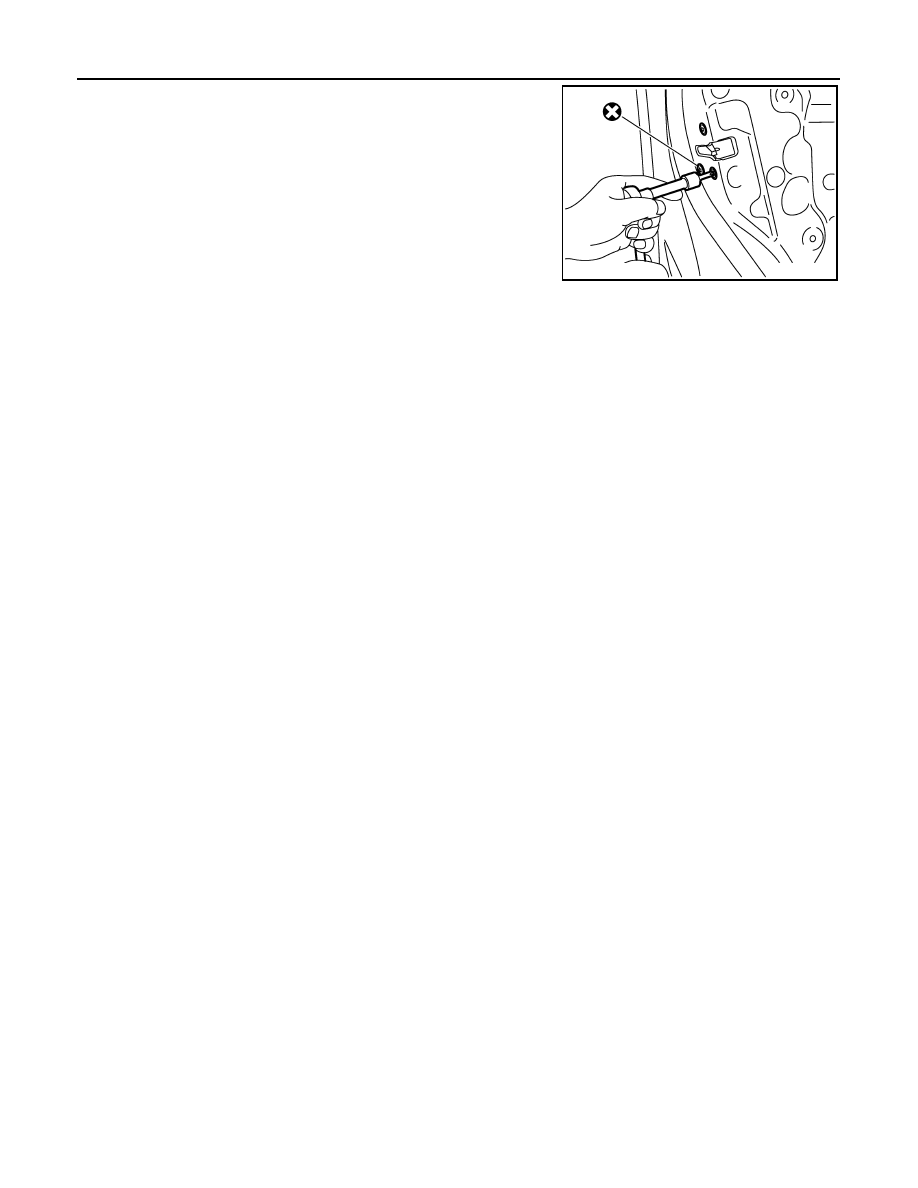
4. Remove screws and the front door lock assembly.

INSTALLATION

Installation is in the reverse order of removal.

Tighten front door lock screws to specified torque.

CAUTION:

• Do not reuse front door lock assembly screws. Always replace screws with new ones when

removed.

• Check front door lock cables are properly engaged to inside handle and outside handle bracket.

• When installing door key cylinder rod on the (LH) front door, be sure to rotate door key cylinder rod

holder until a click is felt.

• After installation, check front door open/close, lock/unlock operation.

• Check front door lock assembly for poor lubrication. If necessary apply a suitable multi-purpose

grease.

REAR DOOR LOCK

PIIB5812E

Front door lock screws:

5.8 Nm (0.59 kg-m, 51 in-lb)

DOOR LOCK

DLK-181

< REMOVAL AND INSTALLATION >

[WITH INTELLIGENT KEY SYSTEM]

C

D

E

F

G

H

I

J

L

M

A

B

DLK

N

O

P

REAR DOOR LOCK : Exploded View

INFOID:0000000009756492

REAR DOOR LOCK : Removal and Installation

INFOID:0000000009756493

REMOVAL

1. Remove the rear door outside handle. Refer to 

DLK-176, "REAR DOOR HANDLE : Removal and Installa-

tion - Outside Handle"

.

2. Disconnect the harness connector from the rear door lock actuator.
3. Remove the screws and the rear door lock assembly.

INSTALLATION

Installation is in the reverse order of removal.

Tighten rear door lock screws to specified torque.

1.

Outside handle bracket

2.

Front gasket

3.

Inside handle assembly

4.

Door lock assembly

5.

Outside handle

6.

Outside handle escutcheon

7.

Rear gasket

ALKIA2940ZZ

PIIB5812E

DLK-182

< REMOVAL AND INSTALLATION >

[WITH INTELLIGENT KEY SYSTEM]

DOOR LOCK

CAUTION:

• Do not reuse rear door lock assembly screws. Always replace screws with new ones when removed.

• Check rear door lock cables are properly engaged to inside handle and outside handle bracket.

• After installation, check rear door open/close, lock/unlock operation.

• Check rear door lock assembly for poor lubrication. If necessary apply a suitable multi-purpose

grease.

Rear door lock screws:

5.8 Nm (0.59 kg-m, 51 in-lb)

TRUNK LID

DLK-183

< REMOVAL AND INSTALLATION >

[WITH INTELLIGENT KEY SYSTEM]

C

D

E

F

G

H

I

J

L

M

A

B

DLK

N

O

P

TRUNK LID

TRUNK LID ASSEMBLY
TRUNK LID ASSEMBLY : Exploded View

INFOID:0000000009756494

TRUNK LID ASSEMBLY : Removal and Installation

INFOID:0000000009756495

CAUTION:

• Use two people when removing or installing trunk lid assembly due to its heavy weight.

• Use protective tape or shop cloths to protect surrounding components from damage during removal

and installation of trunk lid assembly.

REMOVAL

1. Remove trunk lid finisher (if equipped). Refer to 

INT-45, "Removal and Installation"

.

1.

Trunk lid hinge LH/RH

2.

Torsion bar LH/RH

3.

Torsion bar clips

4.

Trunk lid finisher (if equipped)

5.

Emergency release handle

6.

Emergency release handle clip

7.

Emergency release handle ca-
ble

8.

Trunk lid lock

9.

Trunk lid bumpers

10.

License lamp finisher

11.

Trunk lid

12.

Rear spoiler (if equipped)

13.

Weatherstrip

A.

Clip

Clip

ALKIA2941ZZ


Content   ..  264  265  266  267   ..