Nissan PULSAR N13 Series / ASTRA LD Series. Manual - part 45
Brakes
181
chor plate to the steering knuckle and slide the caliper
off the brake disc. Suspend the caliper clear of the
work area using wire or cord.
(3)
Suitably mark the location of the disc in
relation to the hub.
(4) Slide the disc off the hub. If the disc is
difficult to remove, install two M8 x 1.25 mm bolts in
the disc and by alternatively tightening the bolts,
remove the disc.
Do not use a hammer to remove the disc.
Installation is a reversal of the removal procedure
ensuring that the mating faces of the disc and hub are
clean and free from burrs and that the marks made on
removal are aligned.
To Inspect
(1) Inspect the machined faces of the disc for
scores, cracks, wear and signs of overheating.
(2) Using a micrometer, measure the thickness
of the disc at several positions around the face of the
disc. Renew the disc if the minimum thickness is
below Specifications.
Inspect the brake discs for scoring and wear
.
(3) If the disc thickness is satisfactory but the
disc is scored, machine equal amounts from the
machined face on each side of the disc, to restore the
serviceability of the disc.
NOTE: Disc machining is best entrusted to
a reliable brake specialist who can advise on
disc serviceability.
6. REAR DISC BRAKES
Special Equipment Required:
To Check Disc Runout — Dial gauge
To Check Disc Thickness — Micrometer
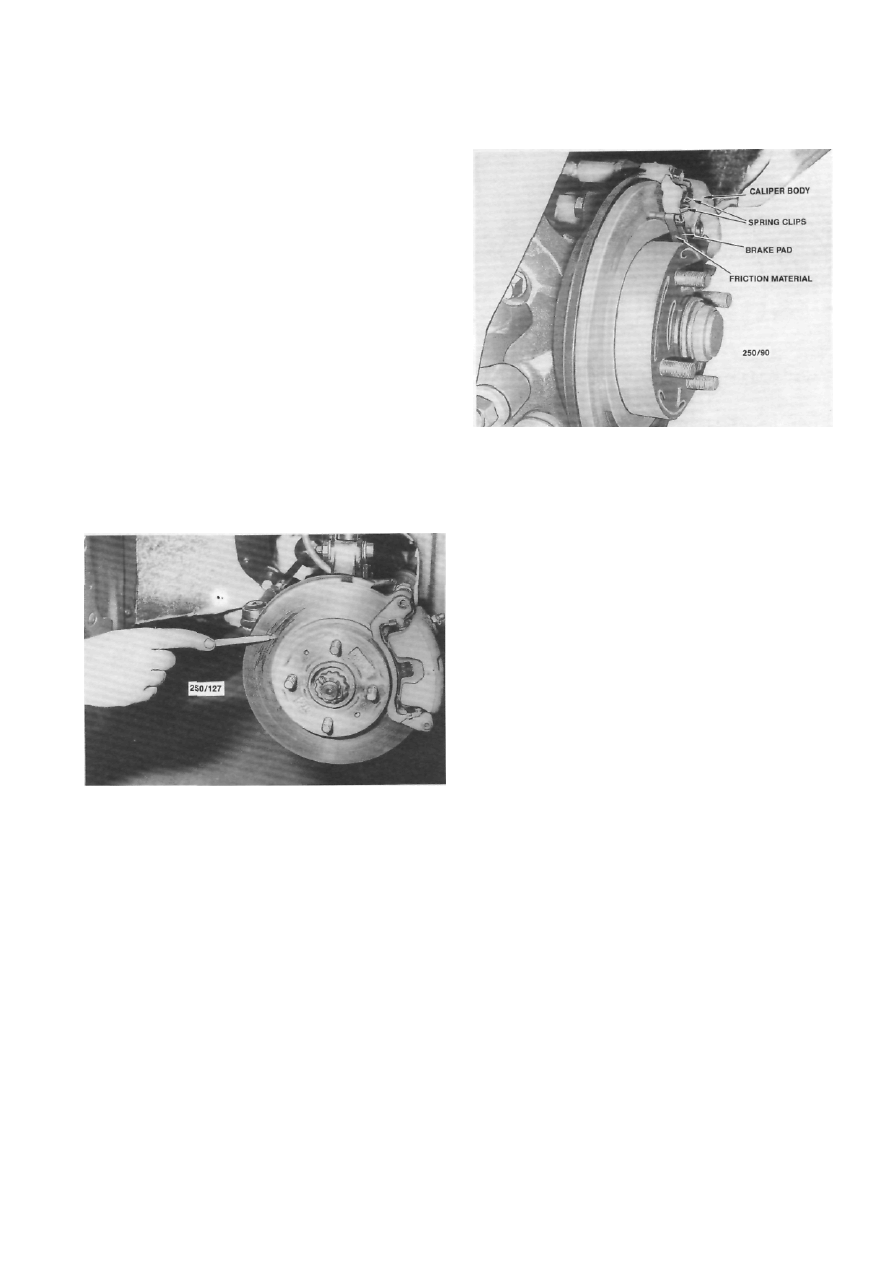
TO CHECK AND RENEW BRAKE PADS
(1) Raise the rear of the vehicle and place it on
chassis stands. Remove the rear wheels.
Renew the rear brake pads if the friction material is less
than 2 mm thick.
(2) Inspect the brake pads on both sides of the
vehicle. If the friction material on one or more of the
pads is less than 2 mm thick or contaminated with
fluid or grease, renew the brake pad as a set as follows.
NOTE: If the brake pads are contaminated
trace and rectify the cause prior to installing
the new set of pads.
(3) Drain approximately two thirds of the brake
fluid from the master cylinder reservoir. This can be
done by loosening the bleeder valve on the caliper and
allowing the fluid to drain into a container. Discard
this fluid.
NOTE: Do not drain all the fluid from the
reservoir otherwise it will be necessary to
bleed the hydraulic system. The fluid is
drained from the reservoir to prevent over-
flow when the caliper piston is pushed back
into the caliper bore to facilitate pad re-
newal.
(4) Remove the guide bolts and lift the caliper
body clear of the disc.
NOTE: Do not allow the caliper to hang on
the brake hose.
(5) Noting the installed positions, remove the
brake pads, shims and spring clips from the anchor
plate.
(6) Using a pair of long nosed pliers with the
nose located in the recesses of the piston, rotate the
piston clockwise to retract it into the cylinder body.
Align the recesses between the brake pad retaining
lugs on the caliper body. Refer to the illustration.
(7) If necessary, check the disc runout and
thickness as described under the Brake Disc heading.
(8) Ensure that the guide bolts move freely in the
caliper body and that the dust boots are in good
condition.