Nissan March K13. Manual - part 353
GW-14
< REMOVAL AND INSTALLATION >
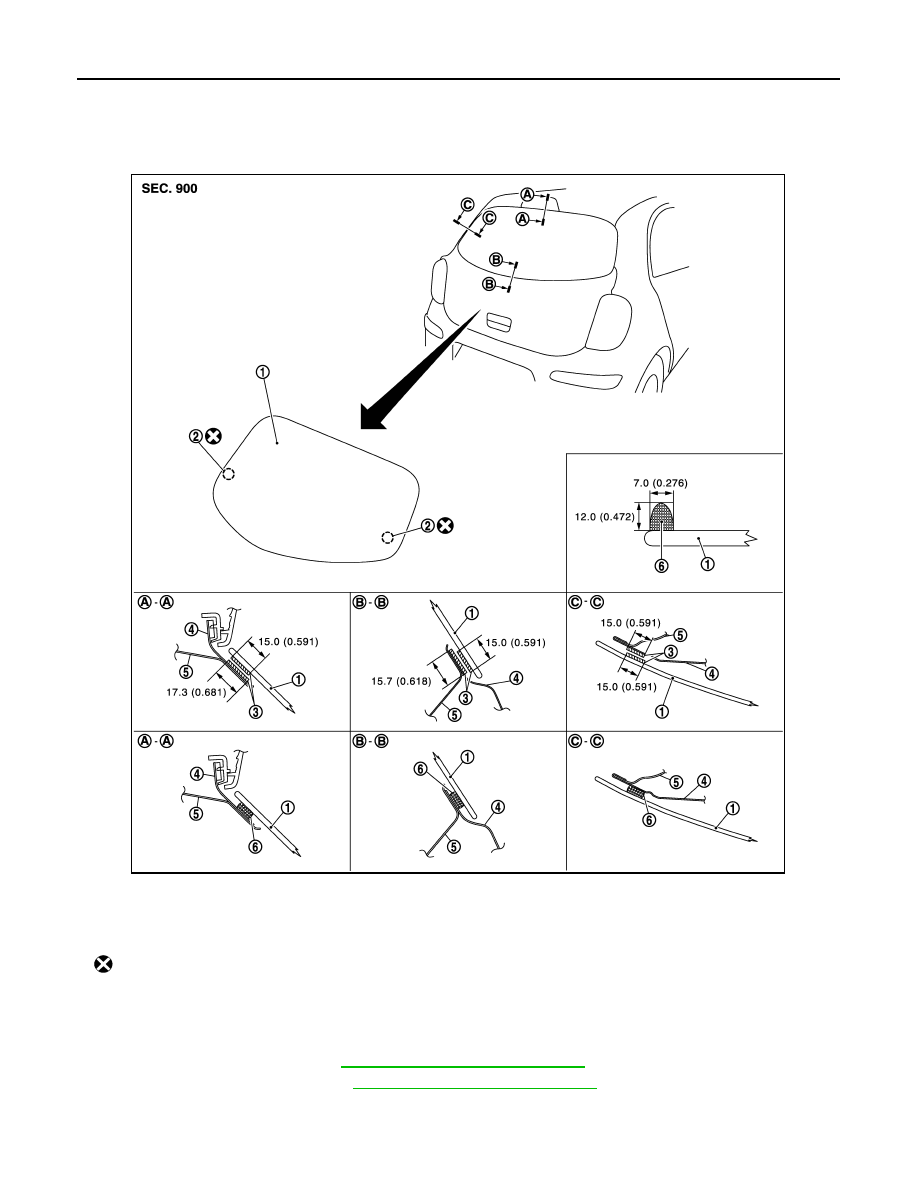
BACK DOOR WINDOW GLASS
BACK DOOR WINDOW GLASS
Exploded View
INFOID:0000000006059359
Removal and Installation
INFOID:0000000006059360
REMOVAL
1.
Remove rear wiper arm. Refer to
WW-57, "Removal and Installation"
2.
Remove rear wiper motor. Refer to
WW-59, "Removal and Installation"
3.
Remove the connectors and grounds for the back door window defogger.
1.
Back door glass window
2.
Back door glass holder upper
3.
Primer
4.
Back door outer
5.
Back door inner
6.
Adhesive
Unit: mm (in)
: Do not reuse
JMKIA5302GB