Nissan Pathfinder (2012 year). Manual - part 634


  Index      Manuals     Nissan Pathfinder (2012 year) - Service and Repair Manual


Search            copyright infringement  


Content      ..     632      633      634     


Nissan Pathfinder (2012 year). Manual - part 634


WW-74

< REMOVAL AND INSTALLATION >

FRONT WIPER AND WASHER SYSTEM

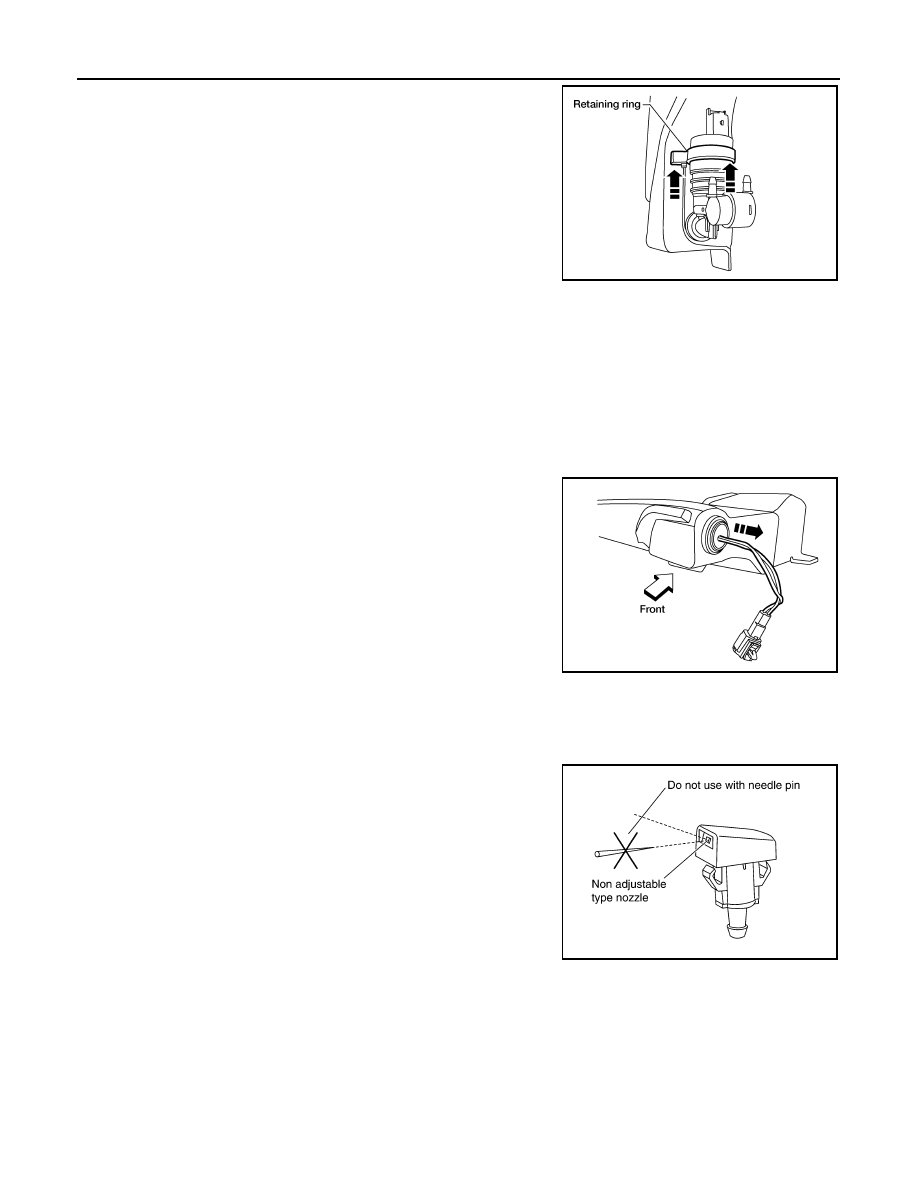
4. Slide retaining ring upward to release front and rear washer

motor.

5. Remove front washer motor from washer fluid reservoir.

Installation

Installation is in the reverse order of removal.

CAUTION:

When installing front washer motor, there should be no packing twists, etc.

WASHER FLUID LEVEL SENSOR

Removal

1. Remove washer fluid reservoir. 
2. Lift level sensor out of washer fluid reservoir in the direction of

the arrow as shown.

Installation

Installation is in the reverse order of removal.

Washer Nozzle Adjustment

INFOID:0000000007355307

• This vehicle is equipped with non-adjustable washer nozzles.

• If not satisfied with washer fluid spray coverage, confirm that the

washer nozzle is installed correctly.

• If the washer nozzle is installed correctly, and the washer fluid

spray coverage is not satisfactory, replace the washer nozzle.

LKIA0540E

LKIA0541E

PKIA2552E

August 2012

2012 Pathfinder

REAR WIPER AND WASHER SYSTEM

WW-75

< REMOVAL AND INSTALLATION >

C

D

E

F

G

H

I

J

K

M

A

B

WW

N

O

P

REAR WIPER AND WASHER SYSTEM

Removal and Installation

INFOID:0000000007355308

REAR WIPER ARM

Removal

1. Remove wiper arm cover, and remove rear wiper arm nut. 
2. Remove the wiper arm.
3. Remove wiper blade from the wiper arm.

Installation

1. Operate rear wiper motor one full cycle, then turn "OFF" (Auto Stop).
2. Clean pivot area as shown. This will reduce the possibility of

wiper arm looseness.

3. Install wiper blade on the wiper arm.
4. Install wiper arm so that the arm rests in the stopper and tighten rear wiper arm nut.
5. Install wiper arm cover.

REAR WIPER MOTOR

LKIA0608E

SEL024J

August 2012

2012 Pathfinder

WW-76

< REMOVAL AND INSTALLATION >

REAR WIPER AND WASHER SYSTEM

Removal

1. Remove wiper arm. Refer to 

WW-75, "Removal and Installation"

.

2. Remove pivot cap.
3. Remove rear wiper motor nut.
4. Remove rear wiper motor cover.
5. Disconnect rear wiper motor connector.
6. Remove nut and remove rear wiper motor. 

7. Remove rear wiper motor cover base.
8. Remove bracket.

Installation

CAUTION:

• Do not drop the wiper motor or cause it to contact other parts.

Installation is in the reverse order of removal.

1.

Rear wiper motor cover

2.

Rear wiper motor 

3.

Plate

4.

Rear wiper motor cover base

5.

Spacer

6.

Bracket

7.

Grommet

8. 

Washer

9.

Rear wiper motor nut

10. Pivot cap

11. Rear wiper arm and blade

12. Wiper arm nut

13. Wiper arm cover

14. Cap nut

15. Gasket

16. Gasket

17. Stud

18. Grommet

19. Nut

AWLIA1808ZZ

LKIA0543E

August 2012

2012 Pathfinder

REAR WIPER AND WASHER SYSTEM

WW-77

< REMOVAL AND INSTALLATION >

C

D

E

F

G

H

I

J

K

M

A

B

WW

N

O

P

REAR WASHER TUBE LAYOUT

NOTE:

Connect the check valve (2) to the washer fluid tube (1) so that the

directional arrow on the check valve (2) points towards the washer

nozzle tube (3).

REAR WASHER NOZZLE

Removal

1. Disconnect rear washer tube from rear washer nozzle.
2. Release retaining clips and remove washer nozzle.

Installation

Installation is in the reverse order of removal.

NOTE:

Inspect rear washer nozzle for proper spray pattern, adjust as necessary. Refer to 

WW-78, "Rear Washer

Nozzle Adjustment"

.

WASHER MOTOR

Removal

1. Remove RH front fender protector. Refer to 

EXT-25, "Removal and Installation of Front Fender Protector"

.

2. Disconnect the rear washer hoses.
3. Disconnect the rear washer motor connectors.

1.

Washer fluid reservoir

2.

Washer fluid tube to rear door

3.

Rear washer nozzle

4.

Check valve

WKIA4143E

WKIA4242E

August 2012

2012 Pathfinder

WW-78

< REMOVAL AND INSTALLATION >

REAR WIPER AND WASHER SYSTEM

4. Slide retaining ring upward to release rear washer motor.

5. Remove rear washer motor from washer fluid reservoir.

Installation

Installation is in the reverse order of removal.

CAUTION:

When installing rear washer motor, there should be no packing twists, etc.

WASHER MOTOR

Refer to 

WW-70

.

Rear Washer Nozzle Adjustment

INFOID:0000000007355309

• Adjust washer nozzle with suitable tool as shown in the figure.

LKIA0540E

Adjustable range

±

15

°

 (In any direction)

LKIA0349E

WEL912A

August 2012

2012 Pathfinder

SERVICE DATA AND SPECIFICATIONS (SDS)

WW-79

< SERVICE DATA AND SPECIFICATIONS (SDS) 

C

D

E

F

G

H

I

J

K

M

A

B

WW

N

O

P

SERVICE DATA AND SPECIFICATIONS (SDS)

SERVICE DATA AND SPECIFICATIONS (SDS)

Specifications

INFOID:0000000007355310

Windshield Washer Fluid

Windshield washer fluid capacity

4.5   (1 1/4 US gal, 1 Imp gal)

Windshield washer fluid specification

Refer to 

MA-18, "FOR USA AND CANADA : Fluids and Lubricants"


(United States and Canada), 

MA-20, "FOR MEXICO : Fluids and Lubri-

cants"

 (Mexico).

August 2012

2012 Pathfinder


Content      ..     632      633      634