Nissan Pathfinder (2012 year). Manual - part 379
EXL-148
< UNIT REMOVAL AND INSTALLATION >
FRONT FOG LAMP
FRONT FOG LAMP
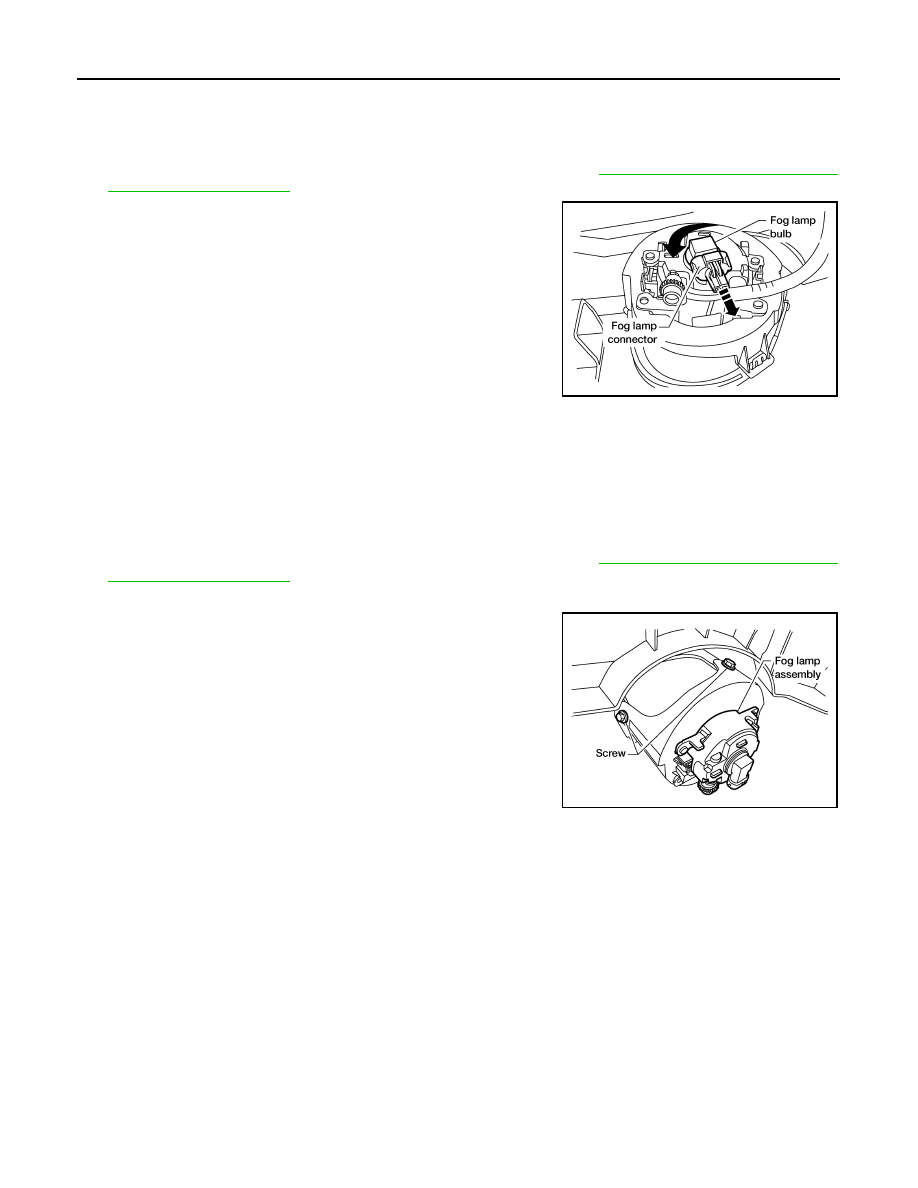
Bulb Replacement
INFOID:0000000007355206
1. Partially remove the front portion of the front fender protector. Refer to
EXT-25, "Removal and Installation
2. Disconnect fog lamp connector.
3. Turn the bulb counterclockwise to remove it.
WARNING:
Do not touch bulb by hand while it is lit or right after being
turned off. Burning may result.
CAUTION:
• Do not touch the glass of bulb directly by hand. Keep
grease and other oily substances away from it.
• Do not leave bulb out of fog lamp reflector for a long time
because dust, moisture smoke, etc. may affect the perfor-
mance of fog lamp. When replacing bulb, be sure to
replace it with new one.
Removal and Installation
INFOID:0000000007355207
FRONT FOG LAMP
The fog lamp is a semi-sealed beam type which uses a replaceable halogen bulb.
Removal
1. Partially remove the front portion of the front fender protector. Refer to
EXT-25, "Removal and Installation
2. Disconnect fog lamp connector.
3. Remove fog lamp screws and pull fog lamp rearward out of front
bumper.
WARNING:
Do not touch bulb by hand while it is lit or right after being
turned off. Burning may result.
CAUTION:
• Do not touch the glass of bulb directly by hand. Keep
grease and other oily substances away from it.
• Do not leave bulb out of fog lamp reflector for a long time
because dust, moisture smoke, etc. may affect the perfor-
mance of fog lamp. When replacing bulb, be sure to
replace it with new one.
Installation
Installation is in the reverse order of removal.
LKIA0573E
LKIA0574E
August 2012
2012 Pathfinder