Nissan Pathfinder (2012 year). Manual - part 196
PREPARATION
DLN-133
< PREPARATION >
[TRANSFER: ATX14B]
C
E
F
G
H
I
J
K
L
M
A
B
DLN
N
O
P
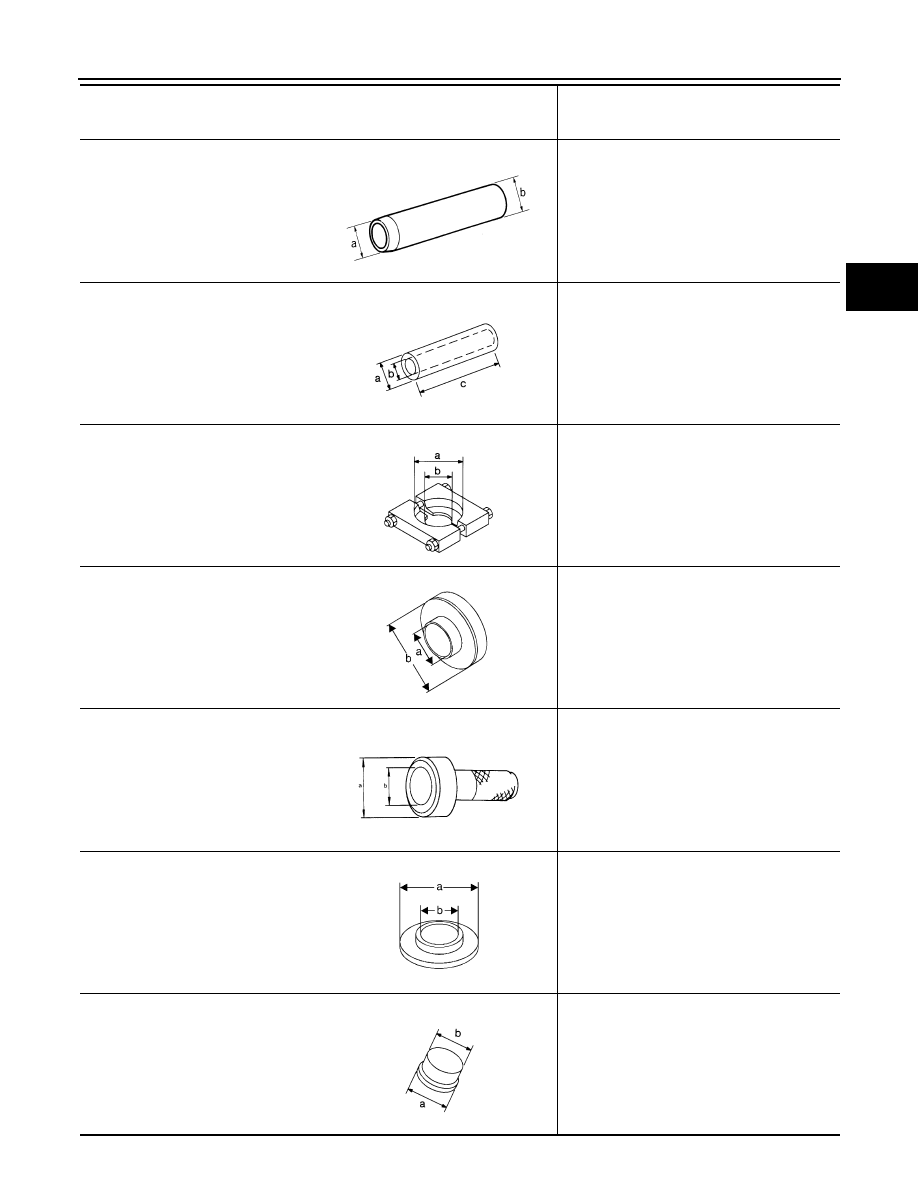
ST22360002
(J-25679-01)
Drift
• Installing side oil seal
a: 23 mm (0.91 in) dia.
b: 32 mm (1.26 in) dia.
ST22452000
(J-34335)
Drift
• Removing press flange snap ring
• Installing press flange snap ring
a: 45 mm (1.77 in) dia.
b: 36 mm (1.42 in) dia.
c: 400 mm (15.76 in) dia.
ST30031000
(
—
)
Puller
• Removing carrier bearing
• Removing front drive shaft front bearing
• Removing front drive shaft rear bearing
a: 90 mm (3.54 in) dia.
b: 50 mm (1.97 in) dia.
ST30032000
(J-26010-01)
Base
• Installing front drive shaft front bearing
• Installing front drive shaft rear bearing
a: 38 mm (1.50 in) dia.
b: 80 mm (3.15 in) dia.
ST30720000
(J-25405)
Drift
• Installing rear oil seal
• Installing input bearing
• Installing input oil seal
a: 77 mm (3.03 in) dia.
b: 55.5 mm (2.185 in) dia.
ST30911000
(
—
)
Puller
• Removing press flange snap ring
• Installing press flange snap ring
• Installing mainshaft
• Installing carrier bearing
a: 98 mm (3.86 in) dia.
b: 40.5 mm (1.594 in) dia.
ST33052000
(
—
)
Adapter
• Removing front drive shaft front bearing
• Removing front drive shaft rear bearing
• Installing mainshaft
a: 28 mm (1.10 in) dia.
b: 22 mm (0.87 in) dia.
Tool number
(Kent-Moore No.)
Tool name
Description
ZZA1091D
NT117
NT411
NT660
ZZA0811D
NT664
NT431
August 2012
2012 Pathfinder