Nissan Pathfinder (2012 year). Manual - part 37
AV-114
< REMOVAL AND INSTALLATION >
[MID AUDIO]
AV CONTROL UNIT
REMOVAL AND INSTALLATION
AV CONTROL UNIT
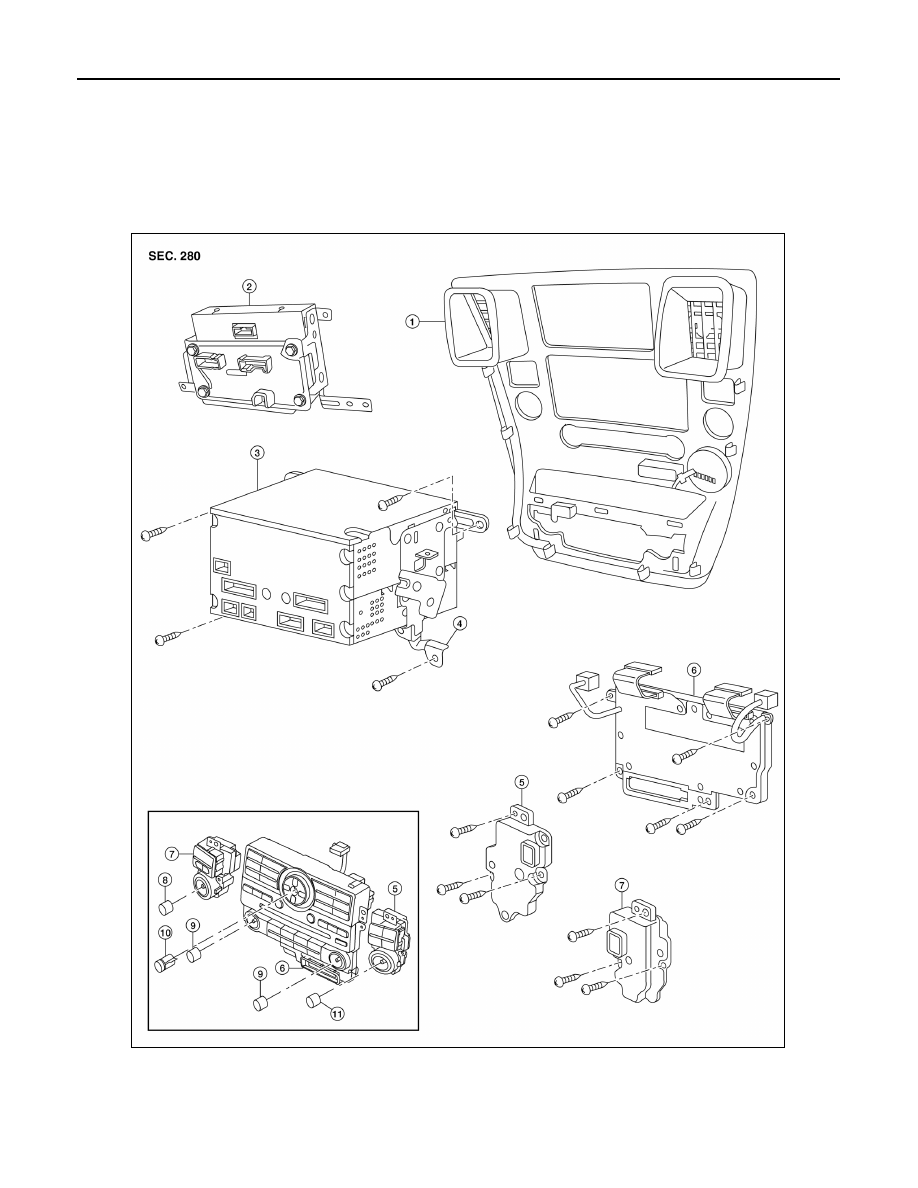
Removal and Installation
INFOID:0000000007347669
1.
Cluster lid C
2.
Display unit
3.
AV control unit
4.
AV control unit brackets
5.
Tuner knob switch
6.
A/C and AV switch assembly
7.
Volume knob switch
8.
Volume knob
9.
Temp knobs RH and LH
10. Enter button
11. Tuner knob
AWNIA2528ZZ
August 2012
2012 Pathfinder