Nissan Teana J32. Manual - part 291
REAR WINDOW DEFOGGER SWITCH
DEF-13
< COMPONENT DIAGNOSIS >
C
D
E
F
G
H
I
J
K
M
A
B
DEF
N
O
P
Is the inspection result normal?
YES
>> Replace A/C auto amp. Refer to
VTL-23, "Removal and Installation"
.
NO
>> GO TO 3.
3.
CHECK REAR WINDOW DEFOGGER SWITCH CIRCUIT
1.
Turn ignition switch OFF.
2.
Disconnect BCM connector.
3.
Check continuity between BCM harness connector and A/C auto amp. connector.
4.
Check continuity between BCM harness connector and ground.
Is the inspection result normal?
YES
>> Replace BCM. Refer to
BCS-78, "Removal and Installation"
NO
>> Repair or replace harness.
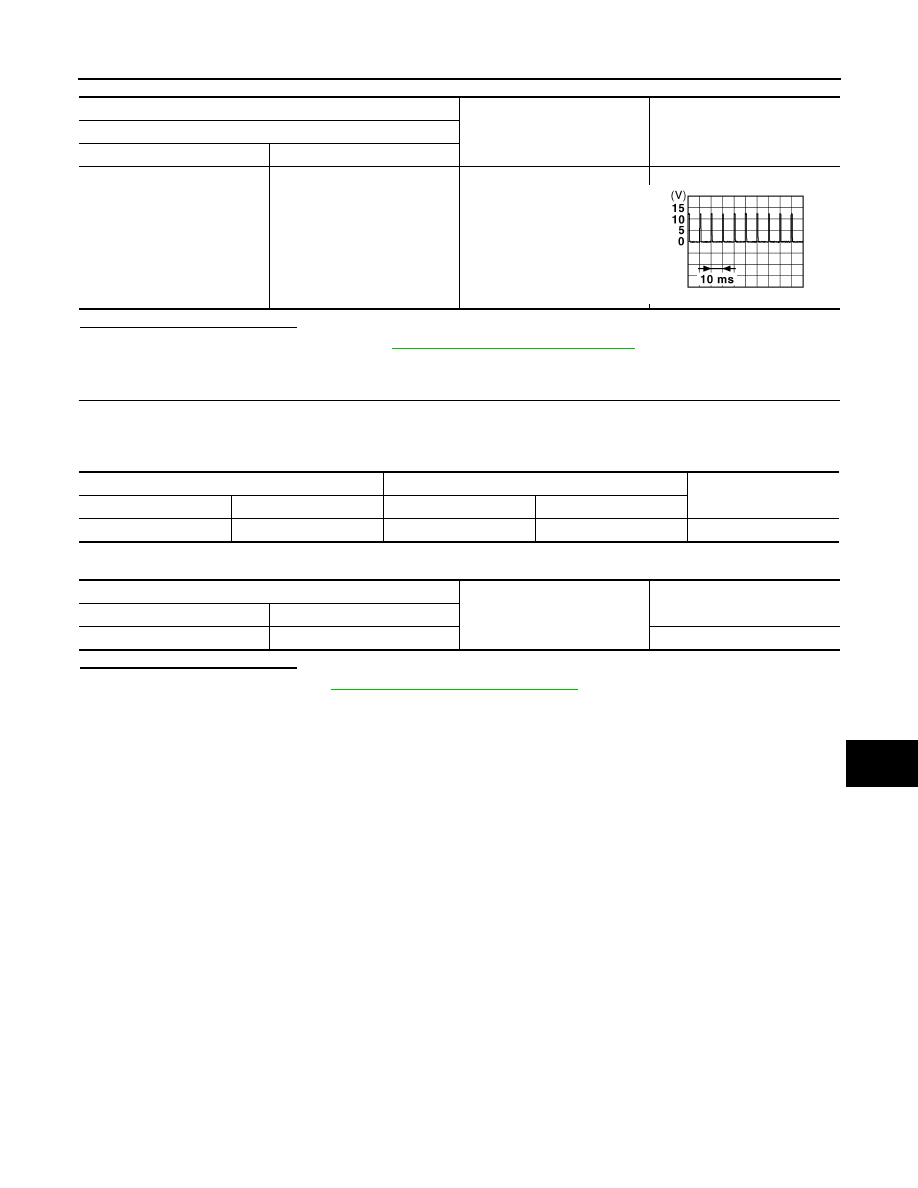
(+)
(
−
)
Voltage (V)
(Approx)
A/C auto amp.
Connector
Terminal
M50
27
Ground
JPMIA0012GB
BCM
A/C auto amp.
Continuity
Connector
Terminal
Connector
Terminal
M123
130
M50
27
Existed
BCM
Ground
Continuity
Connector
Terminal
M123
130
Not existed