Nissan Murano Z51 (2011 year). Manual - part 22
DEF-12
< DTC/CIRCUIT DIAGNOSIS >
REAR WINDOW DEFOGGER RELAY
REAR WINDOW DEFOGGER RELAY
Description
INFOID:0000000006260853
Power is supplied to the rear window defogger with BCM control.
Component Function Check
INFOID:0000000006260854
1.
CHECK REAR WINDOW DEFOGGER RELAY POWER SUPPLY CIRCUIT
1.
Perform Active Test (“REAR DEFOGGER”) with CONSULT-III.
2.
Touch “ON”.
3.
Check that the rear window heating wire is getting warmer.
Is the inspection result normal?
YES
>> Rear window defogger relay power supply circuit is OK.
NO
>> Refer to
Diagnosis Procedure
INFOID:0000000006260855
1.
CHECK FUSE
1.
Turn ignition switch OFF.
2.
Check 10A fuse (No.3, located in fuse block (J/B).
-
Is the inspection result normal?
YES
>> GO TO 2.
NO
>> Replace the blown fuse after repairing the affected circuit if a fuse is blown.
2.
CHECK REAR WINDOW DEFOGGER RELAY CIRCUIT
1.
Turn ignition switch ON.
2.
Check voltage between BCM harness connector and ground.
Is the inspection result normal?
YES
>> GO TO 5.
NO
>> GO TO 3.
3.
CHECK FUSE BLOCK (J/B)
Check voltage between fuse block (J/B) connector and ground.
Is the inspection result normal?
YES
>> Repair or replace harness or connector between BCM and fuse block (J/B).
NO
>> GO TO 4.
4.
CHECK REAR WINDOW DEFOGGER RELAY
Check rear window defogger relay.
Refer to
DEF-13, "Component Inspection"
Is the inspection result normal?
YES
>> Replace fuse block (J/B).
NO
>> Replace rear window defogger relay.
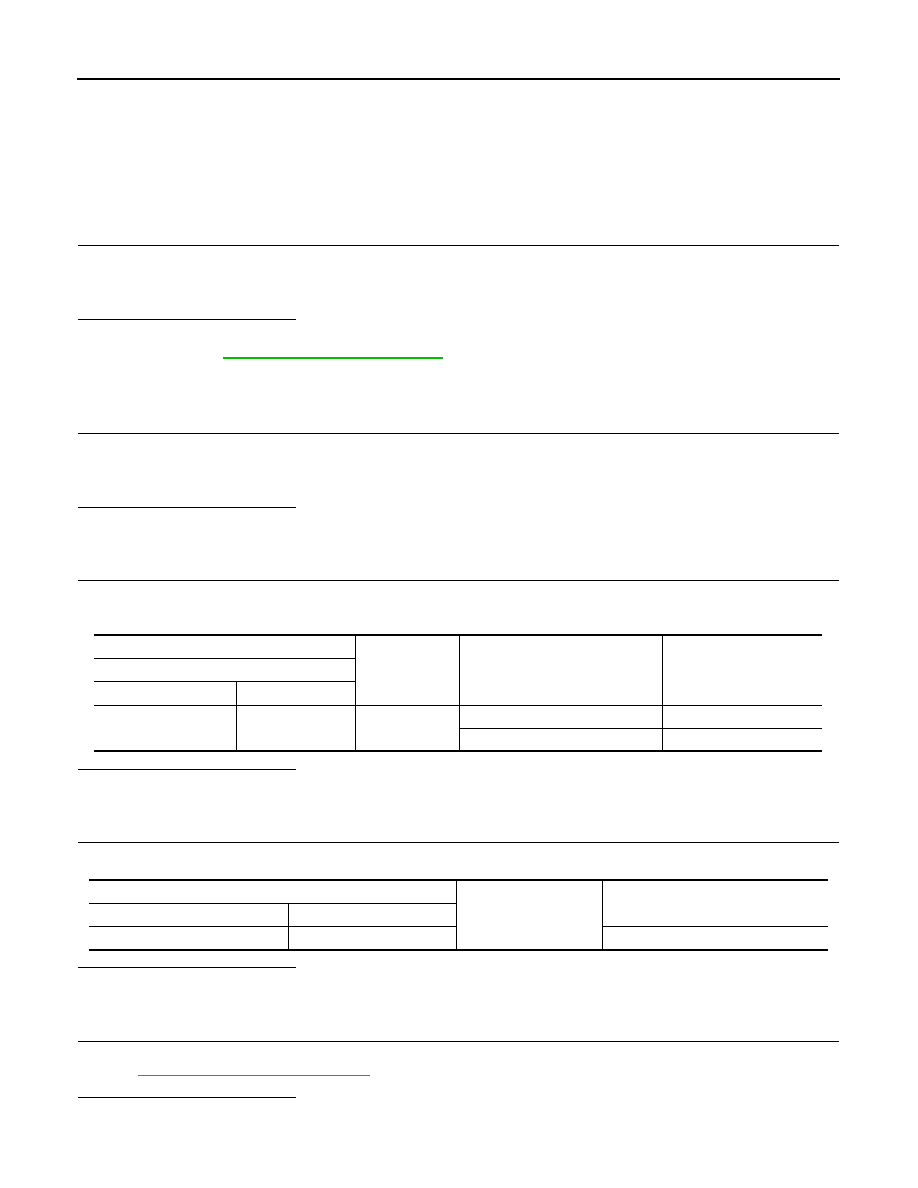
(+)
(-)
Condition of rear window defog-
ger switch
Voltage (V)
(Approx.)
BCM
Connector
Terminal
M123
151
Ground
ON 0
OFF
Battery voltage
Fuse block (J/B)
Ground
Voltage (V)
(Approx.)
Connector
Terminal
M2
4B
Battery voltage
Revision: 2011 November
2011 MURANO