содержание .. 1342 1343 1344 1345 ..
Nissan X-Trail 32. Manual - part 1344
COOLER PIPE AND HOSE
HA-35
< REMOVAL AND INSTALLATION >
[R9M (EXCEPT FOR RUSSIA)]
C
D
E
F
G
H
J
K
L
M
A
B
HA
N
O
P
6.
Remove mounting bolt, and then remove internal heat exchanger pipe.
INSTALLATION
Note the following items, and then install in the reverse order of removal.
CAUTION:
• Replace O-rings with new ones. Then apply compressor oil to them when installing.
• Check for leakages when recharging refrigerant. Refer to
HIGH-PRESSURE PIPE 1
HIGH-PRESSURE PIPE 1 : Removal and Installation
INFOID:0000000011000239
CAUTION:
Perform lubricant return operation before each refrigeration system disassembly. However, if a large
amount of refrigerant or lubricant is detected, never perform lubricant return operation. Refer to
22, "Perform Lubricant Return Operation"
REMOVAL
1.
Use a refrigerant collecting equipment (for HFO-1234yf) to discharge the refrigerant. Refer to
2.
Remove front bumper fascia assembly. Refer to
EXT-15, "Removal and Installation"
.
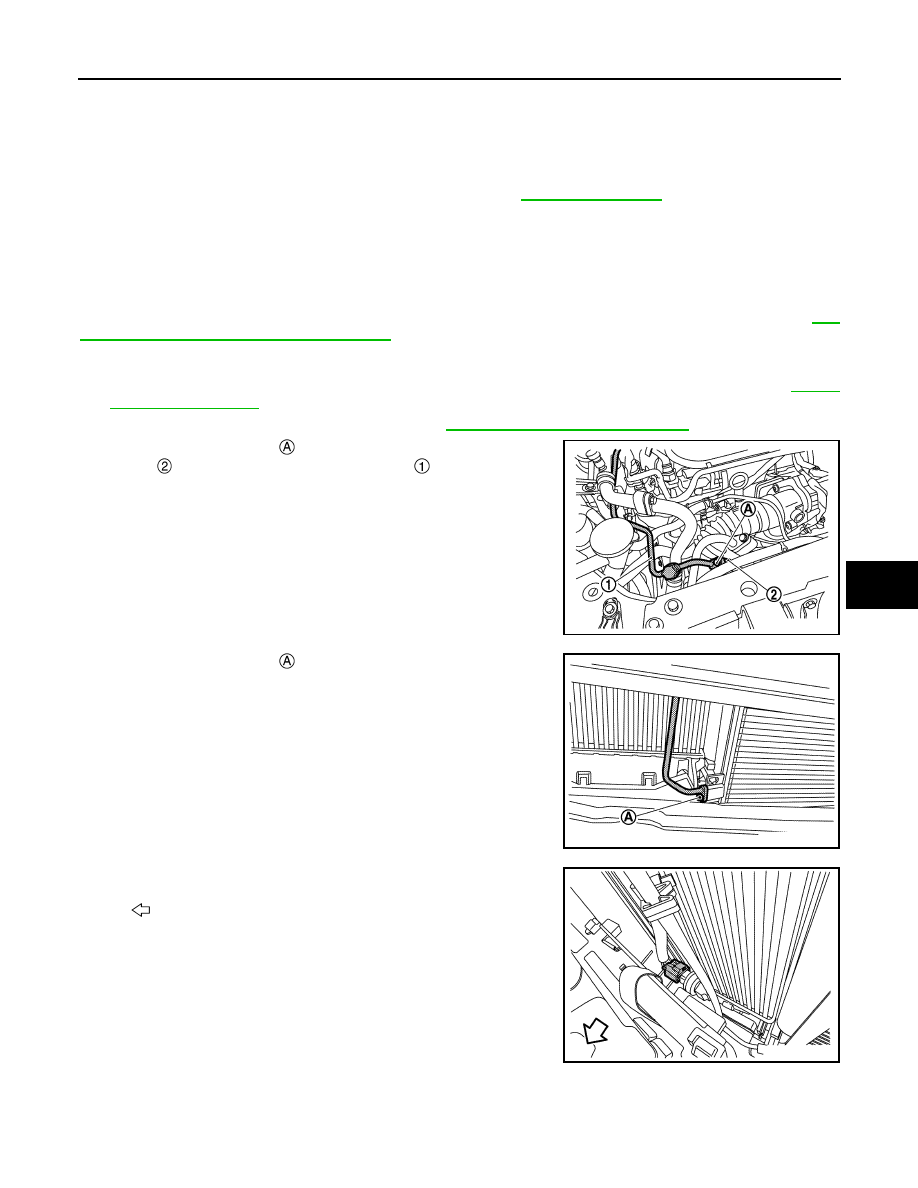
3.
Remove mounting bolt
, and then disconnect high-pressure
pipe 1
from internal heat exchanger pipe
.
CAUTION:
Cap or wrap the joint of the A/C piping with suitable mate-
rial such as vinyl tape to avoid the entry of air.
4.
Remove mounting bolt
, and then disconnect high-pressure
pipe 1 from the condenser & liquid tank assembly.
CAUTION:
Cap or wrap the joint of the A/C piping and condenser with
suitable material such as vinyl tape to avoid the entry of air.
5.
Disconnect refrigerant pressure sensor harness connector.
6.
Remove mounting bolt, and then remove high-pressure pipe 1 from the vehicle.
INSTALLATION
Note the following items, and then install in the reverse order of removal.
JMIIA3737ZZ
JMIIA3743ZZ
: Vehicle front
JMIIA3741ZZ