содержание .. 1222 1223 1224 1225 ..
Nissan X-Trail 32. Manual - part 1224
TURN SIGNAL LAMP CIRCUIT
EXL-353
< DTC/CIRCUIT DIAGNOSIS >
[HALOGEN HEADLAMP]
C
D
E
F
G
H
I
J
K
M
A
B
EXL
N
O
P
Rear turn signal lamp
Is the inspection result normal?
YES
>> GO TO 6.
NO
>> GO TO 5.
5.
CHECK TURN SIGNAL LAMP POWER SUPPLY CIRCUIT (SHORT)
1.
Turn ignition switch OFF.
2.
Disconnect BCM connector.
3.
Check continuity between BCM harness connector and ground.
Front turn signal lamp
Side turn signal lamp
Rear turn signal lamp
Is the inspection result normal?
YES
>> Replace BCM. Refer to
BCS-121, "Removal and Installation"
.
NO
>> Repair or replace harness.
6.
CHECK TURN SIGNAL LAMP POWER SUPPLY CIRCUIT (OPEN)
1.
Turn ignition switch OFF.
2.
Disconnect BCM connector.
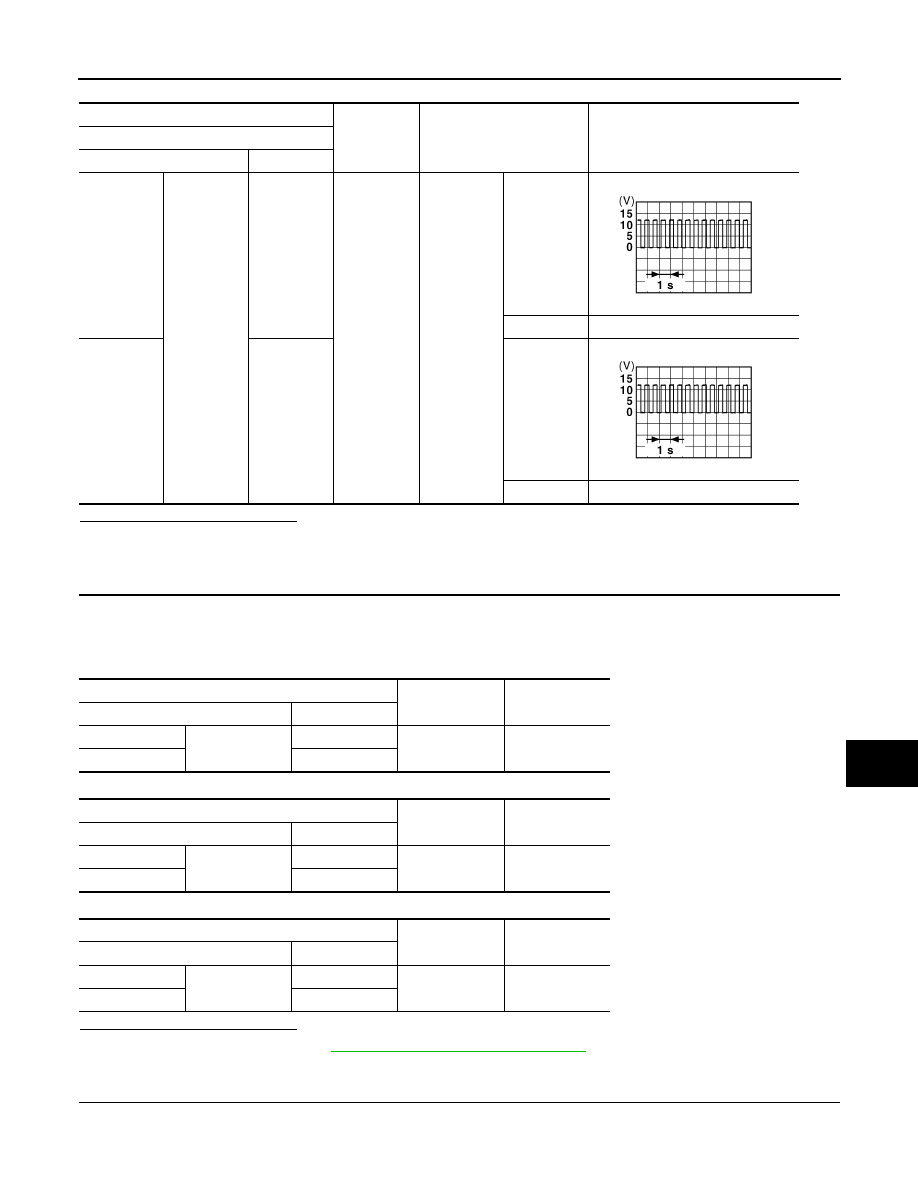
+
-
Test item
Voltage
(Approx.)
BCM
Connector
Terminal
RH
B46
136
Ground
Turn signal
switch
Right
Center
0 V
LH
133
Left
Center
0 V
PKID0926E
PKID0926E
BCM
—
Continuity
Connector
Terminal
RH
E23
168
Ground
Not existed
LH
167
BCM
—
Continuity
Connector
Terminal
RH
M87
43
Ground
Not existed
LH
42
BCM
—
Continuity
Connector
Terminal
RH
B46
136
Ground
Not existed
LH
133