Nissan Qashqai J11. Manual - part 940
PB-142
< REMOVAL AND INSTALLATION >
PARKING BRAKE CONTROL
PARKING BRAKE CONTROL
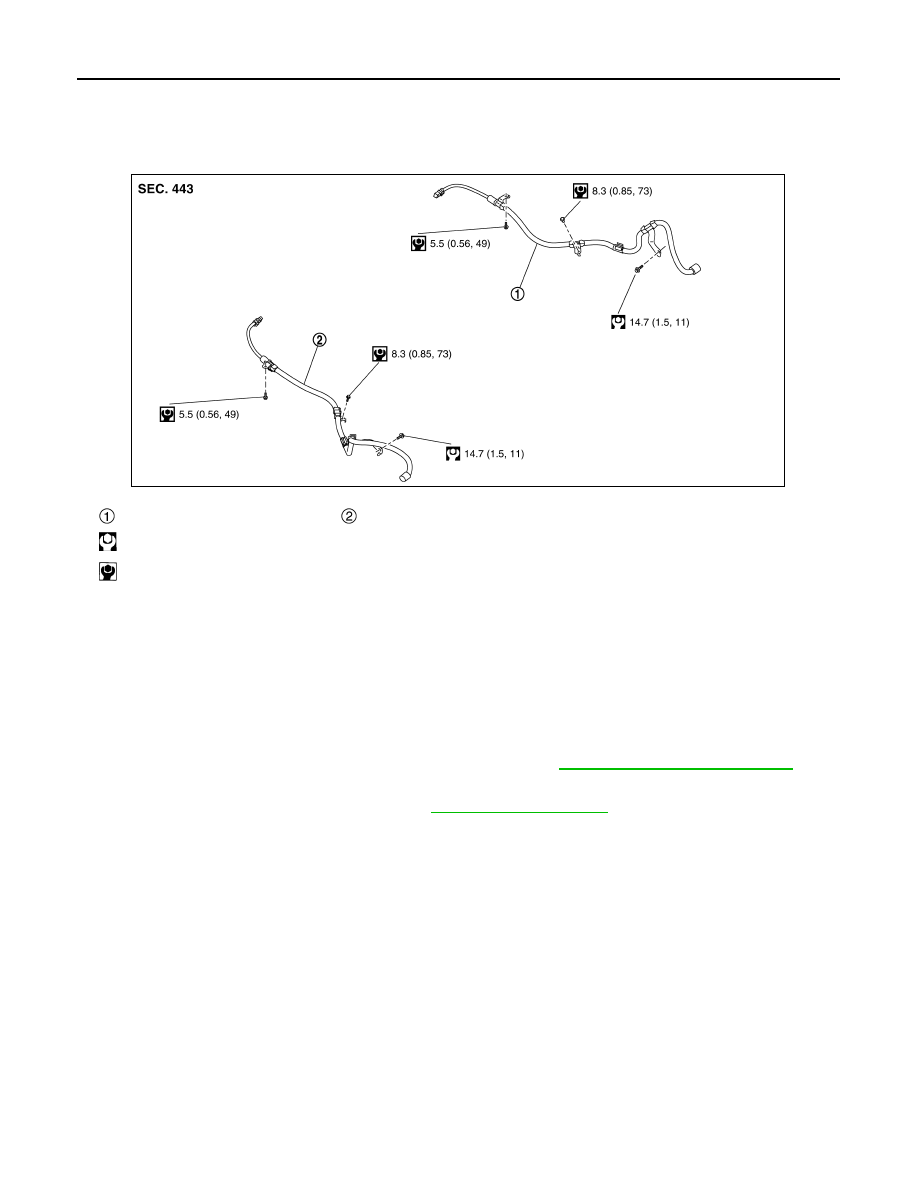
Exploded View
INFOID:0000000010833573
Removal and Installation
INFOID:0000000010833574
REMOVAL
1.
Turn the ignition switch ON.
CAUTION:
Never start the engine.
2.
Release the parking brake.
CAUTION:
If the brake cannot be released, release it manually. Refer to
3.
Turn the ignition switch OFF.
4.
Disconnect battery negative terminal. Refer to
5.
Remove rear tires.
6.
Disconnect parking brake actuator harness connector.
7.
Remove parking brake actuator harness mounting bolts.
8.
Remove parking brake actuator harness from the vehicle.
INSTALLATION
Install the reverse order of the removal.
Parking brake actuator harness RH
Parking brake actuator harness LH
: N·m (kg-m, ft-lb)
: N·m (kg-m, in-lb)
JSFIA2487GB