Content .. 1752 1753 1754 1755 ..
Nissan Qashqai J11. Manual - part 1754
EXL-318
< REMOVAL AND INSTALLATION >
[HALOGEN HEADLAMP]
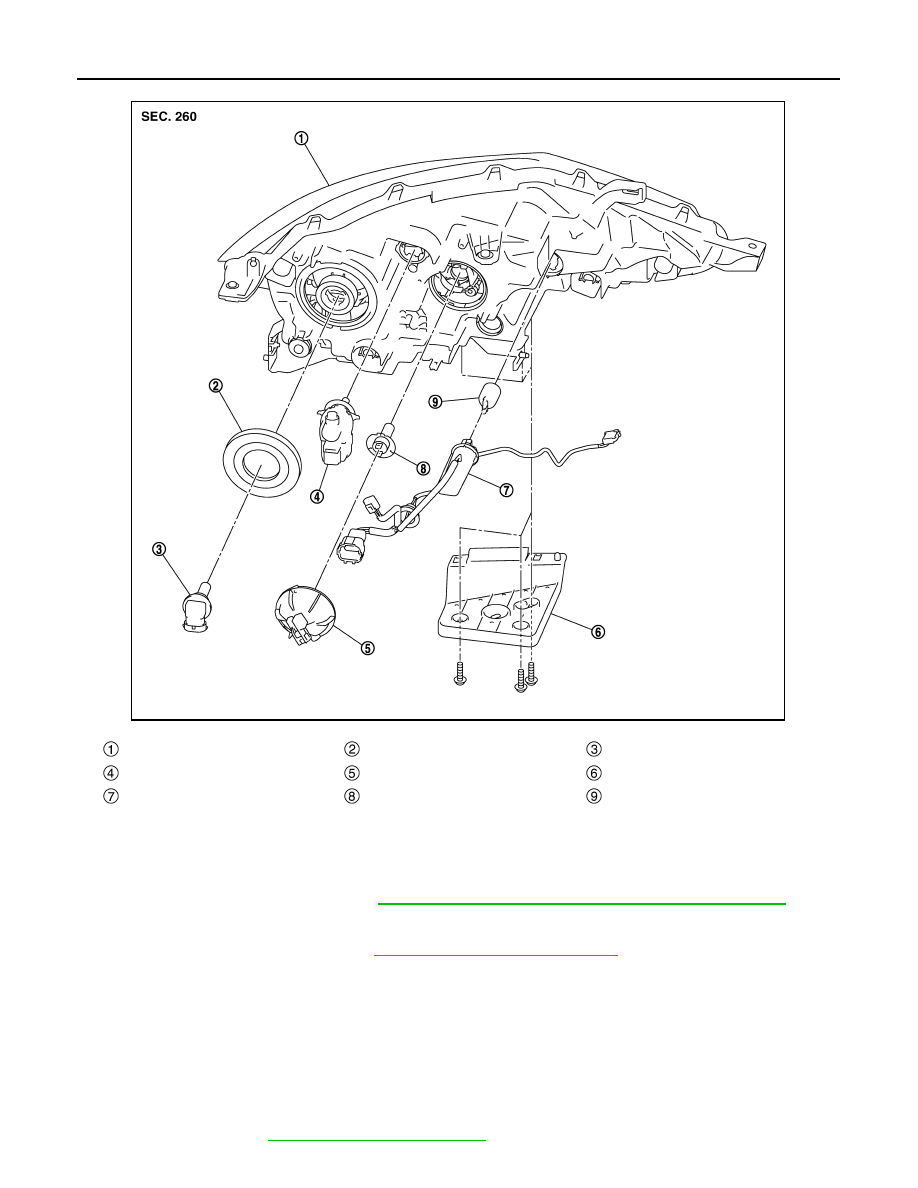
FRONT COMBINATION LAMP
Removal and Installation
INFOID:0000000010437125
CAUTION:
Disconnect the battery negative terminal or remove power circuit fuse when performing the operation
for preventing electric leakage. Refer to
EXL-182, "Precautions for Removing Battery Terminal"
REMOVAL
1.
Remove front bumper fascia. Refer to
EXT-19, "Removal and Installation"
.
2.
Remove front combination lamp assembly mounting bolts.
3.
Pull out front combination lamp assembly forward the vehicle.
4.
Disconnect front combination lamp assembly harness connectors.
5.
Remove front combination lamp assembly.
INSTALLATION
Note the following item, and then install in the reverse order of removal.
CAUTION:
After installation, perform aiming adjustment. Refer to the following:
• LHD MODELS: Refer to
.
Front combination lamp housing
Seal packing
Headlamp bulb (LO)
Headlamp aiming motor
Headlamp socket cover assembly
Front combination lamp bracket
Front turn signal lamp bulb socket
Headlamp bulb (HI)
Front turn signal lamp bulb
JMLIA5091ZZ