Nissan Qashqai J11. Manual - part 148
LU-52
< PERIODIC MAINTENANCE >
[R9M]
OIL FILTER
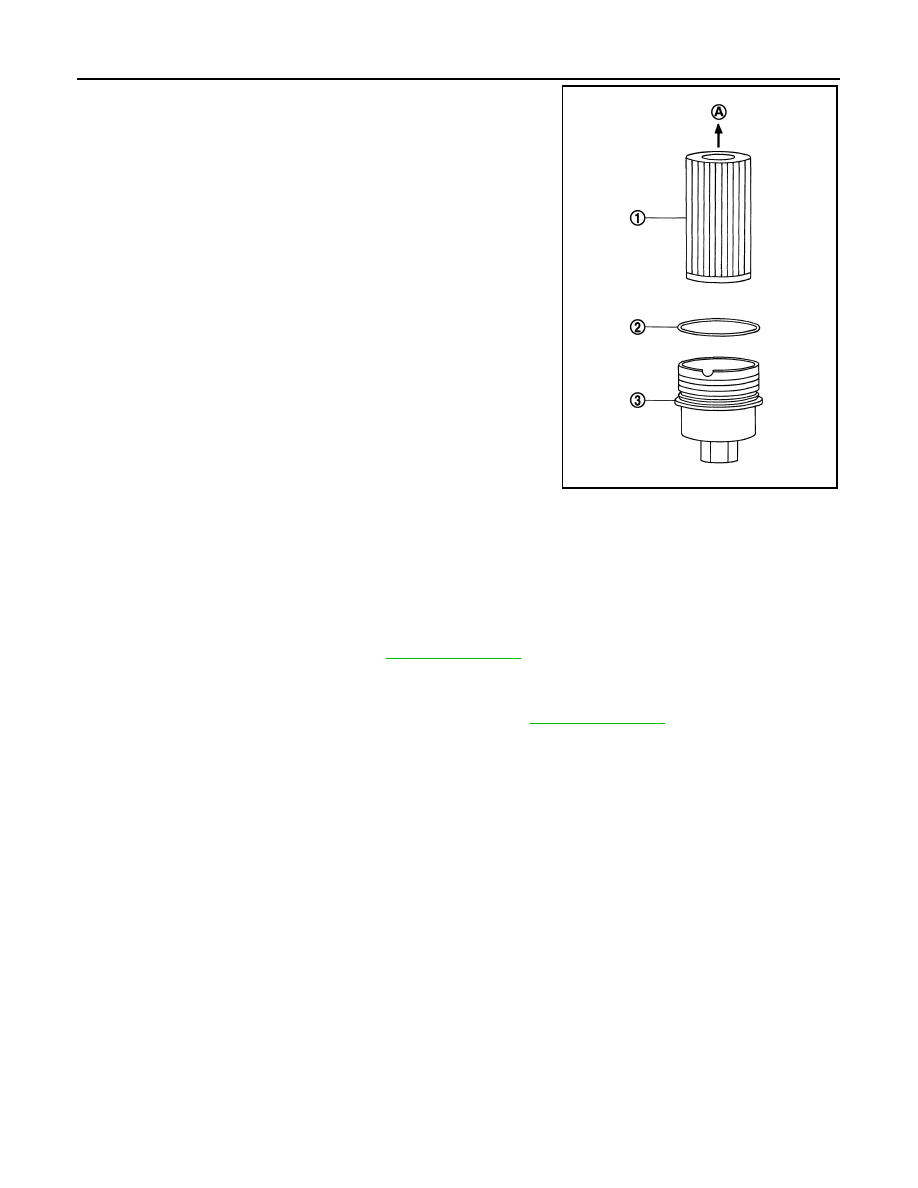
2.
Install oil filter (1) and O-ring (2) to oil filter body (3).
CAUTION:
Be sure to use a new O-ring.
• Securely press the oil filter into the oil filter body.
• When installing an O-ring, apply engine oil all around the O-
ring.
3.
Install oil filter body assembly to oil cooler.
Inspection
INFOID:0000000010284228
INSPECTION AFTER INSTALLATION
1.
Check that the engine oil level. Refer to
2.
Start the engine, and check that there is no leak of engine oil.
3.
Stop the engine and wait for 10 minutes.
4.
Check that the engine oil level, and adjust the level. Refer to
A
: Oil cooler side
E1BIA0600ZZ
Oil filter body:
25Nm (2.6 kg-m, 18 ft-lb)