Nissan Qashqai J11. Manual - part 142


  Index      Nissan     Nissan Qashqai J11 - Service and Repair Manual


Search            


Content   ..  140  141  142  143   ..


Nissan Qashqai J11. Manual - part 142


LU-28

< REMOVAL AND INSTALLATION >

[MR20DD]

OIL COOLER

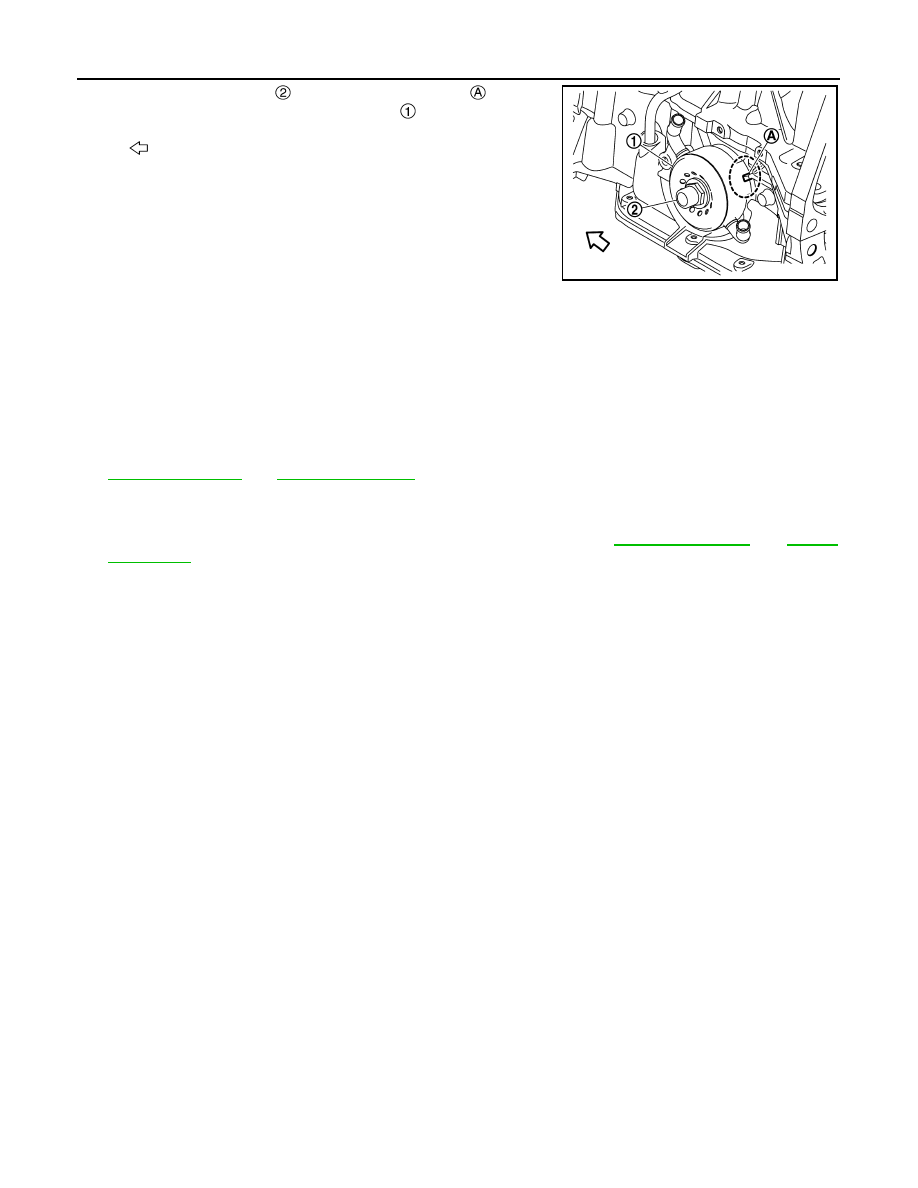
• Tighten the connector bolt 

 after aligning the stopper 

 on the oil

pan (upper) side with protrusion of oil cooler 

.

Inspection

INFOID:0000000010624161

INSPECTION AFTER REMOVAL

Oil Cooler

Check oil cooler for cracks. Check oil cooler for clogging by blowing through engine coolant inlet. If necessary,
replace oil cooler.

INSPECTION AFTER INSTALLATION

1.

Check the engine oil level and the engine coolant level and add engine oil and engine coolant. Refer to

LU-22, "Inspection"

 and 

CO-38, "Inspection"

.

2.

Start the engine, and check that there is no leakage of engine oil or engine coolant.

3.

Stop the engine and wait for 10 minutes.

4.

Check the engine oil level and the engine coolant level again. Refer to 

LU-22, "Inspection"

 and 

CO-38,

"Inspection"

.

: Engine front

JPBIA6907ZZ

OIL PUMP

LU-29

< UNIT DISASSEMBLY AND ASSEMBLY >

[MR20DD]

C

D

E

F

G

H

I

J

K

L

M

A

LU

N

P

O

UNIT DISASSEMBLY AND ASSEMBLY

OIL PUMP

Exploded View

INFOID:0000000010624162

Oil pump is integrated in the oil pan (upper). Refer to 

EM-218, "Exploded View"

.

LU-30

< SERVICE DATA AND SPECIFICATIONS (SDS) 

[MR20DD]

SERVICE DATA AND SPECIFICATIONS (SDS)

SERVICE DATA AND SPECIFICATIONS (SDS)

SERVICE DATA AND SPECIFICATIONS (SDS)

Periodical Maintenance Specification

INFOID:0000000010624163

ENGINE OIL CAPACITY (APPROXIMATE)

Unit: 

 (lmp qt)

Engine Oil Pressure

INFOID:0000000010624164

Unit: kPa (bar, kg/cm

2

, psi)

*: Engine oil temperature at 80

°

C (176

°

F)

Drain and refill 

With oil filter change

3.8 (3-3/8)

Without oil filter change

3.6 (3-1/8)

Dry engine (Overhaul)

4.4 (3-7/8)

Engine speed

Approximate discharge pressure*

Idle speed

More than 85 (0.85, 0.867, 12.3)

2,000 rpm

More than 200 (2.0, 2.04, 29) 

PRECAUTIONS

LU-31

< PRECAUTION >

[K9K]

C

D

E

F

G

H

I

J

K

L

M

A

LU

N

P

O

PRECAUTION

PRECAUTIONS

Precaution for Liquid Gasket

INFOID:0000000010284204

REMOVAL OF LIQUID GASKET

• After removing the mounting bolts and nuts, separate the mating

surface using a seal cutter and remove the liquid gasket.

CAUTION:

Be careful not to damage the mating surfaces.

• In areas where the cutter is difficult to use, use a plastic hammer to

lightly tap the gasket applied area.

CAUTION:

If for some unavoidable reason a tool such as a flat-bladed
screwdriver is used, be careful not to damage the mating sur-
faces.

LIQUID GASKET APPLICATION PROCEDURE 

1.

Using a scraper, remove the old liquid gasket adhering to the
gasket application surface and the mating surface.
• Remove the liquid gasket completely from the groove of the

gasket application surface, mounting bolts and bolt holes.

2.

Wipe the gasket application surface and the mating surface with
white gasoline (lighting and heating use) to remove adhering
moisture, grease and foreign materials.

3.

Attach the liquid gasket to the tube presser.
Use Genuine Liquid Gasket or equivalent.

4.

Apply the gasket without breaks to the specified location with the
specified dimensions.
• If there is a groove for the liquid gasket application, apply the

gasket to the groove.

• As for the bolt holes, normally apply the gasket inside the

holes. If specified, it should be applied outside the holes. Make
sure to read the instruction in this manual.

• Within five minutes of gasket application, install the mating

component.

• If the liquid gasket protrudes, wipe it off immediately.
• Do not retighten after the installation.
• After 30 minutes or more have passed from the installation, fill

the engine oil and coolant.

CAUTION:

If there are instructions in this manual, observe them.

PBIC0275E

PBIC0003E

EMA0622D

SEM159F


Content   ..  140  141  142  143   ..