содержание .. 816 817 818 819 ..
Nissan Tiida C11. Manual - part 818
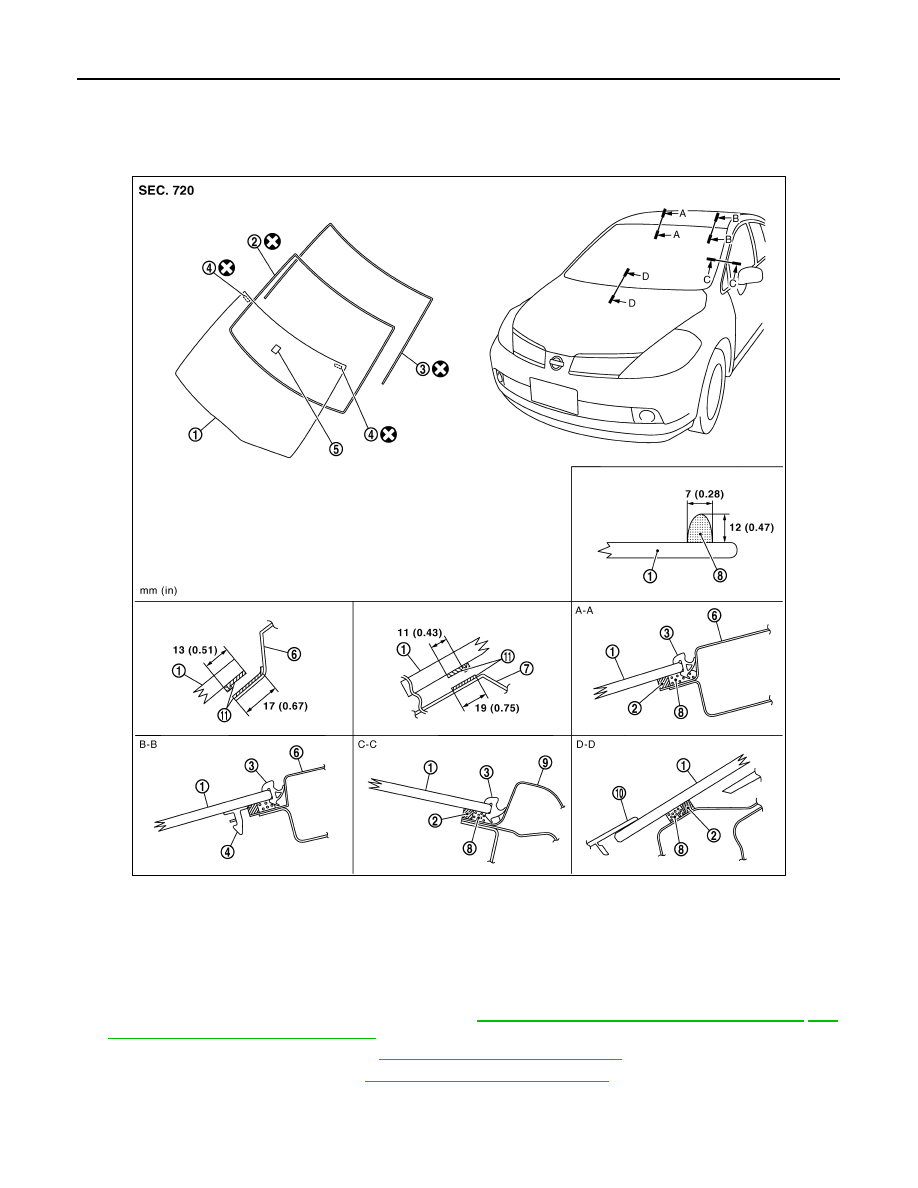
GW-10
< ON-VEHICLE REPAIR >
WINDSHIELD GLASS
ON-VEHICLE REPAIR
WINDSHIELD GLASS
Removal and Installation
INFOID:0000000001716818
REMOVAL
1.
Partially remove the headlining (front edge). Refer to
INT-31, "Removal and Installation - Hatchback"
33, "Removal and Installation - Sedan"
.
2.
Remove the front wiper arms. Refer to
WW-70, "Removal and Installation"
.
3.
Remove the cowl top cover. Refer to
EXT-20, "Removal and Installation"
.
4.
Disconnect the harness connector of wiper deicer.
5.
Apply protective tape around the windshield glass to protect the painted surface from damage.
PIIB6285E
1.
Windshield glass assembly
2.
Dam sealant
3.
Windshield molding
4.
Spacer
5.
Mirror base
6.
Roof panel outer
7.
Cowl top front
8.
Adhesive
9.
Front pillar outer panel
10. Cowl top cover
11.
Primer