Mitsubishi Outlander. Body repair manual - part 19
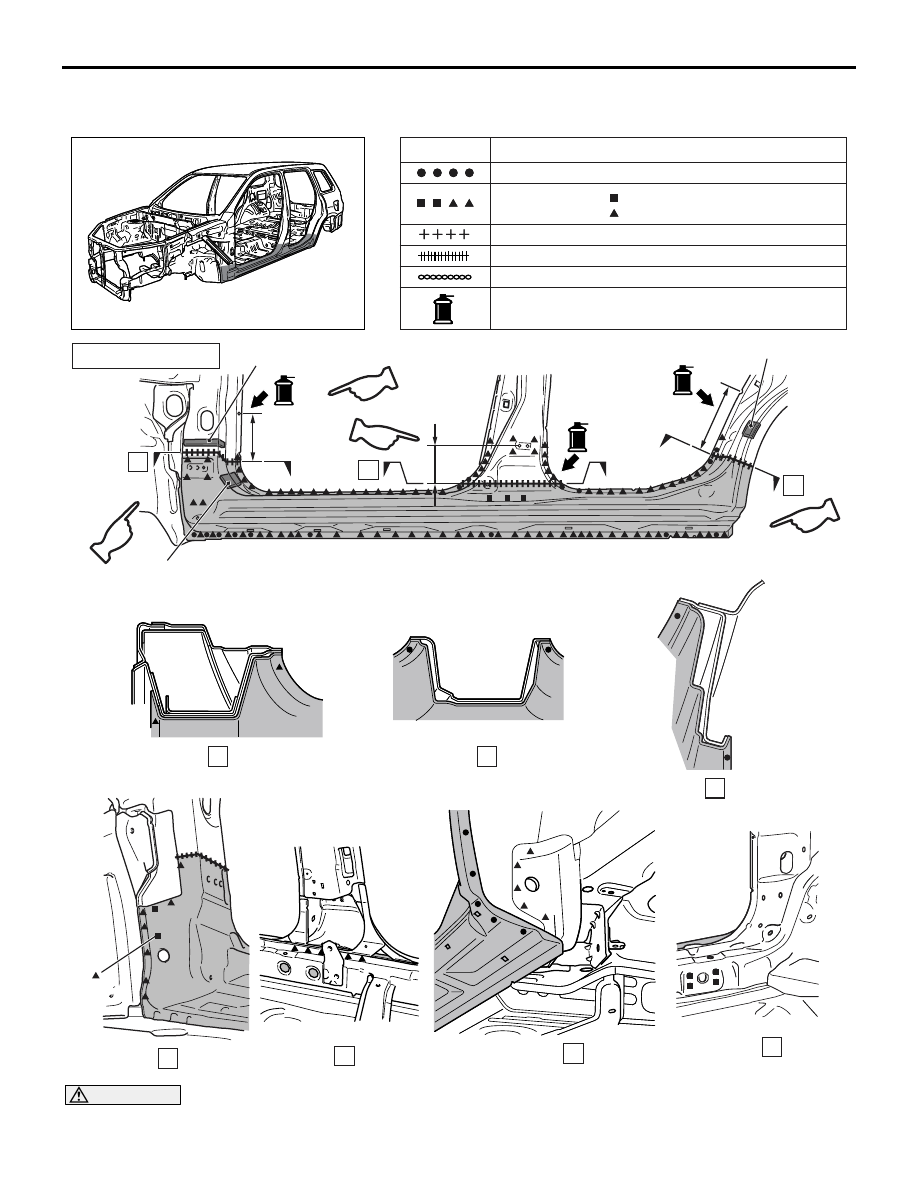
SIDE SILL
WELDED PANEL REPLACEMENT
3-19
SIDE SILL
M4030007000403
AB300048
Spot welding
MIG plug welding : indicates two panels to be welded
: indicates three panels to be welded
MIG spot welding
MIG arc welding (continuous)
Braze welding
Anti-corrosion agent application locations
(Use access holes to apply liberally to butt-welded joints.)
( )
Symbol
Operation description
AF
AB300040
A
D
E
G
B
C
F
A
B
C
D
E
F
G
REPAIR WELDS
160 mm
100 ± 20 mm
270 ± 20 mm
AB
Right
side
Acoustic foam
Acoustic foam
Acoustic foam
CAUTION
When repairing the area using foam materials do not use firing tools since the foaming materials may
burn.