Mitsubishi Montero (1998+). Manual - part 24


  Index      Mitsubishi     Mitsubishi Montero - service repair manual 1998 year


Search            


Content   ..  22  23  24  25   ..


Mitsubishi Montero (1998+). Manual - part 24


         A/C SWITCH

         Removal & Installation

         Lower glove box. Remove instrument cover. Remove lap cooler

and foot shower ducts. Remove center panel and A/C-heater control

panel. Remove bezel and knob. Disconnect A/C switch connector, and

remove A/C switch. To install, reverse removal procedure.

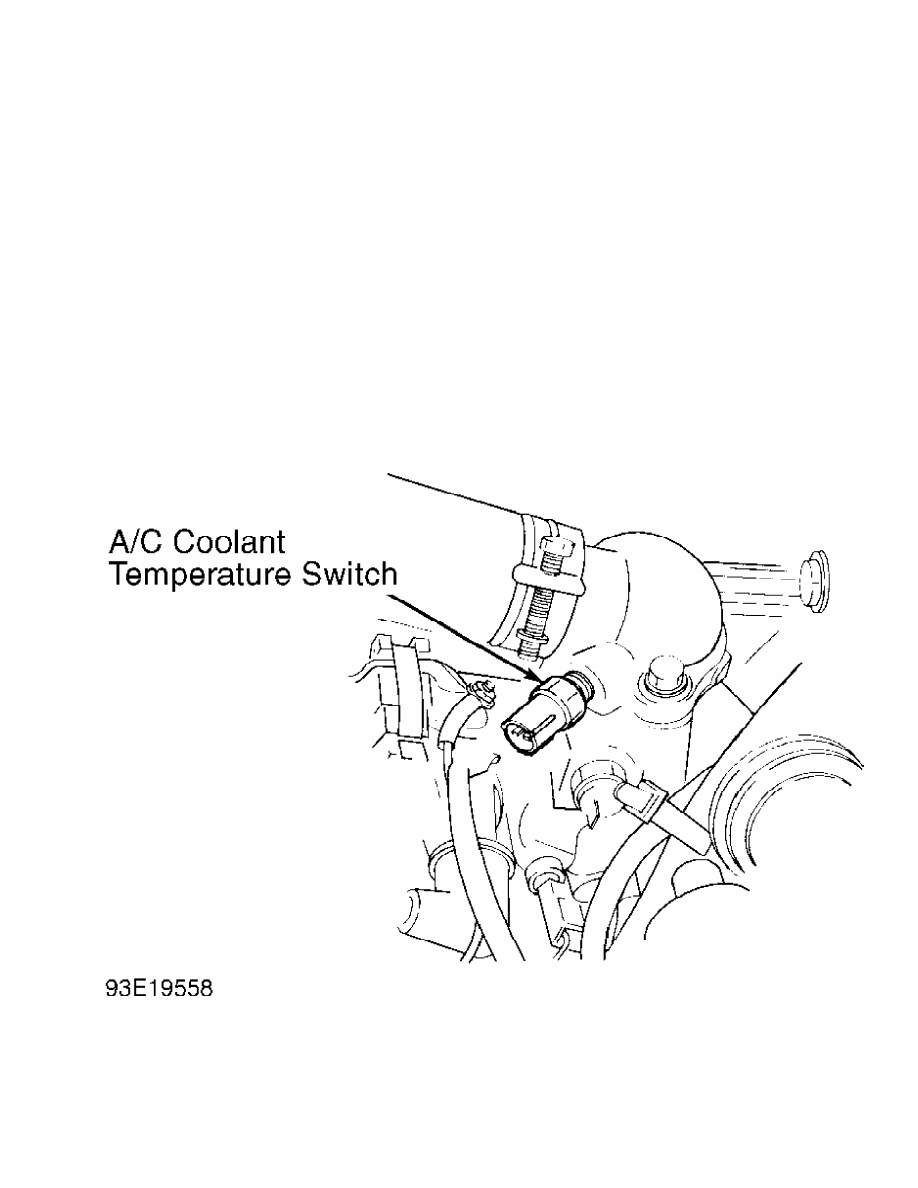
         A/C ENGINE COOLANT TEMPERATURE SWITCH

         Removal & Installation

         Drain coolant below level of thermostat housing. See  Fig. 8.

Remove A/C engine coolant temperature switch wiring harness connector,

and unscrew A/C engine coolant temperature switch from thermostat

housing. To install, reverse removal procedure. Tighten A/C engine

coolant temperature switch to specification. See  TORQUE SPECIFICATIONS

. Add coolant and check for leaks.

Fig. 8:  Locating A/C Engine Coolant Temperature Switch

Courtesy of Mitsubishi Motor Sales of America.

         BLOWER MOTOR & RESISTOR

         Removal & Installation

         Remove right side foot shower duct. Disconnect blower and/or

resistor. Remove blower motor and/or resistor. See  Fig. 9. To install,

reverse removal procedure.

Fig. 9:  Exploded View Of Blower Assembly

Courtesy of Mitsubishi Motor Sales of America.

         COMPRESSOR

         Removal & Installation

         Discharge A/C system, using approved refrigerant

recovery/recycling equipment. Loosen idler pulley, and remove belt.

Disconnect compressor electrical connector. Remove high and low

pressure lines and "O" rings from compressor. Remove compressor

mounting bolts. Remove compressor. To install, reverse removal

procedure. See Fig. 10.

Fig. 10:  Exploded View Of Compressor Mounting (Typical)

Courtesy of Mitsubishi Motor Sales of America.

         CONDENSER

         Removal & Installation

         1) Discharge A/C system, using approved refrigerant

recovery/recycling equipment. Remove front grille and grille brackets.

Remove hood latch bracket mounting bolt. Remove hood latch brace.

Remove A/T oil cooler and engine oil cooler mounting bolts and

brackets.

         2) Remove receiver bracket and receiver. Remove condenser fan

motor. Disconnect pressure lines from condenser. Remove condenser

mounting bolts. Lift condenser from vehicle. To install, reverse

removal procedure. See Fig. 11. If replacing condenser, add 1.4 ounces

of refrigerant oil to new condenser.

Fig. 11:  Exploded View Of Condenser & Condenser Fan Motor

Courtesy of Mitsubishi Motor Sales of America.

         EVAPORATOR ASSEMBLY


Content   ..  22  23  24  25   ..