Mitsubishi Pajero Pinin. Manual - part 15


  Index      Mitsubishi     Mitsubishi Pajero Pinin - service repair manual 2001 year


Search            


Content   ..  13  14  15  16   ..


Mitsubishi Pajero Pinin. Manual - part 15


ENGINE <4G9-GDI> – 

Camshaft and Camshaft Oil Seal

11A-20

"

C

A

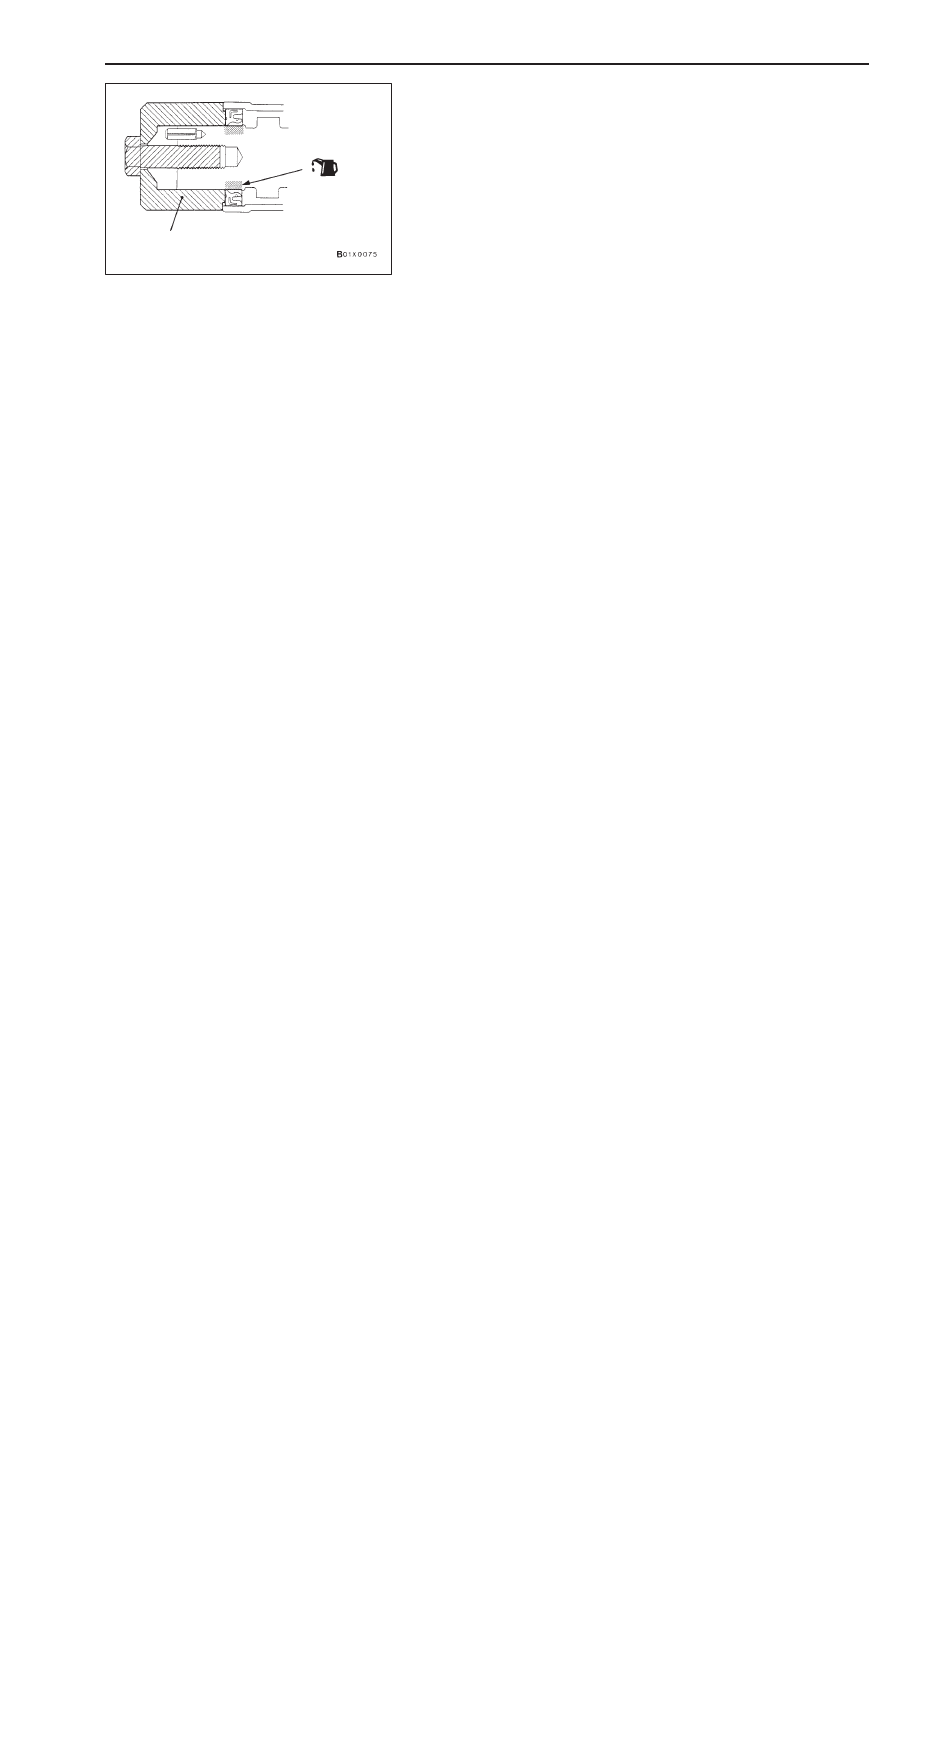
CAMSHAFT OIL SEAL INSTALLATION

1.

Apply engine oil to the entire circumference of the oil seal
lip.

2.

Press-fit the oil seal as shown in the illustration.

"

D

A

CAMSHAFT SPROCKET INSTALLATION

Use the special tool to secure the camshaft sprocket in the
same way as during removal, and then tighten the bolt to
the specified torque.

Tightening torque: 88 Nm

MD998713

ENGINE <4G9-GDI> – 

Oil Pan

11A-21

OIL PAN

REMOVAL AND INSTALLATION

Pre-removal and Post-installation Operation

D

Under Cover Removal and Installation

D

Oil Level Gauge Removal and Installation

D

Engine Oil Draining and Supplying (Refer to GROUP
12 – On-vehicle Service.)

φ

 4 

±

 1 mm

Bolt
hole

8

98 – 118 Nm

93 Nm

6

12

1

Sealant:
MITSUBISHI GENUINE PART
MD970389 or equivalent

10

93 Nm

42 Nm

7 Nm

7 Nm

9

7 Nm

11

5

14

1

4

4

2

3

12 Nm

18 Nm

42 Nm

11

39 Nm

7

5

7 Nm

14

19 Nm

48 Nm

24 Nm

13

Groove

69 Nm

Removal steps

1. Splash shIeld
2. Power steering pressure hose

clamp

3. Steering gear box and shaft

connection

A

A

"

4. Steering gear box installation bolt

A

B

"

5. Lower oil pan
6. Drain plug

"

A

A

7. Gasket

8. Oil screen
9. Gasket

10. Free-wheeling clutch engage switch

connector connection

A

C

"

11. Front differential mount center bolt

A

C

"

12. Front differential mount
13. Bell housing cover

A

D

"

14. Upper oil pan

ENGINE <4G9-GDI> – 

Oil Pan

11A-22

REMOVAL SERVICE POINTS

A

A

"

STEERING GEAR BOX INSTALLATION BOLT
REMOVAL

Remove the steering gear box installation bolts and lower
the steering gear box.

A

B

"

LOWER OIL PAN REMOVAL

Place a piece of wood against the lower oil pan, and tap
the piece of wood with a hammer to remove the lower oil
pan.

Caution
Because the upper oil pan used is made from aluminium,
the oil pan remover (MB998727) should not be used.

A

C

"

FRONT DIFFERENTIAL MOUNT CENTER BOLT/
FRONT DIFFERENTIAL MOUNT REMOVAL

1.

Support the front differential by a jack, and remove the
front differential mount center bolts and the front differential
mount.

2.

Remove the jack and lower the front differential.

A

D

"

UPPER OIL PAN REMOVAL

After removing all installation bolts, install 2 bolts (M6


85)

in the upper oil pan as shown, noting that one located on
the left side and one on the right side. Turn the bolts to remove
the upper oil pan.

Caution
Because the upper oil pan used is made from aluminium,
the oil pan remover (MB998727) should not be used.

INSTALLATION SERVICE POINT

"

A

A

DRAIN PLUG GASKET INSTALLATION

Install the drain plug gasket in the direction so that it faces
as shown in the illustration.

Lower oil pan

Bolt

Drain plug
gasket

Oil pan side

ENGINE <4G9-GDI> – 

Crankshaft Oil Seal

11A-23

CRANKSHAFT OIL SEAL

REMOVAL AND INSTALLATION

93 – 103 Nm

7

3

2

1

10

Crankshaft

Sealant: 3M Stud locking 4170 or equivalent

Lip section

Lip section

Engine oil

6

10

5

8

7

8

4

93 – 103 Nm

9

Crankshaft

(Engine oil:
bolt washer
 surface)

(Bolt thread)

(Bolt thread)

<A/T>

<M/T>

<A/T>

<M/T>

5

(Engine oil:
bolt washer
 surface)

Crankshaft front oil seal removal
steps

D

Timing belt (Refer to P.11A-29.)

D

Crank angle sensor
(Refer to GROUP 16.)

1. Crankshaft sprocket
2. Key
3. Crankshaft sensing blade
4. Crankshaft spacer

"

C

A

5. Crankshaft front oil seal

Crankshaft rear oil seal removal
steps

D

Transmission assembly
(M/T: Refer to GROUP 22.)
(A/T: Refer to GROUP 23.)

D

Clutch cover and disc <M/T>

A

A

" "

B

A

6. Adapter plate <A/T>

A

A

" "

B

A

7. Flywheel <M/T>

A

A

" "

B

A

8. Drive plate <A/T>

A

A

" "

B

A

9. Crankshaft adapter <A/T>

"

A

A

10. Crankshaft rear oil seal


Content   ..  13  14  15  16   ..