Mitsubishi Lancer (4A9 engine). Manual - part 285
TROUBLESHOOTING
HEATER, AIR CONDITIONER AND VENTILATION
55A-21
DIAGNOSIS PROCEDURE
STEP 1. Connector check: C-119 A/C control
panel connector and C-15 A/C-ECU connector
Q: Is the check result normal?
YES :
Go to Step 2.
NO :
Repair the connector.
STEP 2. Check the wiring harness between C-119
A/C control panel connector terminal No. 9 and
C-15 A/C-ECU connector terminal No. 9.
• Check the A/C control panel signal line for open
or short circuit.
Q: Is the check result normal?
YES :
Go to Step 3.
NO :
Repair the wiring harness.
STEP 3. Check whether the diagnosis code is
reset
Replace the A/C control panel, and erase the diagno-
sis code. Then check that no diagnosis code is being
set.
Q: Is the diagnosis code set?
YES :
Replace the A/C-ECU.
NO :
This diagnosis is complete.
Code No. B1021: Fan dial SW error <Vehicles without A/C>
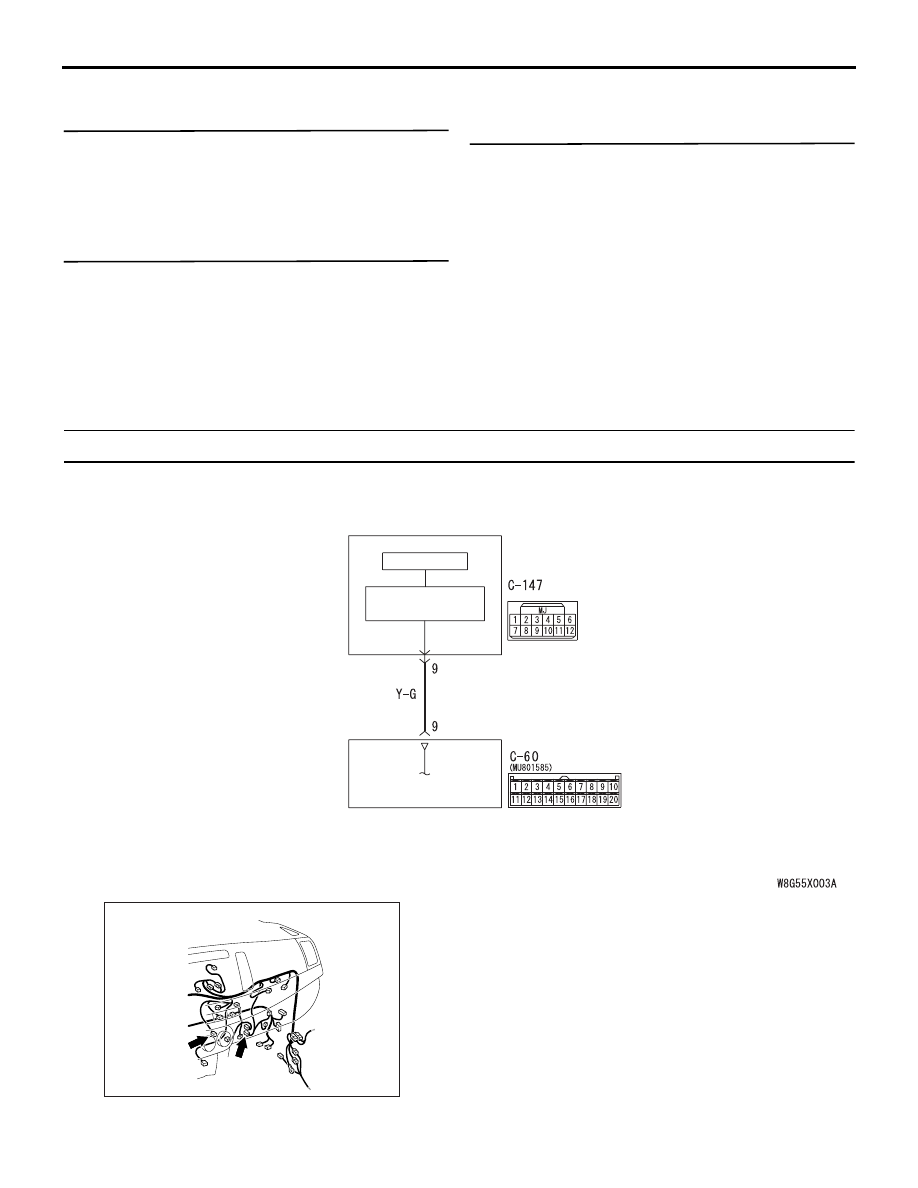
Heater Control Panel Circuit
HEATER
CONTROL
UNIT
HEATER
CONTROL
PANEL
CPU
INTERFACE
CIRCUIT
Wire colour code
B : Black LG : Light green G : Green L : Blue W : White Y : Yellow SB : Sky blue
BR : Brown O : Orange GR : Grey R : Red P : Pink V : Violet PU : Purple SI : Silver
ACA00851
AC612706
Connectors: C-60, C-147 <LHD>
BP
C-60 (B)
C-147
COMMENTS ON TROUBLE SYMPTOM
This code will be set when the air volume control dial
position on the AC control panel is detected as
abnormal.
PROBABLE CAUSES
• Malfunction of the heater control panel
• Damaged wiring harness or connectors
• Malfunction of the heater control unit