Mitsubishi Evolution X. Manual - part 180
OIL PAN
TSB Revision
ENGINE MECHANICAL
11A-51
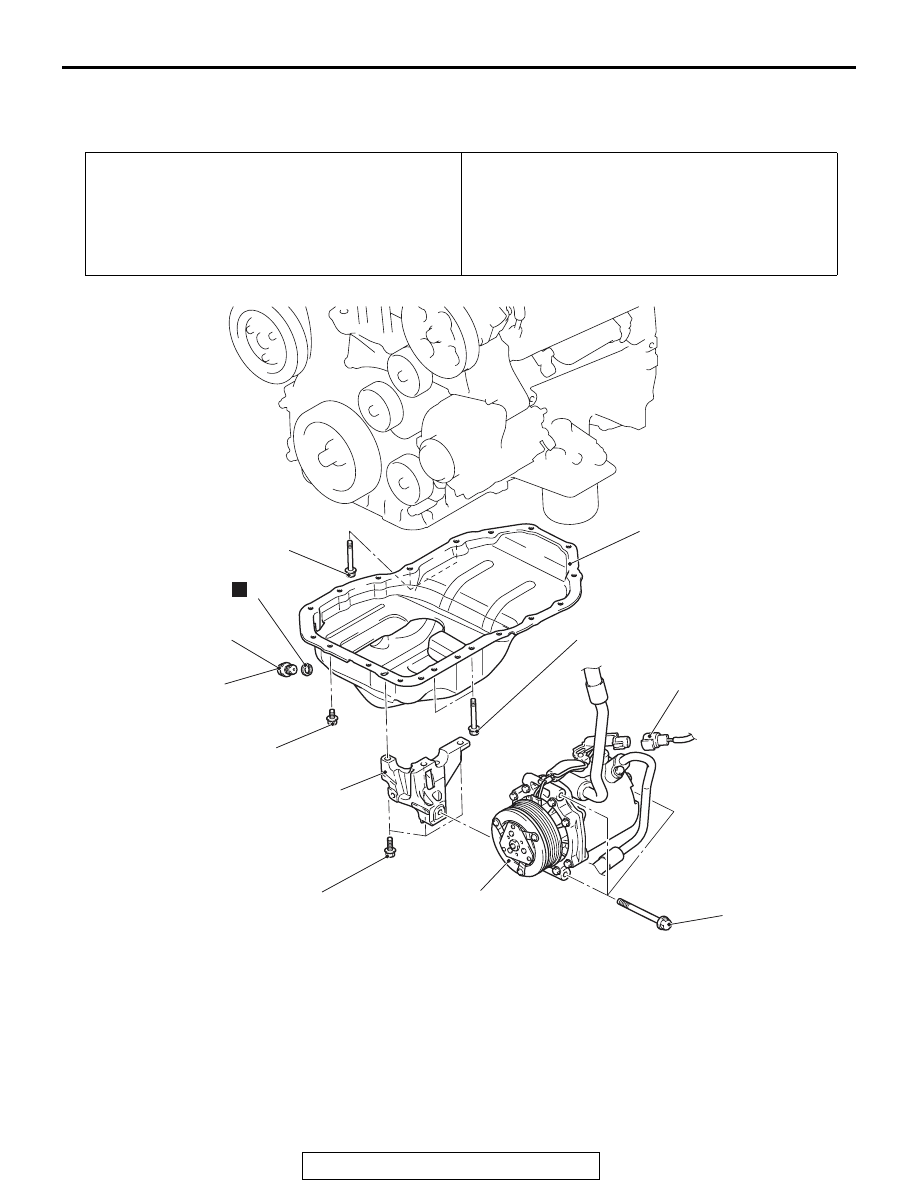
OIL PAN
REMOVAL AND INSTALLATION
M1112002801818
Required Special Tool:
• MD998727: Oil Pan FIPG Cutter
Pre-removal operation
• Engine Room Under Cover Front A, B, Engine Room
Under Cover Center and Engine Room Side Cover (RH)
Removal (Refer to GROUP 51, Under Cover
• Engine Oil Draining (Refer to GROUP 12, On-vehicle Ser-
vice
− Engine Oil Replacement
).
• Drive Belt Removal (Refer to
).
Post-installation operation
• Drive Belt Installation (Refer to
).
• Engine Oil Refilling (Refer to GROUP 12, On-vehicle Ser-
vice
− Engine Oil Replacement
).
• Engine Room Under Cover Front A, B, Engine Room
Under Cover Center and Engine Room Side Cover (RH)
Installation (Refer to GROUP 51, Under Cover
AC708918
4
3
5
1
2
39 ± 5 N·m
29 ± 3 ft-lb
10 ± 2 N·m
89 ± 17 in-lb
29 ± 2 N·m
22 ± 1 ft-lb
23 ± 6 N·m
17 ± 4 ft-lb
23 ± 6 N·m
17 ± 4 ft-lb
N
AB
6
29 ± 2 N·m
22 ± 1 ft-lb
Removal steps
1.
A/C compressor assembly
connector connection
<<
A
>>
>>
C
<<
2.
A/C compressor and clutch
assembly
3.
A/C compressor bracket
4.
Engine oil pan drain plug
>>
B
5.
Engine oil pan drain plug gasket
<<
B
>>
>>
A
6.
Engine oil pan
Removal steps (Continued)