Mitsubishi 380. Manual - part 758
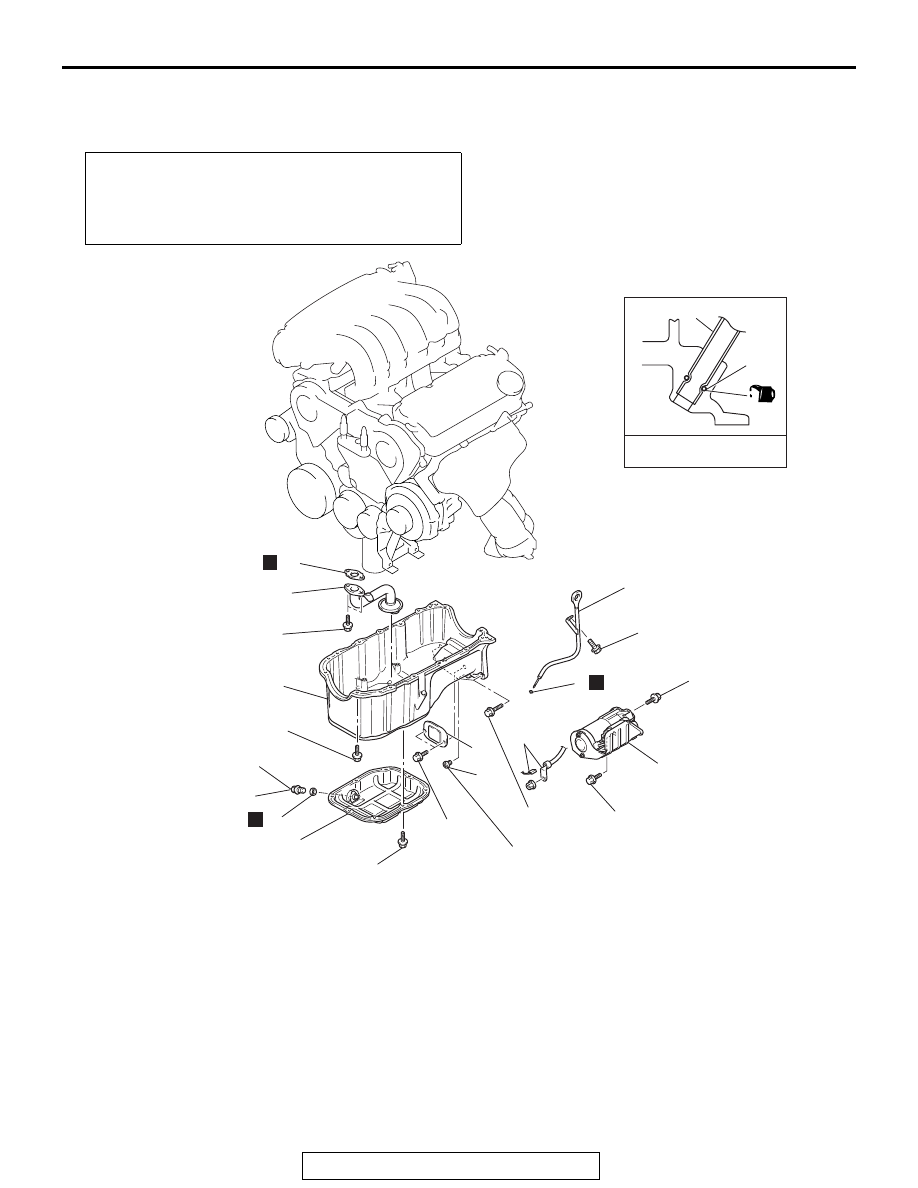
OIL PAN AND OIL SCREEN
TSB Revision
ENGINE MECHANICAL <3.8L ENGINE>
11A-34
OIL PAN AND OIL SCREEN
REMOVAL AND INSTALLATION
M1112002500193
Pre-removal and Post-installation Operation
• Under Cover Removal and Installation (Refer to GROUP
51, Under Cover
.)
• Engine Oil Draining and Refilling (Refer to GROUP 12,
On-vehicle Service
.)
AC308673
1
2
3
4
5
6
7
8
9
10
11
12
11 ± 0.5 N·m
93 ± 4 in-lb
49 ± 3 N·m
36 ± 2 ft-lb
35 ± 5 N·m
26 ± 4 ft-lb
30 ± 3 N·m
23 ± 2 ft-lb
30 ± 3 N·m
23 ± 2 ft-lb
14 ± 1 N·m
120 ± 13 in-lb
11 ± 1 N·m
97 ± 9 in-lb
39 ± 5 N·m
29 ± 3 ft-lb
19 ± 3 N·m
14 ± 2 ft-lb
8.5 ± 3.5 N·m
76 ± 31 in-lb
N
N
N
AB
6
5
ENGINE OIL
REMOVAL STEPS
1.
ENGINE OIL PAN DRAIN PLUG
2.
ENGINE OIL PAN DRAIN PLUG
GASKET
3.
STARTER CONNECTOR
4.
STARTER ASSEMBLY
5.
ENGINE OIL DIPSTICK
ASSEMBLY
6.
O-RING
<<A>>
>>B<<
7.
ENGINE LOWER OIL PAN
•
FRONT NO.1 EXHAUST PIPE
(REFER TO GROUP 15,
EXHAUST PIPE AND MAIN
MUFFLER
8.
COVER
<<B>>
9.
TORQUE CONVERTER
CONNECTING BOLT
<<C>>
>>A<<
10. ENGINE UPPER OIL PAN
11. OIL SCREEN
12. GASKET
REMOVAL STEPS (Continued)