Mazda CX-9 Grand Touring. Manual - part 575
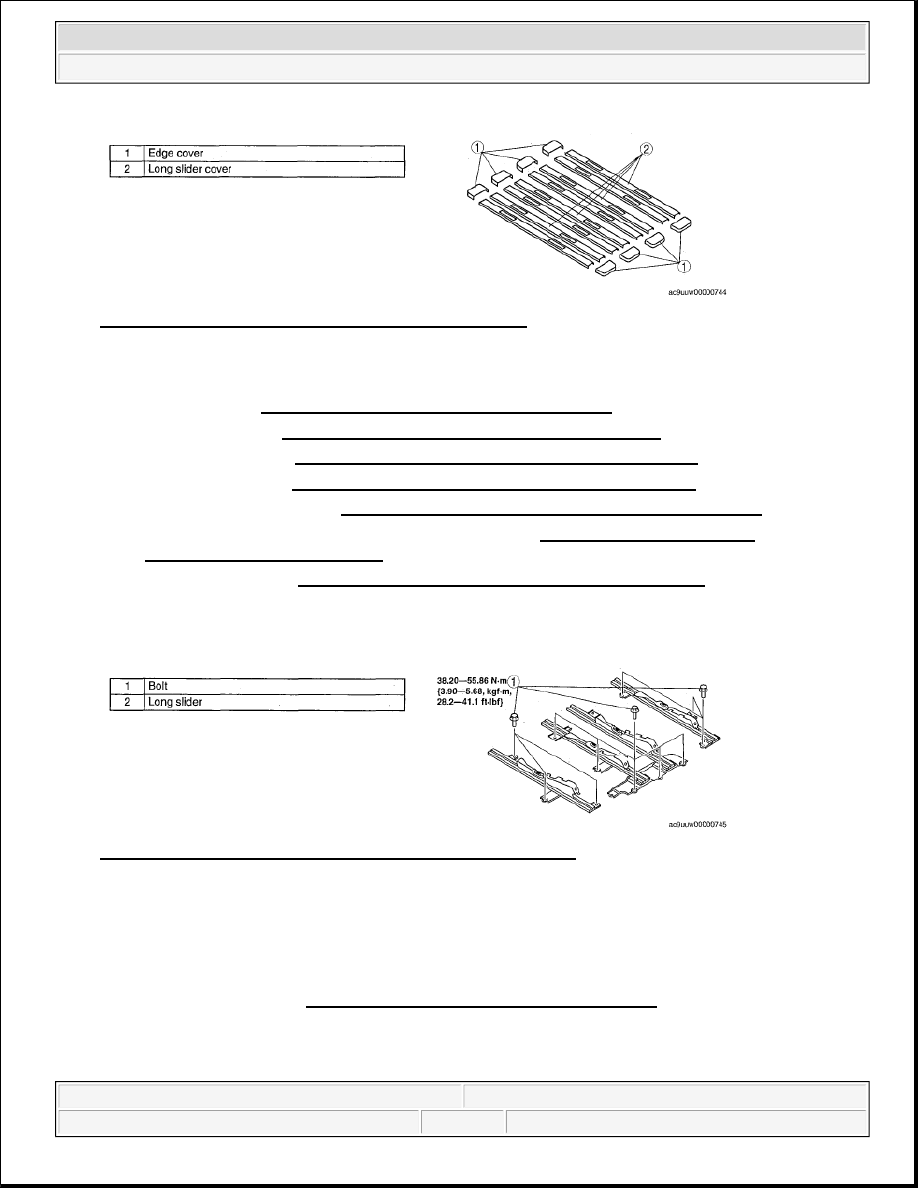
Fig. 39: Identifying Edge Cover And Long Slider Cover
Courtesy of MAZDA MOTORS CORP.
4. Remove the following parts:
1. Trunk box (See TRUNK BOX REMOVAL/INSTALLATION .)
2. Seat side box (See SEAT SIDE BOX REMOVAL/INSTALLATION .)
3. Trunk end trim (See TRUNK END TRIM REMOVAL/INSTALLATION .)
4. Third-row seat (See THIRD-ROW SEAT REMOVAL/INSTALLATION.)
5. Rear scuff plate inner (See REAR SCUFF PLATE REMOVAL/INSTALLATION .)
6. Third-row seat belt lower anchor installation bolt (See THIRD-ROW SEAT BELT
REMOVAL/INSTALLATION .)
7. Trunk side trim (See TRUNK SIDE TRIM REMOVAL/INSTALLATION .)
5. Set the floor covering out of the way.
6. Remove in the order indicated in the table.
Fig. 40: Identifying Long Slider, Bolt & Torque Specifications
Courtesy of MAZDA MOTORS CORP.
7. Install in the reverse order of removal.
THIRD-ROW SEAT REMOVAL/INSTALLATION
1. Remove the trunk box. (See TRUNK BOX REMOVAL/INSTALLATION .)
2. Remove the covers.
3. Remove the bolts.
4. Install in the reverse order of removal.
2008 Mazda CX-9 Grand Touring
2008 BODY & ACCESSORIES Seats - Mazda CX-9
Microsoft
Sunday, November 15, 2009 10:40:01 AM
Page 30
© 2005 Mitchell Repair Information Company, LLC.