Mazda CX-9 Grand Touring. Manual - part 527


  Index      Mazda     Mazda CX-9 Grand Touring - service repair manual 2008 year


Search            


Content   ..  525  526  527  528   ..


Mazda CX-9 Grand Touring. Manual - part 527


1. Turn the ignition switch on, depress the parking brake pedal one notch, and verify that the brake 

system warning light illuminates.  

2. Verify that the rear brakes do not drag. 

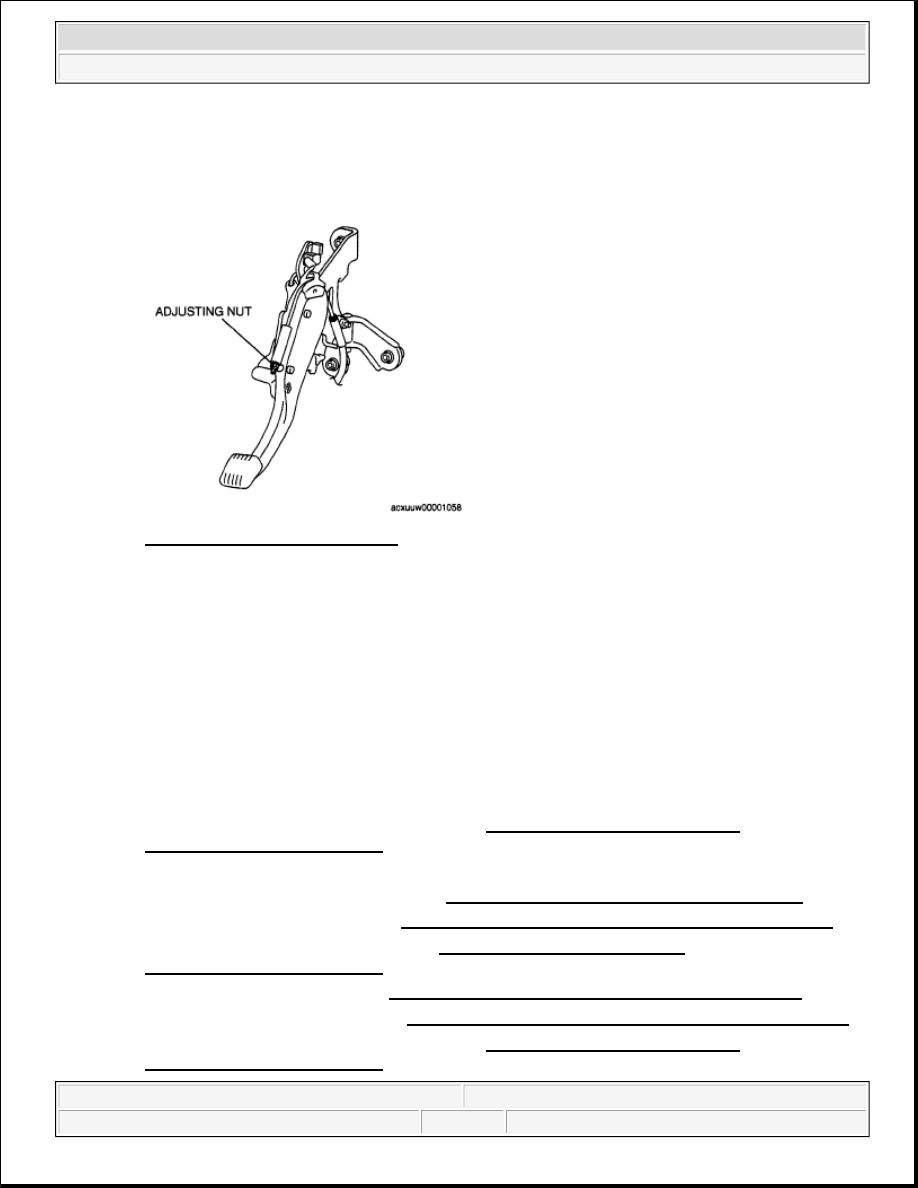
Fig. 2: Identifying Adjusting Nut 
Courtesy of MAZDA MOTORS CORP. 

PARKING BRAKE REMOVAL/INSTALLATION [2WD] 

1. Perform the following procedure and remove the parking brake pedal. 

1. Remove the dashboard under cover (LH). (See DASHBOARD UNDER COVER 

REMOVAL/INSTALLATION .)  

2. Perform the following procedure and remove the front parking brake cable. 

1. Remove the front seat (Driver side). (See FRONT SEAT REMOVAL/INSTALLATION .)  

2. Remove the decoration panel. (See DECORATION PANEL REMOVAL/INSTALLATION .)  

3. Remove the front console box mat, (See FRONT CONSOLE BOX MAT 

REMOVAL/INSTALLATION .)  

4. Remove the indicator panel. (See INDICATOR PANEL REMOVAL/INSTALLATION .)  

5. Remove the front console box. (See FRONT CONSOLE BOX REMOVAL/INSTALLATION .) 

6. Remove the dashboard under cover (LH). (See DASHBOARD UNDER COVER 

REMOVAL/INSTALLATION .) 

CAUTION:

Performing the following procedures without first removing the ABS 
wheel-speed sensor may possibly cause an open circuit in the 
harness if it is pulled by mistake. Before performing the following 
procedures, remove the ABS wheel-speed sensor (axle side) and fix it 
to an appropriate place where the sensor will not be pulled by 
mistake while servicing the vehicle.  


2008 Mazda CX-9 Grand Touring 

2008 BRAKES Parking Brake System - Mazda CX-9


Microsoft 


Sunday, November 15, 2009 9:48:01 AM

Page 2 

© 2005 Mitchell Repair Information Company, LLC. 

7. Remove the side wall. (See SIDE WALL REMOVAL/INSTALLATION .)  

8. Remove the console panel. (See CONSOLE PANEL REMOVAL/INSTALLATION .)  

9. Remove the console cover. (See CONSOLE COVER REMOVAL/INSTALLATION .)  

10. Remove the console. (See CONSOLE REMOVAL/INSTALLATION .)  

11. Remove the dust cover.  

12. Remove the front side trim (LH). (See FRONT SIDE TRIM REMOVAL/INSTALLATION .)  

13. Remove the front scuff plate (LH). (See FRONT SCUFF PLATE 

REMOVAL/INSTALLATION .)  

14. Remove the fuel-filler lid release lever cover.  

15. Turn the floor covering over until the front parking brake cable cover appears.  

16. Remove the rear heat duct (LH). (See REAR HEAT DUCT COMPONENT 

REMOVAL/INSTALLATION .)  

17. Remove the under guard (LH). (See CHARCOAL CANISTER, CANISTER VENT (CV) 

SOLENOID VALVE, AIR FILTER COMPONENT REMOVAL/INSTALLATION [MZI-
3.7]
 .)  

3. Perform the following procedure and remove the rear parking brake cable. 

1. Remove the under guard (LH). (See CHARCOAL CANISTER, CANISTER VENT (CV) 

SOLENOID VALVE, AIR FILTER COMPONENT REMOVAL/INSTALLATION [MZI-
3.7]
 .)  

4. Perform the following procedure and remove the parking brake plate, back plate and wheel hub. 

1. Remove the rear ABS wheel-speed sensor from the rear wheel hub. (See REAR ABS WHEEL-

SPEED SENSOR REMOVAL/INSTALLATION [2WD] .)  

5. Remove in the order indicated in the table.  

6. Install in the reverse order of removal.  

7. Adjust the parking brake stroke. (See PARKING BRAKE ADJUSTMENT.) 


2008 Mazda CX-9 Grand Touring 

2008 BRAKES Parking Brake System - Mazda CX-9


Microsoft 


Sunday, November 15, 2009 9:48:01 AM

Page 3 

© 2005 Mitchell Repair Information Company, LLC. 

Fig. 3: Exploded View Of Parking Brake With Torque Specification


2008 Mazda CX-9 Grand Touring 

2008 BRAKES Parking Brake System - Mazda CX-9


Microsoft 


Sunday, November 15, 2009 9:48:01 AM

Page 4 

© 2005 Mitchell Repair Information Company, LLC. 

Courtesy of MAZDA MOTORS CORP.

BRAKE CALIPER COMPONENT REMOVAL NOTE 

1. Remove the brake caliper assembly from the trailing link and suspend it with a cable so it does not 

interfere. 

Fig. 4: Identifying Brake Caliper Component 
Courtesy of MAZDA MOTORS CORP. 

DISC PLATE REMOVAL NOTE 

1. If any disc plate is difficult to remove, perform the following steps to remove it. 

1. Insert a flathead screwdriver into the service hole and turn the adjuster in the direction of the arrow 

to compress the parking brake shoe.  

2. Remove the disc plate. 


2008 Mazda CX-9 Grand Touring 

2008 BRAKES Parking Brake System - Mazda CX-9


Microsoft 


Sunday, November 15, 2009 9:48:01 AM

Page 5 

© 2005 Mitchell Repair Information Company, LLC. 


Content   ..  525  526  527  528   ..