Mazda CX-9 Grand Touring. Manual - part 379


  Index      Mazda     Mazda CX-9 Grand Touring - service repair manual 2008 year


Search            


Content   ..  377  378  379  380   ..


Mazda CX-9 Grand Touring. Manual - part 379


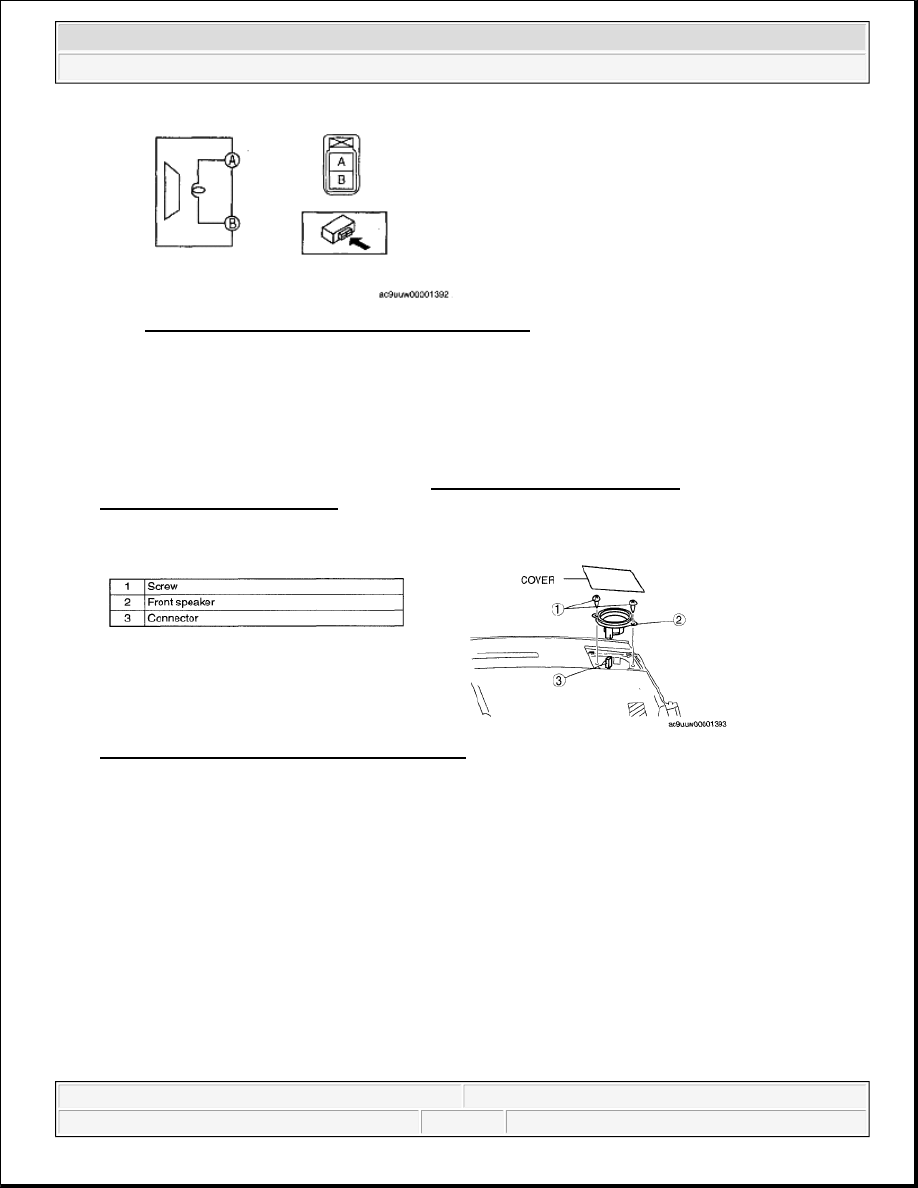
Fig. 17: Identifying Rear Door Speaker Terminals 
Courtesy of MAZDA MOTORS CORP. 

FRONT SPEAKER REMOVAL/INSTALLATION 

1. Disconnect the negative battery cable.  

2. Remove the cover from the dashboard using a flathead screwdriver wrapped with protective tape.  

3. Remove the solar radiation sensor. (LH) (See SOLAR RADIATION SENSOR 

REMOVAL/INSTALLATION .)  

4. Remove in the order indicated in the table. 

Fig. 18: Identifying Front Speaker Components 
Courtesy of MAZDA MOTORS CORP. 

5. Install in the reverse order of removal.  

FRONT SPEAKER INSPECTION 

1. Verify the resistance between front speaker terminals. 

If the resistance is not within the specification, replace the front speaker.  

Resistance 3.6 ohms  

2. Connect a 1.5 V battery to the front speaker and verify that noise is heard from the front speaker. 

If no noise is heard, replace the front speaker. 


2008 Mazda CX-9 Grand Touring 

2008 BODY & ACCESSORIES Entertainment - Mazda CX-9


Microsoft 


Sunday, November 15, 2009 10:47:05 AM

Page 13 

© 2005 Mitchell Repair Information Company, LLC. 

Fig. 19: Identifying Front Speaker Terminals 
Courtesy of MAZDA MOTORS CORP. 

CENTER SPEAKER REMOVAL/INSTALLATION 

1. Disconnect the negative battery cable.  

2. Remove the following parts: 

1. Front console box mat (See FRONT CONSOLE BOX MAT REMOVAL/INSTALLATION .)  

2. Indicator panel (See INDICATOR PANEL REMOVAL/INSTALLATION .)  

3. Decoration panel (See DECORATION PANEL REMOVAL/INSTALLATION .)  

4. Front console box (See FRONT CONSOLE BOX REMOVAL/INSTALLATION .)  

5. Center panel (See CENTER PANEL REMOVAL/INSTALLATION .)  

3. Remove in the order indicated in the table. 

Fig. 20: Identifying Center Speaker Components 
Courtesy of MAZDA MOTORS CORP. 

4. Install in the reverse order of removal.  

CENTER SPEAKER INSPECTION 

1. Verify the resistance between center speaker terminals. 

If the resistance is not within the specification, replace the center speaker.  

Resistance 3.6 ohms  


2008 Mazda CX-9 Grand Touring 

2008 BODY & ACCESSORIES Entertainment - Mazda CX-9


Microsoft 


Sunday, November 15, 2009 10:47:05 AM

Page 14 

© 2005 Mitchell Repair Information Company, LLC. 

2. Connect a 1.5 V battery to the center speaker and verify that noise is heard from the center speaker. 

If no noise is heard, replace the center speaker. 

Fig. 21: Identifying Center Speaker Terminals 
Courtesy of MAZDA MOTORS CORP. 

REAR SPEAKER REMOVAL/INSTALLATION 

1. Disconnect the negative battery cable.  

2. Remove the following parts: 

1. Trunk box (See TRUNK BOX REMOVAL/INSTALLATION .)  

2. Seat side box (See SEAT SIDE BOX REMOVAL/INSTALLATION .)  

3. Trunk end trim (See TRUNK END TRIM REMOVAL/INSTALLATION .)  

4. Third-row seat (See THIRD-ROW SEAT REMOVAL/INSTALLATION .)  

5. Third-row seat belt lower anchor installation bolt (See THIRD-ROW SEAT BELT 

REMOVAL/INSTALLATION .)  

6. Rear scuff plate inner (See REAR SCUFF PLATE REMOVAL/INSTALLATION .)  

7. Trunk side trim (See TRUNK SIDE TRIM REMOVAL/INSTALLATION .)  

8. Roof side trim (See ROOF SIDE TRIM REMOVAL/INSTALLATION .)  

9. Third-row seat belt upper anchor installation bolt (See THIRD-ROW SEAT BELT 

REMOVAL/INSTALLATION .)  

10. D-pillar trim (See D-PILLAR TRIM REMOVAL/INSTALLATION .)  

3. Remove in the order indicated in the table. 

Fig. 22: Identifying Rear Speaker Components


2008 Mazda CX-9 Grand Touring 

2008 BODY & ACCESSORIES Entertainment - Mazda CX-9


Microsoft 


Sunday, November 15, 2009 10:47:06 AM

Page 15 

© 2005 Mitchell Repair Information Company, LLC. 

Courtesy of MAZDA MOTORS CORP.

4. Install in the reverse order of removal.  

REAR SPEAKER INSPECTION 

1. Verify the resistance between rear speaker terminals. 

If the resistance is not within the specification, replace the rear speaker.  

Resistance 3.6 ohms  

2. Connect a 1.5 V battery to the rear speaker and verify that noise is heard from the rear speaker. 

If no noise is heard, replace the rear speaker. 

Fig. 23: Identifying Rear Speaker Terminals 
Courtesy of MAZDA MOTORS CORP. 

ROOF SPEAKER REMOVAL/INSTALLATION 

1. Disconnect the negative battery cable.  

2. Remove the RES unit cover. (See RES UNIT REMOVAL/INSTALLATION.)  

3. Remove in the order indicated in the table. 

Fig. 24: Identifying Roof Speaker Components 
Courtesy of MAZDA MOTORS CORP. 

4. Install in the reverse order of removal. 


2008 Mazda CX-9 Grand Touring 

2008 BODY & ACCESSORIES Entertainment - Mazda CX-9


Microsoft 


Sunday, November 15, 2009 10:47:06 AM

Page 16 

© 2005 Mitchell Repair Information Company, LLC. 


Content   ..  377  378  379  380   ..