Mazda CX-9 Grand Touring. Manual - part 370


  Index      Mazda     Mazda CX-9 Grand Touring - service repair manual 2008 year


Search            


Content   ..  368  369  370  371   ..


Mazda CX-9 Grand Touring. Manual - part 370


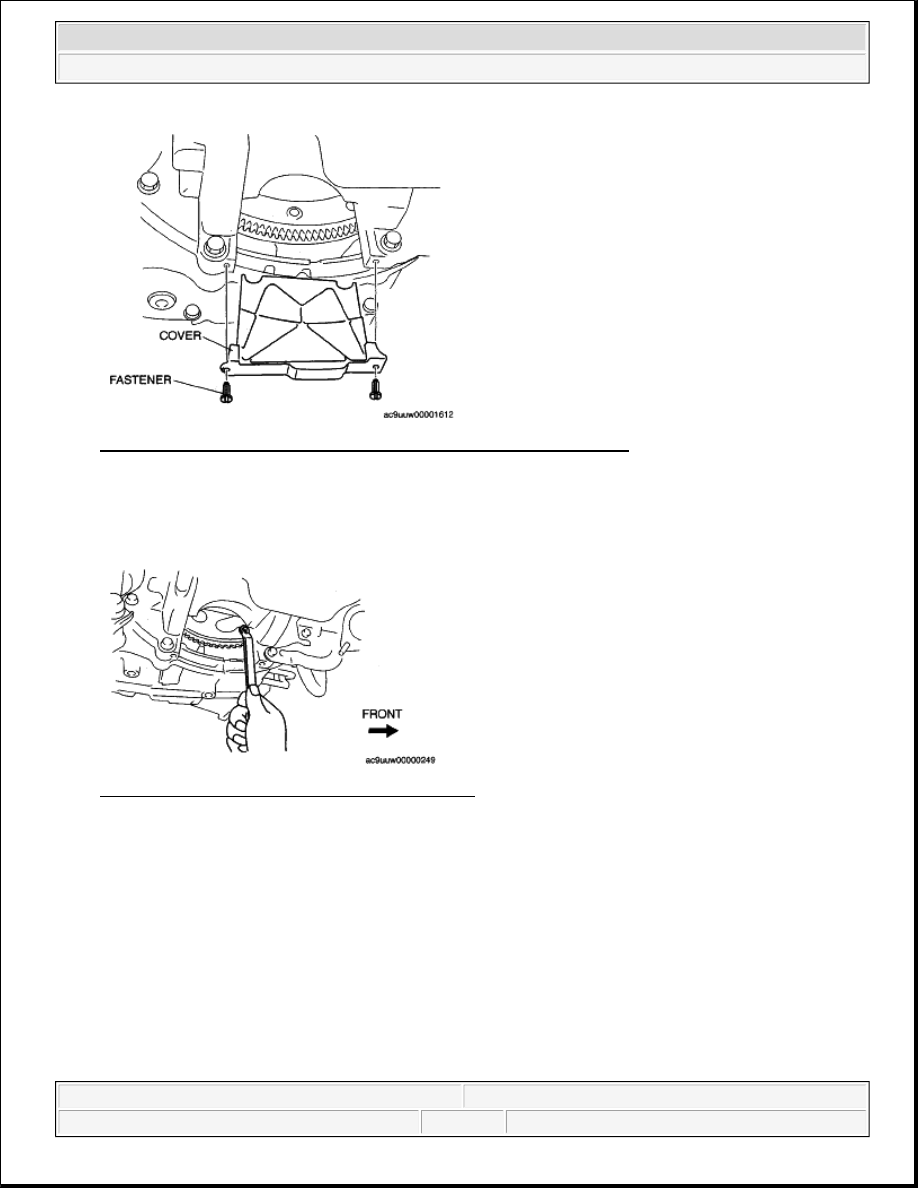
Fig. 104: Identifying Crankshaft Pulley Lock Bolt, Cover & Fastener 
Courtesy of MAZDA MOTORS CORP. 

2. Set a wrench to the drive plate bolt at the position shown in the figure to lock the crankshaft rotation.  

3. Remove the crankshaft pulley lock bolt and washer. 

Fig. 105: Removing Crankshaft Pulley Lock Bolt 
Courtesy of MAZDA MOTORS CORP. 

NO.3 ENGINE MOUNT REMOVAL NOTE 

1. Loosen the No.1 engine mount bolt C. 


2008 Mazda CX-9 Grand Touring 

2008 ENGINE Mechanical (MZI-3.7) - Mazda CX-9


Microsoft 


Sunday, November 15, 2009 10:01:57 AM

Page 67 

© 2005 Mitchell Repair Information Company, LLC. 

Fig. 106: View Of No.1 Engine Mount Bolt C 
Courtesy of MAZDA MOTORS CORP. 

2. Remove the No.1 engine mount bracket bolts A and B as shown. 

3. Position the coolant reserve tank out of the way. (See COOLANT RESERVE TANK 

REMOVAL/INSTALLATION [MZI-3.7] .)  

4. Remove the following parts to install the SST. 

1. The windshield wiper arm and blade. (See WINDSHIELD WIPER ARM AND BLADE 

REMOVAL/INSTALLATION .)  

2. The cowl grille. (See COWL GRILLE REMOVAL/INSTALLATION .)  

3. The cowl panel. (See COWL PANEL REMOVAL/INSTALLATION .)  

4. The air cleaner. (See INTAKE-AIR SYSTEM REMOVAL/INSTALLATION [MZI-3.7] .)  

5. The front cooler pipe installation bolt (position the front cooler pipe out of the way.).  

5. Install the SST using the following procedure. 

NOTE:

Do not remove the No.1 engine mount rubber from the front 
crossmember. 

Fig. 107: Identifying No.1 Engine Mount Bracket Bolts 
Courtesy of MAZDA MOTORS CORP. 


2008 Mazda CX-9 Grand Touring 

2008 ENGINE Mechanical (MZI-3.7) - Mazda CX-9


Microsoft 


Sunday, November 15, 2009 10:01:57 AM

Page 68 

© 2005 Mitchell Repair Information Company, LLC. 

Fig. 108: Identifying Front Cooler Pipe & Bolt 
Courtesy of MAZDA MOTORS CORP. 

1. Install the right rear shaft of the SST to the bolt of the right shock absorber shown in the figure.  

2. Install the left rear shaft of the SST to the bolt of the left shock absorber (Identical position to the 

right side). 

CAUTION:

Refer to the SST instruction manual for the basic handing 
procedure.  

NOTE:

When installing the SST, adjust the position of each shaft so that 
they do not interfere with the vehicle body. 

Fig. 109: Identifying Main Frame, Rear Shaft, Side Bar & Front Shaft 
Courtesy of MAZDA MOTORS CORP. 


2008 Mazda CX-9 Grand Touring 

2008 ENGINE Mechanical (MZI-3.7) - Mazda CX-9


Microsoft 


Sunday, November 15, 2009 10:01:57 AM

Page 69 

© 2005 Mitchell Repair Information Company, LLC. 

Fig. 110: View Of Right Rear Shaft Of SST 
Courtesy of MAZDA MOTORS CORP. 

3. Install the left/right front shaft of the SST with front foot No.2 to the bolt shown in the figure.  

4. Adjust the positions of the SST side bars so that they are the same height (left and right) and 

horizontal.  

5. Make sure each joint is securely tightened. 

Fig. 111: View Of Left/Right Front Shaft Of SST 
Courtesy of MAZDA MOTORS CORP. 

6. Support the engine using the SSTs.  

7. Remove the No.3 engine mount. 


2008 Mazda CX-9 Grand Touring 

2008 ENGINE Mechanical (MZI-3.7) - Mazda CX-9


Microsoft 


Sunday, November 15, 2009 10:01:57 AM

Page 70 

© 2005 Mitchell Repair Information Company, LLC. 


Content   ..  368  369  370  371   ..