Mazda CX-9 Grand Touring. Manual - part 58


  Index      Mazda     Mazda CX-9 Grand Touring - service repair manual 2008 year


Search            


Content   ..  56  57  58  59   ..


Mazda CX-9 Grand Touring. Manual - part 58


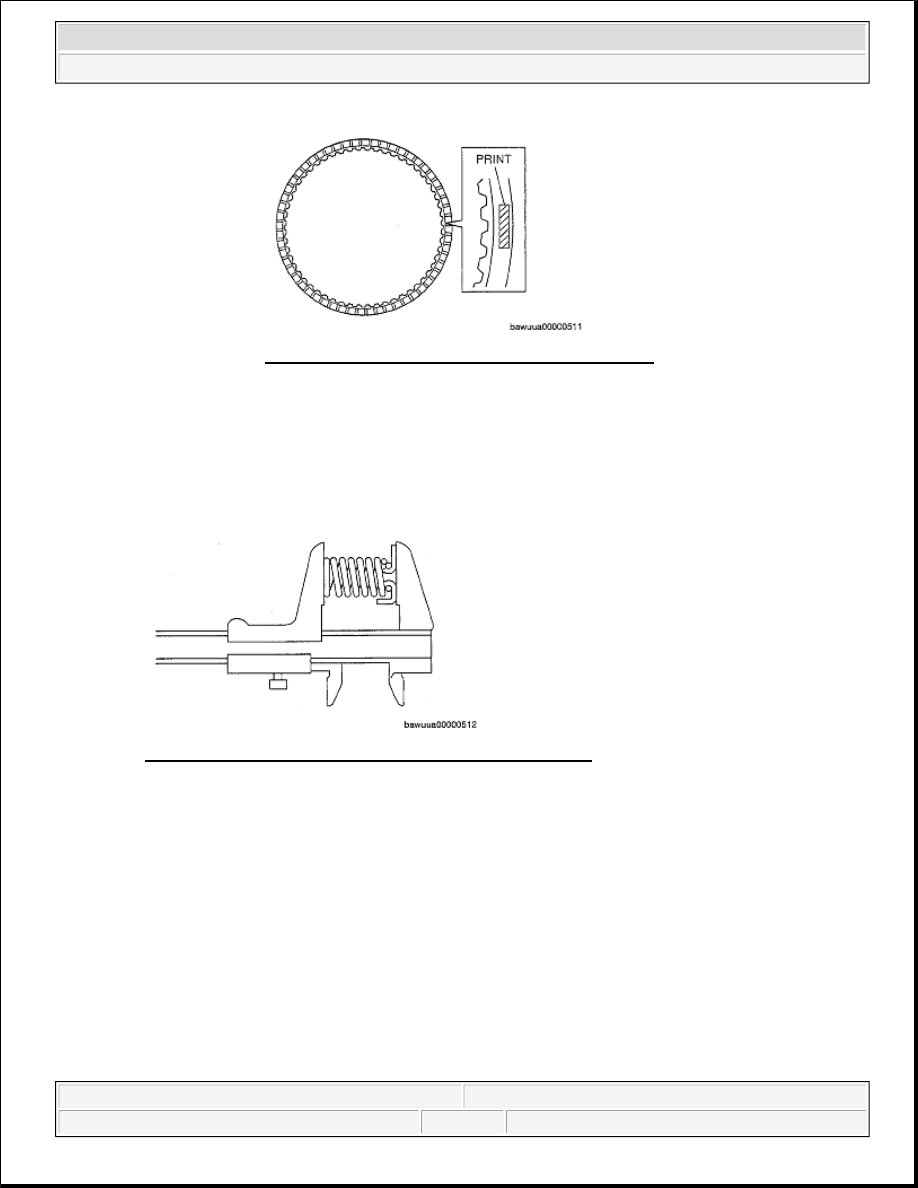
2. Using vernier calipers, measure the free length of the piston return spring. 

C1 clutch return spring free length Standard: 17.01 mm {0.6697 in}  

If it is less than the specification, replace the piston return spring with a new one. 

Fig. 129: Measuring Free Length Of Piston Return Spring 
Courtesy of MAZDA MOTORS CORP. 

C1 CLUTCH COMPONENT ASSEMBLY 

Components 

Fig. 128: Inspecting Lining Of All Drive Plates 
Courtesy of MAZDA MOTORS CORP. 


2008 Mazda CX-9 Grand Touring 

2005-08 TRANSMISSION Automatic Transaxle Overhaul (AW6A-EL) - CX-7, CX-9 & Mazda 6


Microsoft 


Sunday, November 15, 2009 10:28:16 AM

Page 66 

© 2005 Mitchell Repair Information Company, LLC. 

Fig. 130: Identifying C1 Clutch Assembly Components 
Courtesy of MAZDA MOTORS CORP. 

Assembly Procedure 

1. Apply ATF to the new O-rings and the C1 clutch drum.  

2. Install the O-rings to the C1 clutch drum. 


2008 Mazda CX-9 Grand Touring 

2005-08 TRANSMISSION Automatic Transaxle Overhaul (AW6A-EL) - CX-7, CX-9 & Mazda 6


Microsoft 


Sunday, November 15, 2009 10:28:16 AM

Page 67 

© 2005 Mitchell Repair Information Company, LLC. 

Fig. 131: Identifying O-Rings Of C1 Clutch Drum 
Courtesy of MAZDA MOTORS CORP. 

3. Apply ATF to the sliding surface of the forward clutch piston. 

4. Install the C1 clutch piston to the C1 clutch drum. 

Fig. 132: Identifying C1 Clutch Piston Of C1 Clutch Drum 
Courtesy of MAZDA MOTORS CORP. 

5. Apply ATF to the seal on the clutch balancer. 

6. Install the retainer, return spring and the clutch balancer to the C1 clutch drum. 

CAUTION:

Do not damage the seal on the piston and O-ring. 

CAUTION:

Do not damage the seal on the clutch balancer. 


2008 Mazda CX-9 Grand Touring 

2005-08 TRANSMISSION Automatic Transaxle Overhaul (AW6A-EL) - CX-7, CX-9 & Mazda 6


Microsoft 


Sunday, November 15, 2009 10:28:16 AM

Page 68 

© 2005 Mitchell Repair Information Company, LLC. 

Fig. 133: Identifying Retainer, Return Spring And Clutch Balancer 
Courtesy of MAZDA MOTORS CORP. 

7. Place the SST on the clutch balancer and compress the return spring component with a press. 

Fig. 134: Placing SST On Clutch Balancer 
Courtesy of MAZDA MOTORS CORP. 

8. Install the snap ring in the groove using snap ring pliers.  

9. Install the driven plates, drive plates and the retaining plate in the following order to the C1 clutch drum 

as shown in the figure. 

Six drive plates type  

Driven- Drive- Driven- Drive- Driven- Drive- Driven- Drive- Driven- Drive- Driven- Drive- 
Retaining  

Seven drive plates type  

Driven- Drive- Driven- Drive- Driven- Drive- Driven- Drive- Driven- Drive- Driven- Drive-

CAUTION:

When installing the snap ring, set the end gap of the snap ring 
as shown in the figure.  

Do not expand the snap ring too much.  


2008 Mazda CX-9 Grand Touring 

2005-08 TRANSMISSION Automatic Transaxle Overhaul (AW6A-EL) - CX-7, CX-9 & Mazda 6


Microsoft 


Sunday, November 15, 2009 10:28:16 AM

Page 69 

© 2005 Mitchell Repair Information Company, LLC. 


Content   ..  56  57  58  59   ..