Mazda CX 7. Manual - part 377
DOORS AND LIFTGATE
09-11–1
09-11
09-11
DOORS AND LIFTGATE
LOCATION INDEX. . . . . . . . . . . . . . . . . . 09-11–1
FRONT DOOR
REMOVAL/INSTALLATION. . . . . . . . . . 09-11–2
Connector Removal Note. . . . . . . . . . . 09-11–2
REAR DOOR
REMOVAL/INSTALLATION. . . . . . . . . . 09-11–3
DOOR ADJUSTMENT. . . . . . . . . . . . . . . 09-11–3
FRONT DOOR UNIT
REMOVAL/INSTALLATION . . . . . . . . . . 09-11–4
REAR DOOR UNIT
REMOVAL/INSTALLATION . . . . . . . . . . 09-11–4
LIFTGATE
REMOVAL/INSTALLATION . . . . . . . . . . 09-11–5
LIFTGATE ADJUSTMENT . . . . . . . . . . . . 09-11–6
STAY DAMPER DISPOSAL . . . . . . . . . . . 09-11–6
End of Toc
WM: DOOR
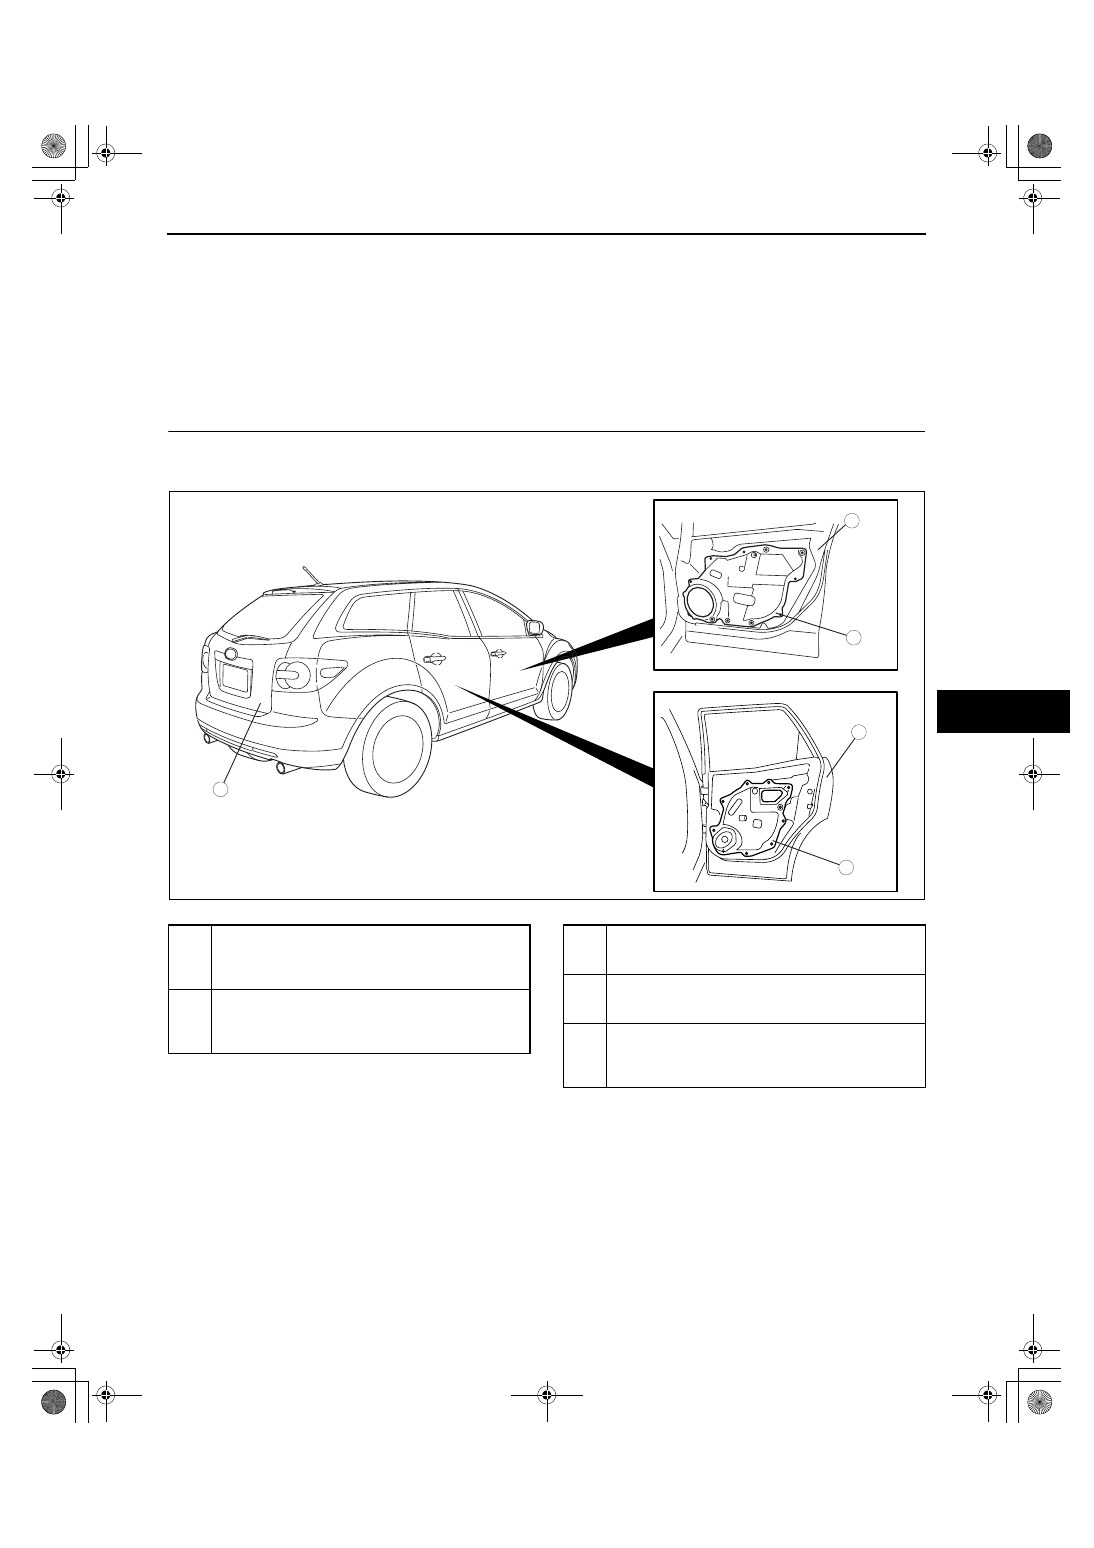
LOCATION INDEX
id091100800100
.
End Of Sie
2
4
1
3
5
acxuuw00001326
1
Front door
(See 09-11-2 FRONT DOOR REMOVAL/
INSTALLATION.)
(See 09-11-3 DOOR ADJUSTMENT.)
2
Rear door
(See 09-11-3 REAR DOOR REMOVAL/
INSTALLATION.)
(See 09-11-3 DOOR ADJUSTMENT.)
3
Front door unit
(See 09-11-4 FRONT DOOR UNIT REMOVAL/
INSTALLATION.)
4
Rear door unit
(See 09-11-4 FRONT DOOR UNIT REMOVAL/
INSTALLATION.)
5
Liftgate
(See 09-11-5 LIFTGATE REMOVAL/
INSTALLATION.)
(See 09-11-6 LIFTGATE ADJUSTMENT.)