Mazda MX-5 Miata / Grand Touring. Manual - part 129


  Index      Mazda     Mazda MX-5 Miata / Grand Touring - service repair manual 2008-2009 year


Search            


Content   ..  127  128  129  130   ..


Mazda MX-5 Miata / Grand Touring. Manual - part 129


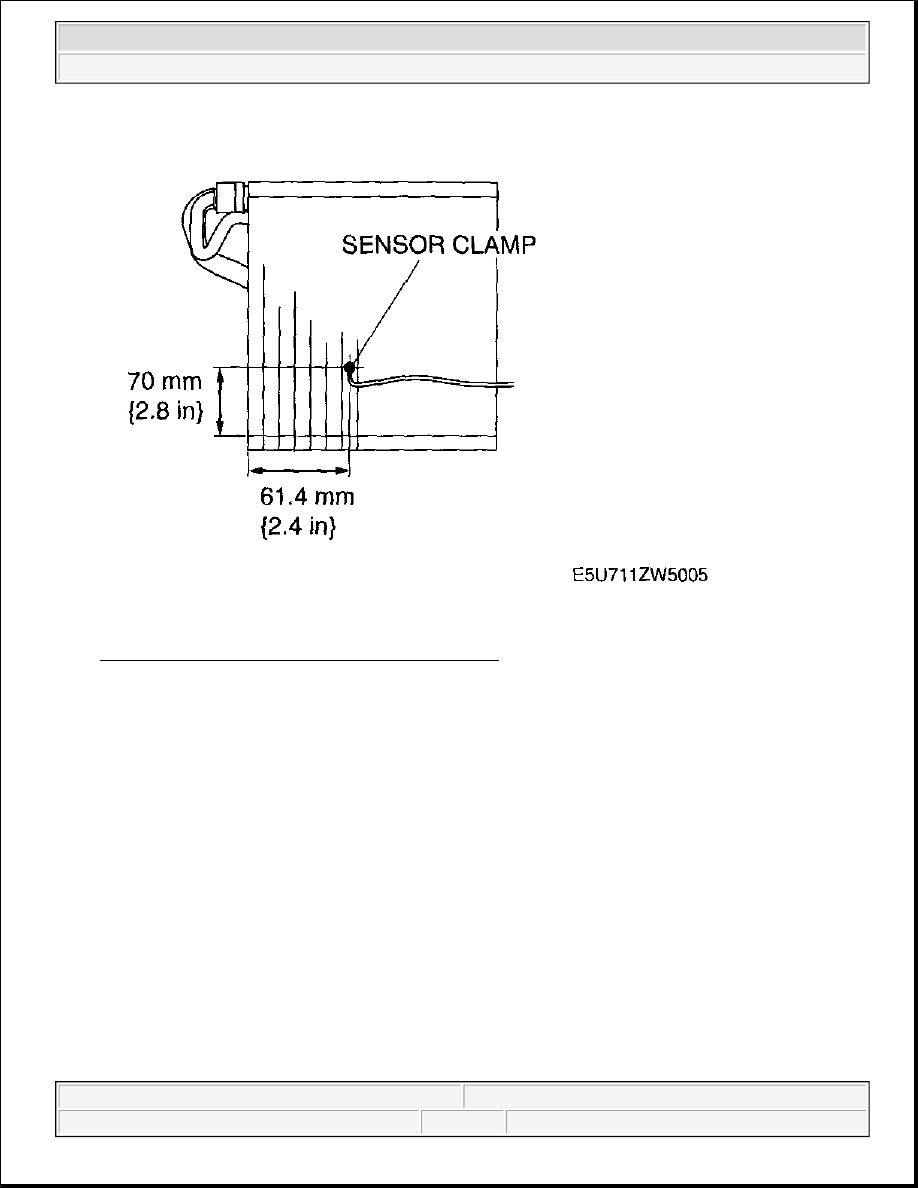
Fig. 9: Assembling Evaporator Temperature Sensor 
Courtesy of MAZDA MOTORS CORP. 

EVAPORATOR INSPECTION 

1. Inspect the evaporator for damage, cracks and oil leakage. 

If there is any malfunction, replace the evaporator.  

2. Visually inspect the fins for bending. 

If there is any bending, use the end of a flathead screwdriver to straighten the fins.  

HEATER CORE INSPECTION 

1. Inspect the heater core for damage, cracks and water leakage. 

If there is any malfunction, replace the heater core.  

2. Visually inspect the fins for bending. 

If there is any bending, use the end of a flathead screwdriver to straighten the fins.  

3. Visually inspect the heater hose for deformation. 

Repair with pliers if there is deformation. If there is any malfunction, replace the heater core. 


2008 Mazda MX-5 Miata Grand Touring 

2008 HVAC Basic System - MX-5 Miata


AIRFLOW MODE MAIN LINK REMOVAL/INSTALLATION 

1. Remove the battery cover.  

2. Disconnect the negative battery cable. (See BATTERY REMOVAL/INSTALLATION [LF] .)  

3. Remove the airflow mode actuator. (See AIRFLOW MODE ACTUATOR 

REMOVAL/INSTALLATION .)  

4. Remove the airflow mode main link as shown in Fig. 10 .  

5. Install in the reverse order of removal. 

Fig. 10: View Of Airflow Mode Main Link 
Courtesy of MAZDA MOTORS CORP. 

A/C COMPRESSOR REMOVAL/INSTALLATION 

1. Remove the battery cover.  

2. Disconnect the negative battery cable. (See BATTERY REMOVAL/INSTALLATION [LF] .)  

3. Discharge the refrigerant from the system. (See REFRIGERANT CHARGING .)  

4. Remove the air cleaner. (See INTAKE-AIR SYSTEM REMOVAL/INSTALLATION [LF] .)  

5. Remove the PCM. (See PCM REMOVAL/INSTALLATION [LF] .)  

6. Remove the drive belt. (See DRIVE BELT REPLACEMENT [LF] .)  

7. Do not allow remaining compressor oil in the A/C compressor and pipes to spill, and remove in the order 

indicated in Fig. 11 . 


2008 Mazda MX-5 Miata Grand Touring 

2008 HVAC Basic System - MX-5 Miata


Fig. 11: View Of A/C Compressor Pipe Hose & Lines (With Torque Specifications) 
Courtesy of MAZDA MOTORS CORP. 

8. Install in the reverse order of removal.  

9. Perform the refrigerant system performance test. (See REFRIGERANT SYSTEM PERFORMANCE 

TEST .)  

CAUTION:

If moisture or foreign material enters the refrigeration cycle, 
cooling ability will be lowered and abnormal noise or other 
malfunction could occur. Always plug open fittings immediately 
after removing any refrigeration cycle parts.  


2008 Mazda MX-5 Miata Grand Touring 

2008 HVAC Basic System - MX-5 Miata


A/C COMPRESSOR INSTALLATION NOTE

1. Rotate new A/C compressor shaft six to eight revolutions while draining new refrigerant oil in a clean 

measuring device. Use this refrigerant oil to refill new compressor. Do not allow refrigerant oil to become 
contaminated.  

2. Rotate old A/C compressor shaft six to eight revolutions while draining old refrigerant oil in a separate, 

clean measuring device.  

3. Compare those oil amounts. The amount of the oil drained from the new A/C compressor should be 

greater than the old one.  

4. Pour the same amount oil of drained from the old A/C compressor back into the new A/C compressor. 

A/C compressor oil type  

DH-PR  

A/C compressor oil sealed volume (approx. quantity)  

130 ml {130 cc, 4.39 fl oz}  

CAUTION:

Due to the high moisture-absorption characteristics of the 
compressor oil, it may absorb moisture if left over a long period of 
time thereby negatively affecting A/C operation. Drain the 
compressor oil and refill within 10 min. of each other.  


2008 Mazda MX-5 Miata Grand Touring 

2008 HVAC Basic System - MX-5 Miata


Content   ..  127  128  129  130   ..