Range Rover Sport. Manual - part 66
 

  Index      Land Rover     Range Rover Sport - service repair manual 2005-2009 year


Search            


Content   ..  64  65  66  67   ..


Range Rover Sport. Manual - part 66


Air Suspension Compressor Drier (60.50.09) 

Removal

1
.

  WARNING: Do not work on or under a vehicle supported only by a jack. Always support the vehicle

on safety stands.

Raise and support the vehicle.

2 . Remove the air suspension compressor. 

For additional information, refer to 

Air Suspension Compressor (60.50.10)

3
.

  CAUTION: Before disconnecting or removing the components, ensure the area around the joint

faces and connections are clean and dry. Plug open connections to prevent contamination.

Disconnect the air line from the air suspension compressor drier.


Release the air line from the retaining clip.

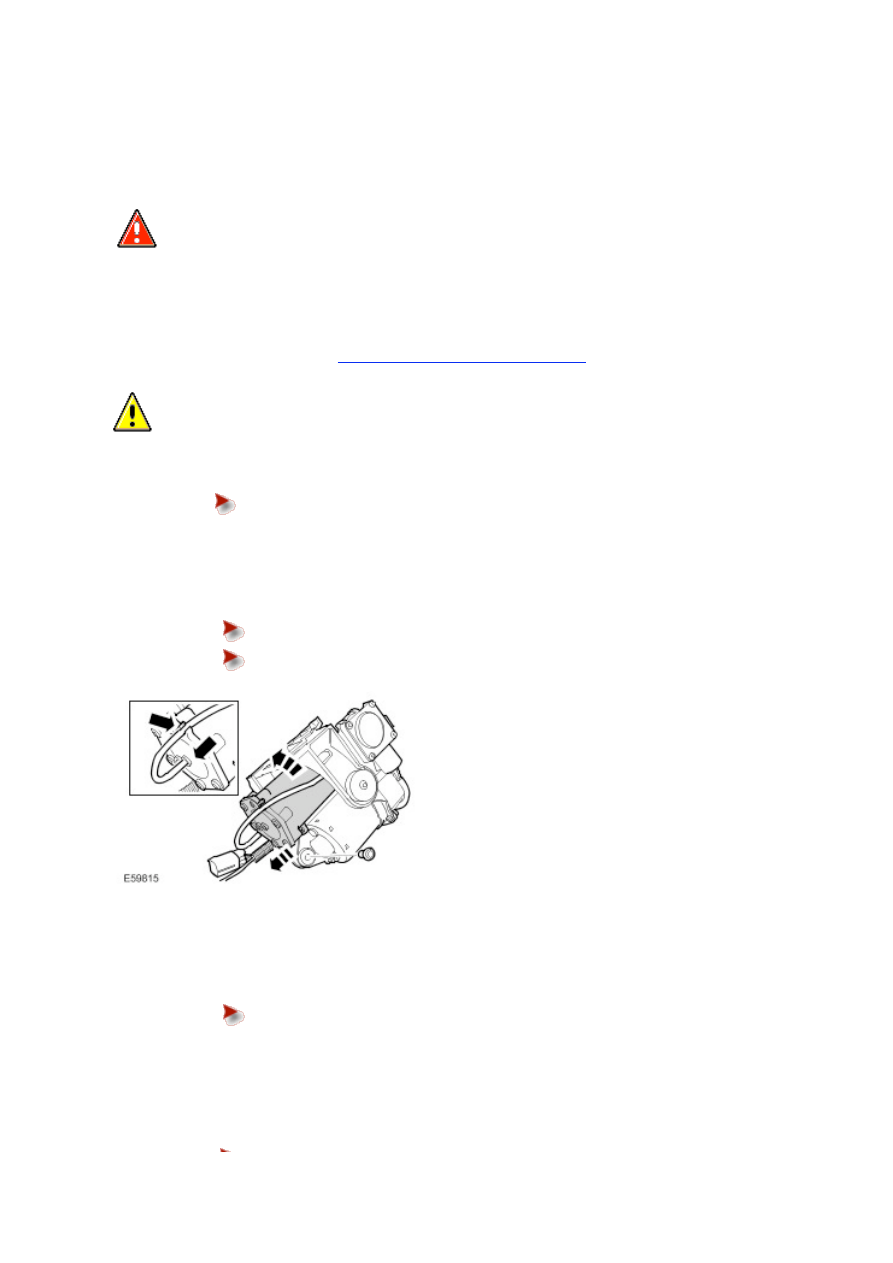
4 . NOTE: 


If equipped, note the position of the air suspension compressor retaining cable.

Remove the air suspension compressor drier.


Remove the retaining screw.


Remove and discard the O-ring seal.

Installation

1 . Install a new O-ring seal.


Lubricate the O-ring with a lithium based grease.

2
.

NOTE: 


If equipped, make sure the air suspension compressor retaining cable is correctly routed around the
compressor cylinder head.

Install the air suspension compressor drier.

Install the retaining screw and tighten to 3 Nm (2.2 lb.ft).

3 .

  CAUTION: Visually inspect the air line ends for damage or wear. Replace the air line as necessary.

  CAUTION: Pull on the air line to make sure it is securely intalled in the connector.

Connect the air line to the air suspension compressor drier.


Attach the air line to the retaining clip.

4 . Install the air suspension compressor. 

For additional information, refer to 

Air Suspension Compressor (60.50.10)

Air Suspension Compressor (60.50.10) 

Removal

1 . Using T4, depressurize the air suspension. 

For additional information, refer to 

Air Suspension System Depressurize and Pressurize (60.50.38)

2
.

  WARNING: Do not work on or under a vehicle supported only by a jack. Always support the vehicle

on safety stands.

Raise and support the vehicle.

3 . Remove the air suspension compressor lower cover.


Remove the 3 bolts.


Release the 5 clips.

4 .

  CAUTION: Always plug any open connections to prevent contamination.

Remove the air suspension compressor.


Disconnect the 3 air lines.


Disconnect the 2 electrical connectors.


Remove the 3 bolts.

1
.

  CAUTION: Make sure that the wiring harness and the air suspension pipes are not trapped behind

the air suspension compressor bracket.

  CAUTION: Make sure the air suspension compressor upper cover is correctly positioned.

NOTE: 


Install, but do not fully tighten the lower retaining bolts, before installing the upper retaining bolt.

Install the air suspension compressor.


Tighten the bolts to 10 Nm (7 lb.ft).


Connect the air lines.


Connect the electrical connectors.

2
.

  CAUTION: Make sure the air suspension exhaust pipe is correctly located in to the air suspension

upper cover.

Install the air suspension compressor lower cover.


Install the bolts and tighten to 9 Nm (7 lb.ft).

3 . Using T4, pressurize the air suspension. 

For additional information, refer to 

Air Suspension System Depressurize and Pressurize (60.50.38)


Content   ..  64  65  66  67   ..