Jeep XJ. Manual - part 71
(10) Disconnect radiator upper and lower hoses
clamps. Disconnect radiator upper and lower hoses.
(11) Mark the position of the hood latch striker on
the radiator crossmember and remove hood latch
striker.
(12) Remove two radiator upper crossmember to
isolator nuts (Fig. 39).
(13) Remove four radiator upper crossmember
bolts and remove upper crossmember.
(14) If equipped with air conditioning, separate
radiator from condenser by removing condenser-to-ra-
diator mounting brackets (Fig. 40).
(15) Lift radiator straight up and out of engine
compartment taking care not to damage fins.
INSTALLATION
The radiator is supplied with two alignment dowels
(Fig. 41). They are located on the bottom tank and fit
into rubber grommets in the radiator lower cross-
member.
(1) Lower radiator into engine compartment. Posi-
tion alignment dowels into rubber grommets in radi-
ator lower crossmember (Fig. 41)
(2) If equipped with air conditioning, attach con-
denser to radiator with mounting brackets (Fig. 40).
(3) Install radiator upper crossmember and four
mounting bolts.
(4) Install radiator upper crossmember-to-isolator
nuts. Tighten nuts to 10 N·m (86 in. lbs.) torque. If
isolator-to-radiator nuts had been removed, tighten
them to 5 N·m (47 in. lbs.) torque.
(5) Install hood latch striker. Note previously
marked position.
(6) Connect radiator upper and lower hoses.
(7) If equipped, connect automatic transmission
fluid cooler lines. Refer to Group 21, Transmissions
for procedures. If equipped with remote cooler, attach
cooler line to bracket at bottom of radiator.
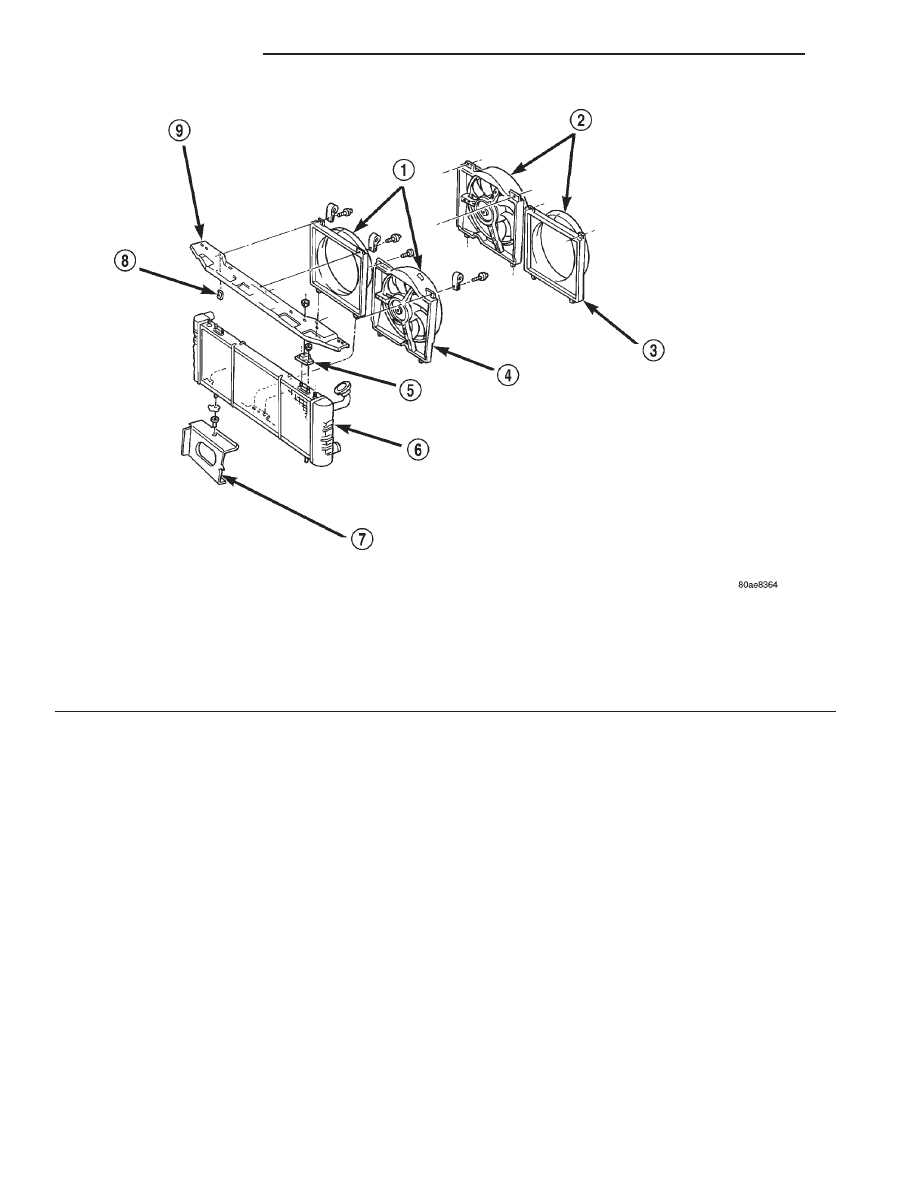
Fig. 39 Radiator Removal/Installation—4.0L Engines
1 – (LHD)
2 – (RHD)
3 – VISCOUS FAN SHROUD
4 – ELECTRIC FAN MODULE
5 – ISOLATOR
6 – RADIATOR
7 – LOWER CROSSMEMBER
8 – U-NUT
9 – UPPER CROSSMEMBER
7 - 32
COOLING SYSTEM
XJ
REMOVAL AND INSTALLATION (Continued)