Jeep Liberty KJ. Manual - part 1282


  Index      Jeep     Jeep Liberty KJ - service repair manual 2006 year


Search            


Content   ..  1280  1281  1282  1283   ..


Jeep Liberty KJ. Manual - part 1282
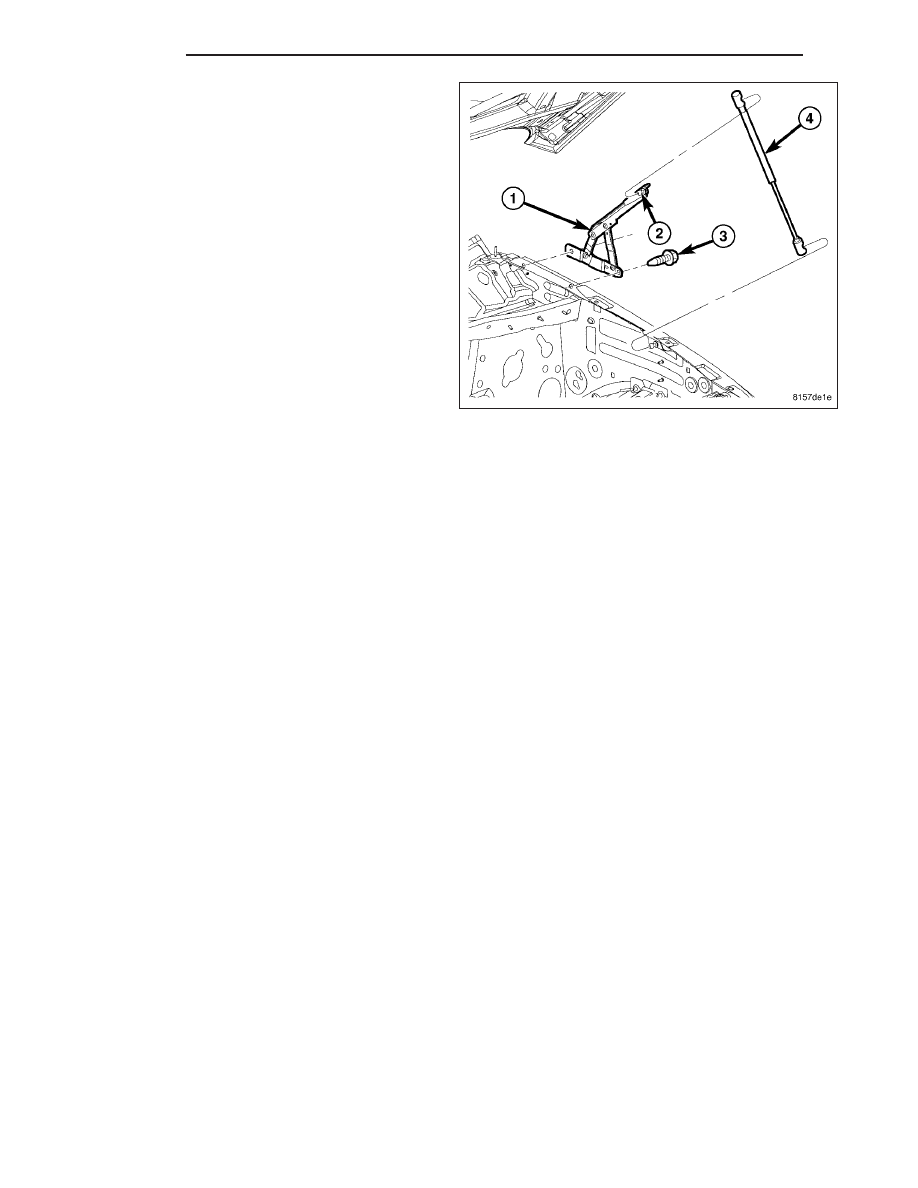


CAUTION: Do not install the support cylinders by
pressing at the center of the cylinder. Press the
ends only.

2. Install the support cylinder (4) over the ball studs

with the thin end connected to the body side of the
hinge and the retaining clips snapping into place.

23 - 28

HOOD

KJ

LATCH RELEASE HANDLE

REMOVAL

1. Remove the cowl trim panel. (Refer to 23 - BODY/INTERIOR/COWL TRIM COVER - REMOVAL)

2. Remove the three screws and remove the handle.

3. Disconnect the hood release cable.

INSTALLATION

1. Connect the hood release cable to the handle.

2. Install the handle and install the three screws.

3. Install the cowl trim cover. (Refer to 23 - BODY/INTERIOR/COWL TRIM COVER - INSTALLATION)

KJ

HOOD

23 - 29

DOOR - FRONT

TABLE OF CONTENTS

page

page

CHECK STRAP

REMOVAL . . . . . . . . . . . . . . . . . . . . . . . . . . . . . . . . . . . . 31
INSTALLATION . . . . . . . . . . . . . . . . . . . . . . . . . . . . . . . 32

DOOR

REMOVAL . . . . . . . . . . . . . . . . . . . . . . . . . . . . . . . . . . . . 33
INSTALLATION . . . . . . . . . . . . . . . . . . . . . . . . . . . . . . . 34
ADJUSTMENTS

ADJUSTMENT . . . . . . . . . . . . . . . . . . . . . . . . . . . . . . 36

DOOR GLASS

REMOVAL . . . . . . . . . . . . . . . . . . . . . . . . . . . . . . . . . . . . 38
INSTALLATION . . . . . . . . . . . . . . . . . . . . . . . . . . . . . . . 39

EXTERIOR HANDLE

REMOVAL . . . . . . . . . . . . . . . . . . . . . . . . . . . . . . . . . . . . 41
INSTALLATION . . . . . . . . . . . . . . . . . . . . . . . . . . . . . . . 41

GLASS RUN CHANNEL

REMOVAL . . . . . . . . . . . . . . . . . . . . . . . . . . . . . . . . . . . . 43
INSTALLATION . . . . . . . . . . . . . . . . . . . . . . . . . . . . . . . 43

HINGE

REMOVAL . . . . . . . . . . . . . . . . . . . . . . . . . . . . . . . . . . . . 45
INSTALLATION . . . . . . . . . . . . . . . . . . . . . . . . . . . . . . . 46

LATCH

REMOVAL . . . . . . . . . . . . . . . . . . . . . . . . . . . . . . . . . . . . 47

INSTALLATION . . . . . . . . . . . . . . . . . . . . . . . . . . . . . . . 48

LATCH STRIKER

REMOVAL . . . . . . . . . . . . . . . . . . . . . . . . . . . . . . . . . . . . 50
INSTALLATION . . . . . . . . . . . . . . . . . . . . . . . . . . . . . . . 50

LOCK CYLINDER

REMOVAL . . . . . . . . . . . . . . . . . . . . . . . . . . . . . . . . . . . . 51
INSTALLATION . . . . . . . . . . . . . . . . . . . . . . . . . . . . . . . 52

TRIM PANEL

REMOVAL . . . . . . . . . . . . . . . . . . . . . . . . . . . . . . . . . . . . 53
INSTALLATION . . . . . . . . . . . . . . . . . . . . . . . . . . . . . . . 54

WATERDAM

REMOVAL . . . . . . . . . . . . . . . . . . . . . . . . . . . . . . . . . . . . 55
INSTALLATION . . . . . . . . . . . . . . . . . . . . . . . . . . . . . . . 55

WINDOW REGULATOR - MANUAL

REMOVAL . . . . . . . . . . . . . . . . . . . . . . . . . . . . . . . . . . . . 57
INSTALLATION . . . . . . . . . . . . . . . . . . . . . . . . . . . . . . . 58

WINDOW REGULATOR - POWER

REMOVAL . . . . . . . . . . . . . . . . . . . . . . . . . . . . . . . . . . . . 60
INSTALLATION . . . . . . . . . . . . . . . . . . . . . . . . . . . . . . . 61

23 - 30

DOOR - FRONT

KJ

CHECK STRAP

REMOVAL

1. Remove the waterdam. (Refer to 23 - BODY/

DOOR - FRONT/WATERDAM - REMOVAL)

2. Remove screws attaching door check to A-pillar.

3. Remove the two nuts (1) and remove the door

check strap (2).

KJ

DOOR - FRONT

23 - 31


Content   ..  1280  1281  1282  1283   ..