Jeep Grand Cherokee WK. Manual - part 13


  Index      Jeep     Jeep Grand Cherokee WK - service repair manual 2005 year


Search            


Content   ..  11  12  13  14   ..


Jeep Grand Cherokee WK. Manual - part 13


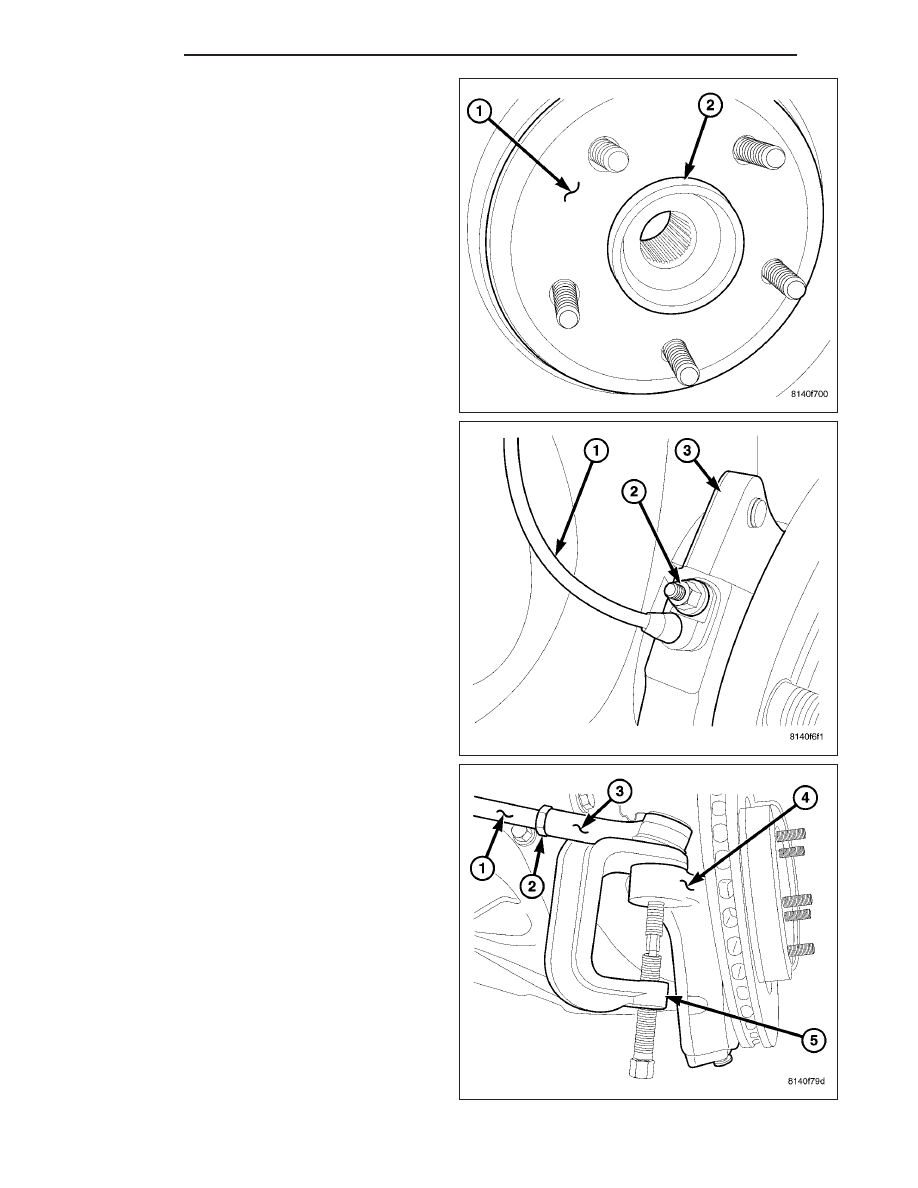
5. Remove the o-ring (2) and discard then remove

disc brake rotor (1). (Refer to 5 - BRAKES/HY-
DRAULIC/MECHANICAL/ROTORS - REMOVAL).

6. Remove the wheel speed sensor (2). (Refer to 5 -

BRAKES/ELECTRICAL/FRONT

WHEEL

SPEED

SENSOR - REMOVAL).

7. Remove the axle shaft nut. (if equipped with four

wheel drive)

8. Remove the hub/bearing (3). (Refer to 2 - SUS-

PENSION/FRONT/HUB / BEARING - REMOVAL).

9. Remove the outer tie rod end retaining nut.

10. Seperate the outer tie rod end (3) from the steer-

ing knuckle using special tool 8677(5). (Refer to
19

-

STEERING/LINKAGE/TIE

ROD

END

-

REMOVAL).

2 - 16

FRONT

WK

11. Remove the lower ball joint nut.

12. Seperate the lower ball joint from the knuckle (1)

using tool C–4150A (2).

13. Remove the upper ball joint nut.

14. Seperate the upper ball joint (2) from the knuckle

(3) using tool 8677 (1).

15. Remove the knuckle (3) from the vehicle.

WK

FRONT

2 - 17

INSTALLATION

1. Install the knuckle (1) to the vehicle.

2. Install the lower ball joint into the knuckle.

3. Install the lower ball joint nut. Tighten the nut to 81

N·m (60 ft.lbs.).

4. Install the upper ball joint (2) into the knuckle (3)

5. Install the upper ball joint nut (4). Tighten the nut to

81 N·m (60 ft.lbs.).

6. Install the outer tie rod end to the steering knuckle.

(Refer to 19 - STEERING/LINKAGE/TIE ROD END
- INSTALLATION).

2 - 18

FRONT

WK

7. Install the hub/bearing (3), Tighten to 136 N·m (100

ft.lbs.). (Refer to 2 - SUSPENSION/FRONT/HUB /
BEARING - INSTALLATION).

8. Install the axle shaft nut. Tighten the nut to 135

N·m (96 ft.lbs.).(if equipped with four wheel drive).

9. Install the wheel speed sensor (2). (Refer to 5 -

BRAKES/ELECTRICAL/FRONT

WHEEL

SPEED

SENSOR - INSTALLATION).

10. Install the disc brake rotor (1). (Refer to 5 -

BRAKES/HYDRAULIC/MECHANICAL/ROTORS -
INSTALLATION).

11. Install the caliper adapter (1). (Refer to 5 -

BRAKES/HYDRAULIC/MECHANICAL/DISC
BRAKE CALIPER ADAPTER - INSTALLATION).

12. Install the tire and wheel assembly. (Refer to 22 -

TIRES/WHEELS/WHEELS - STANDARD PROCE-
DURE).

13. Perform wheel alignment (Refer to 2 - SUSPEN-

SION/WHEEL

ALIGNMENT

-

STANDARD

PROCEDURE).

WK

FRONT

2 - 19


Content   ..  11  12  13  14   ..