Jeep Grand Cherokee WJ. Manual - part 368


  Index      Jeep     Jeep Grand Cherokee WJ - service repair manual 2001 year


Search            


Content   ..  366  367  368  369   ..


Jeep Grand Cherokee WJ. Manual - part 368


INSTALLATION

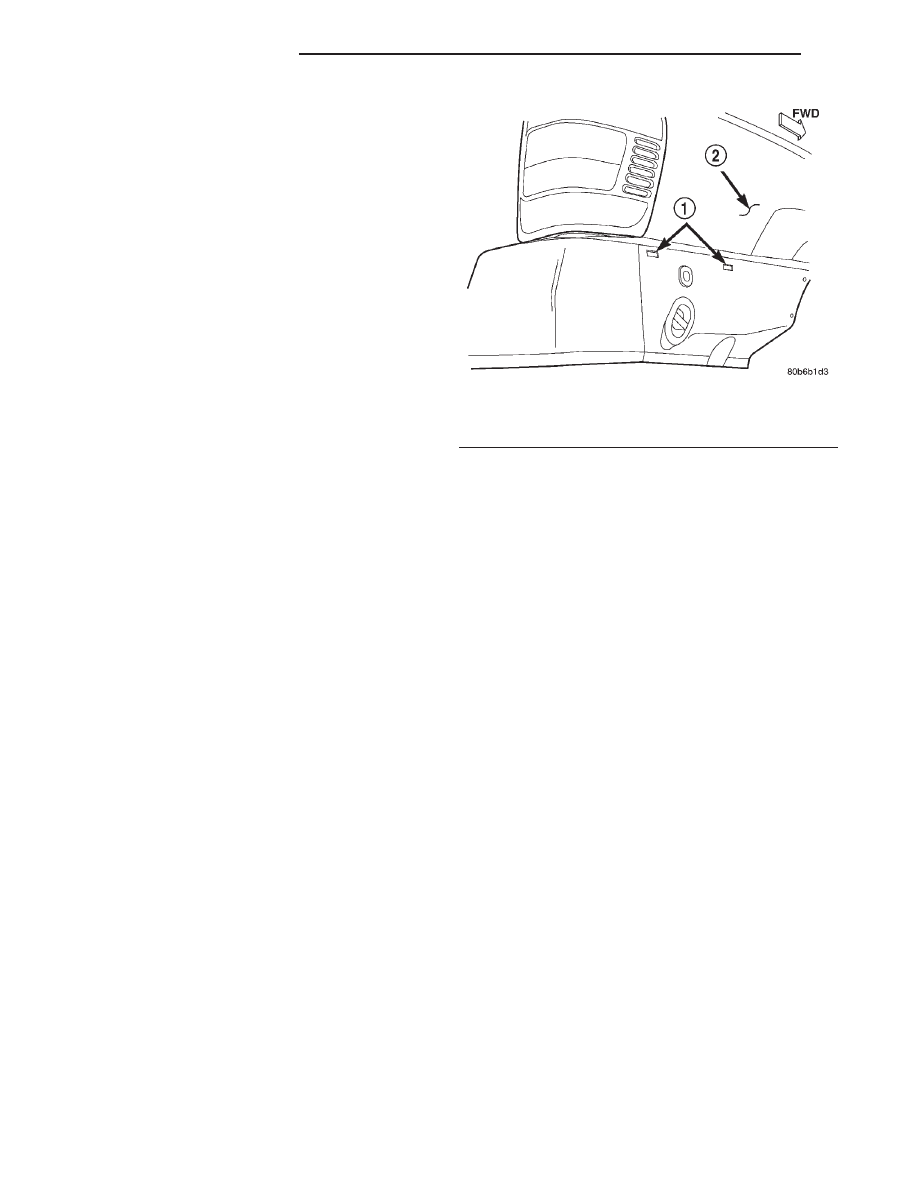
(1) Position fascia on vehicle aligning retainers

with slots in quarter panel (Fig. 7).

(2) Press forward edges of fascia inward to engage

retainers.

(3) Install screws attaching fascia to liftgate open-

ing.

(4) Install plastic push pins attaching fascia to lift-

gate opening.

(5) Install nuts attaching upper edge of fascia to

quarter panel and wheel liner.

(6) Install plastic rivets attaching fascia to wheel

liner.

(7) Install support lower vehicle.
(8) Install plastic push pins attaching fascia to fuel

tank skid plate.

(9) Install the interior trim panels removed to

access fascia retainers.

(10) Install tie down loop screws.
(11) Install tires.

REAR ABSORBER

REMOVAL

(1) Remove rear fascia.
(2) Remove rivets attaching absorber to rear cross-

member (Fig. 5).

(3) Separate absorber from vehicle.

INSTALLATION

(1) Position absorber on vehicle.
(2) Install rivets attaching absorber to rear cross-

member.

(3) Install rear fascia.

Fig. 7 Fascia Attachment

1 – SLOT
2 – QUARTER PANEL

13 - 4

FRAME AND BUMPERS

WJ

REMOVAL AND INSTALLATION (Continued)

FRAME

TABLE OF CONTENTS

page

page

DESCRIPTION AND OPERATION

FRAME . . . . . . . . . . . . . . . . . . . . . . . . . . . . . . . . . 5

REMOVAL AND INSTALLATION

FRONT TOW HOOK. . . . . . . . . . . . . . . . . . . . . . . . 5
FRONT SKID PLATE . . . . . . . . . . . . . . . . . . . . . . . 5
TRANSFER CASE SKID PLATE . . . . . . . . . . . . . . . 6

FUEL TANK SKID PLATE . . . . . . . . . . . . . . . . . . . . 6
REAR TOW HOOK . . . . . . . . . . . . . . . . . . . . . . . . . 6
TRAILER HITCH . . . . . . . . . . . . . . . . . . . . . . . . . . 6

SPECIFICATIONS

FRAME DIMENSIONS . . . . . . . . . . . . . . . . . . . . . . 7
TORQUE SPECIFICATIONS . . . . . . . . . . . . . . . . . 10

DESCRIPTION AND OPERATION

FRAME

DESCRIPTION

Jeep Grand Cherokee vehicles do not have a con-

ventional frame. They are constructed as a unitized
body and frame. Jeep unibodies are constructed from
special high strength steel and coated metals. This
process reduces weight and provides strength to
withstand the forces applied against structural mem-
bers. The structural members provide a unibody that
has great structural strength.

REMOVAL AND INSTALLATION

FRONT TOW HOOK

REMOVAL

(1) Remove bolts that attach tow hook bracket to

the lower crossmember (Fig. 1).

(2) Separate tow hook bracket from lower cross-

member.

INSTALLATION

(1) Position tow hook bracket at the lower cross-

member.

(2) Install bolts attaching tow hook bracket to cross-

member. Tighten bolts to 54 N·m (40 ft. lbs.) torque.

FRONT SKID PLATE

REMOVAL

(1) Position a support under skid plate.
(2) Remove bolts attaching skid plate to frame

(Fig. 2).

(3) Separate skid plate from frame.

Fig. 1 Front Tow Hook

1 – TAPPING PLATE
2 – CROSSMEMBER
3 – BRACKET
4 – TOW HOOK

Fig. 2 Front Skid Plate

1 – SKID PLATE

WJ

FRAME AND BUMPERS

13 - 5

INSTALLATION

(1) Position skid plate on a support.
(2) Raise it into position
(3) Install bolts attaching skid plate to frame.

Tighten bolts to 54 N·m (40 ft. lbs.) torque.

TRANSFER CASE SKID PLATE

REMOVAL

(1) Support skid plate.
(2) Remove bolts that attach skid plate to trans-

mission support crossmember and frame sill (Fig. 3).

(3) Remove support and skid plate from vehicle.

INSTALLATION

(1) Install nutserts, if removed.
(2) Position and support skid plate at the frame

sill and transmission support crossmember.

(3) Attach skid plate to frame sill and crossmember

with the bolts. Tighten bolts to 34 N·m (25 ft. lbs) torque.

FUEL TANK SKID PLATE

The fuel tank skid plate is integrated with the fuel

tank. Refer to Fuel Tank for service procedures

REAR TOW HOOK

REMOVAL

(1) Remove rear tow hook to frame brace.
(2) Remove bolts attaching the tow hook bracket to

frame (Fig. 4).

(3) Separate tow hook bracket from frame.

INSTALLATION

(1) position tow hook bracket on frame.
(2) Install bolts attaching tow hook bracket to

frame. Tighten bolts to 68 N·m (50 ft. lbs.) torque.

(3) Install rear tow hook to frame brace.

TRAILER HITCH

REMOVAL

(1) Raise and support vehicle.
(2) Remove rear fascia.
(3) Remove screws attaching trailer harness plug

to trailer hitch.

(4) Disconnect harness connector from harness

plug.

(5) Position support stands under trailer hitch.

Fig. 3 Transfer Case Skid Plate

1 – TRANSFER CASE
2 – NUTSERT
3 – SKID PLATE
4 – CROSSMEMBER

Fig. 4 Rear Tow Hook

1 – TOW HOOK BRACE
2 – TOW HOOK
3 – BRACKET
4 – FUEL TANK

13 - 6

FRAME AND BUMPERS

WJ

REMOVAL AND INSTALLATION (Continued)

(6) Remove bolts attaching trailer hitch to frame

rails (Fig. 5).

(7) Separate trailer hitch from vehicle.

INSTALLATION

(1) Position trailer hitch on support stands.
(2) Position trailer hitch on vehicle.
(3) Install bolts attaching trailer hitch to frame

rails. Tighten bolts to 68 N·m (50 lbs.) torque.

(4) Connect harness connector to harness plug.
(5) Position harness plug in trailer hitch and

install screws.

(6) Install rear fascia.
(7) Remove supports and lower vehicle.

SPECIFICATIONS

FRAME DIMENSIONS

Fig. 5 Trailer Hitch

1 – FUEL TANK
2 – TRAILER HITCH

WJ

FRAME AND BUMPERS

13 - 7

REMOVAL AND INSTALLATION (Continued)


Content   ..  366  367  368  369   ..