Jaguar X-Type Sedan and Estate (Wagon). Manual - part 30


  Index      Jaguar     Jaguar X-Type Sedan and Estate (Wagon) (2.0 L, 2.5 L and 3.0 L Gasoline; 2.0 L and 2.2 L, Diesel) - manual 2001-2009 year


Search            


Content   ..  28  29  30  31   ..


Jaguar X-Type Sedan and Estate (Wagon). Manual - part 30


17. 

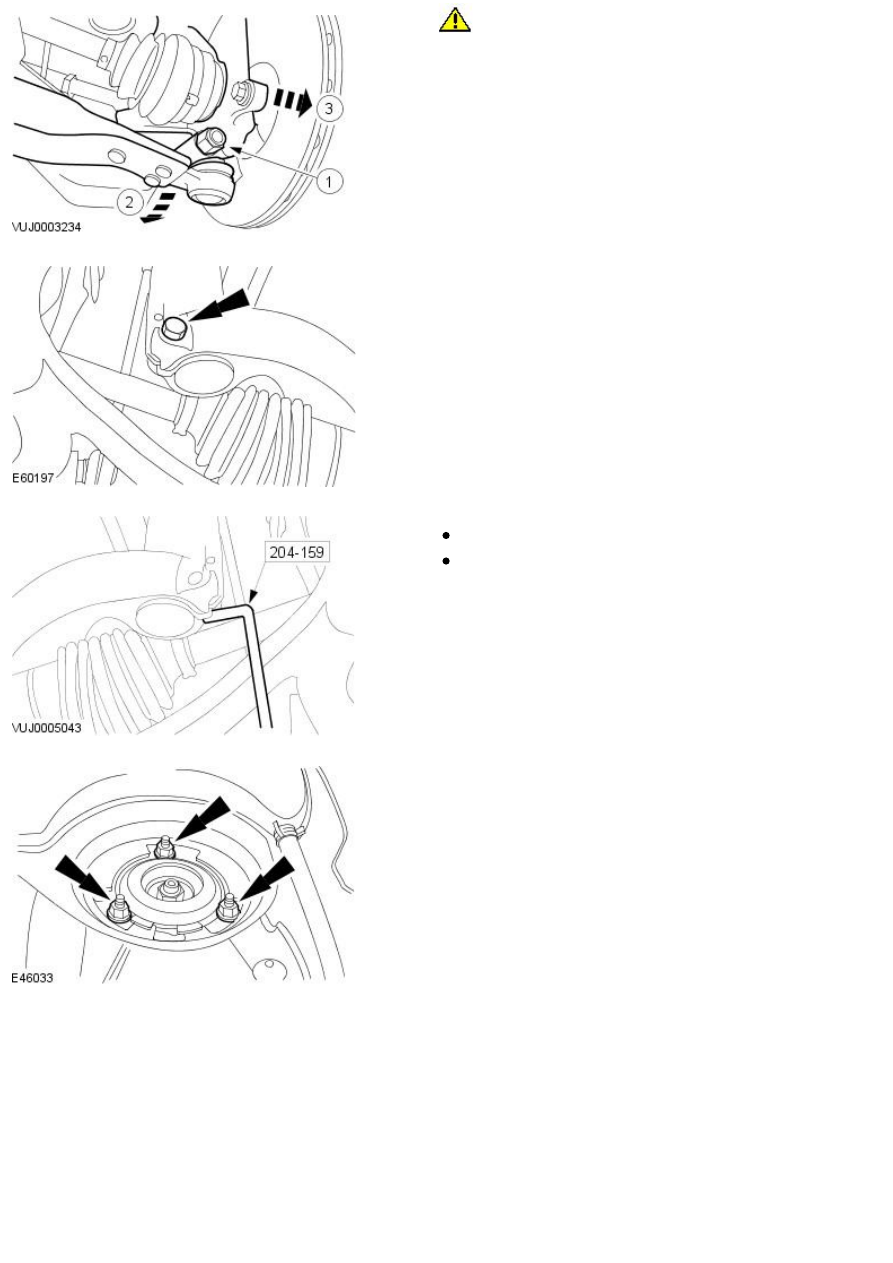
CAUTION: To prevent damage to the lower arm bushing, make

sure the subframe is lowered before detaching the lower arm ball joint.

Detach the wheel knuckle.

1. Remove the lower arm ball joint retaining nut and bolt.

2. Reposition the lower arm.

3. Detach the wheel knuckle from the halfshaft.

1. Remove and discard the lower arm ball joint shield.

18. Remove the wheel knuckle pinch bolt.

19. Using the special tool, remove the wheel knuckle.

Using the special tool, spread the wheel knuckle.

Remove the wheel knuckle.

20. NOTE: Note the orientation of the retaining stud marked with a paint
spot.

Remove the strut and spring assembly.

Installation

All vehicles

1. NOTE: Make sure orientation arrow on the strut top rubber mount faces
from front to rear of the vehicle.

• NOTE: Make sure the retaining stud marked with a paint spot is correctly
orientated.

Install the strut and spring assembly.

Tighten to 25 Nm.

2. Using the special tool, install the wheel knuckle.

3. Install the wheel knuckle pinch bolt.

Tighten to 85 Nm.

4. NOTE: Install a new retaining nut.

• NOTE: Install a new lower arm ball joint shield.

Attach the wheel knuckle.

1. Reposition the lower arm.

2. Attach the wheel knuckle to the halfshaft.

3. Install the lower arm ball joint retaining nut and bolt.

Tighten to 83 Nm.

5. Loosely install the new wheel hub nut.

6. Using the special tool raise the front subframe.

7. NOTE: Left-hand shown, right-hand similar.

Loosely install the front subframe rear mount retaining bolts.

8. NOTE: Left-hand shown, right-hand similar.

Loosely install the front subframe reinforcement plate retaining bolts.

9. NOTE: Left-hand shown, right-hand similar.

Tighten the front subframe rear mount retaining bolts.

Tighten to 142 Nm.

10. NOTE: Left-hand shown, right-hand similar.

Tighten the front subframe reinforcement bolts.

M8 to 35 Nm.

M10 to 70 Nm.

11. Remove the special tool.

Vehicles with high intensity discharge headlamps

12. Attach the link rod to the headlamp leveling sensor.

All vehicles

13. Attach the tie-rod end.

Tighten to 35 Nm.

14. Attach the brake caliper and anchor plate assembly.

Tighten to 133 Nm.


Content   ..  28  29  30  31   ..