Isuzu Trooper (1998-2002 year). Manual - part 685


  Index      Isuzu     Isuzu Trooper - service repair manual 1998-2002 year


Search            


Content   ..  683  684  685  686   ..


Isuzu Trooper (1998-2002 year). Manual - part 685


7A–32

AUTOMATIC TRANSMISSION (4L30–E)

Removal

NOTE: Before remove transmission and transfer
assembly from vehicle, change the tansfer mode to 2WD
using push button on dash panel.

1. Remove engine hood.
2. Disconnect battery ground cable.
3. Remove transfer control lever knob (1) and

disconnect wiring harness connectors, then remove
front console (2).

4. Remove selector lever assembly (3).
5. Remove transfer control lever (4).
6. Remove transfer protector (5).
7. Disconnect shift control rod from the selector lever

assembly side.

256RW013

8. Remove rear propeller shaft (6).
9. Remove front propeller shaft (7).

10. Remove harness protector (8).

11. Support transfer case with a jack and remove two rear

mount nuts (9) from the 3rd crossmember side. 

12. Remove eight third crossmember bolts and third

crossmember (10).

13. Remove front exhaust silencer mounting nuts.
14. Remove left seat belt tension rod.
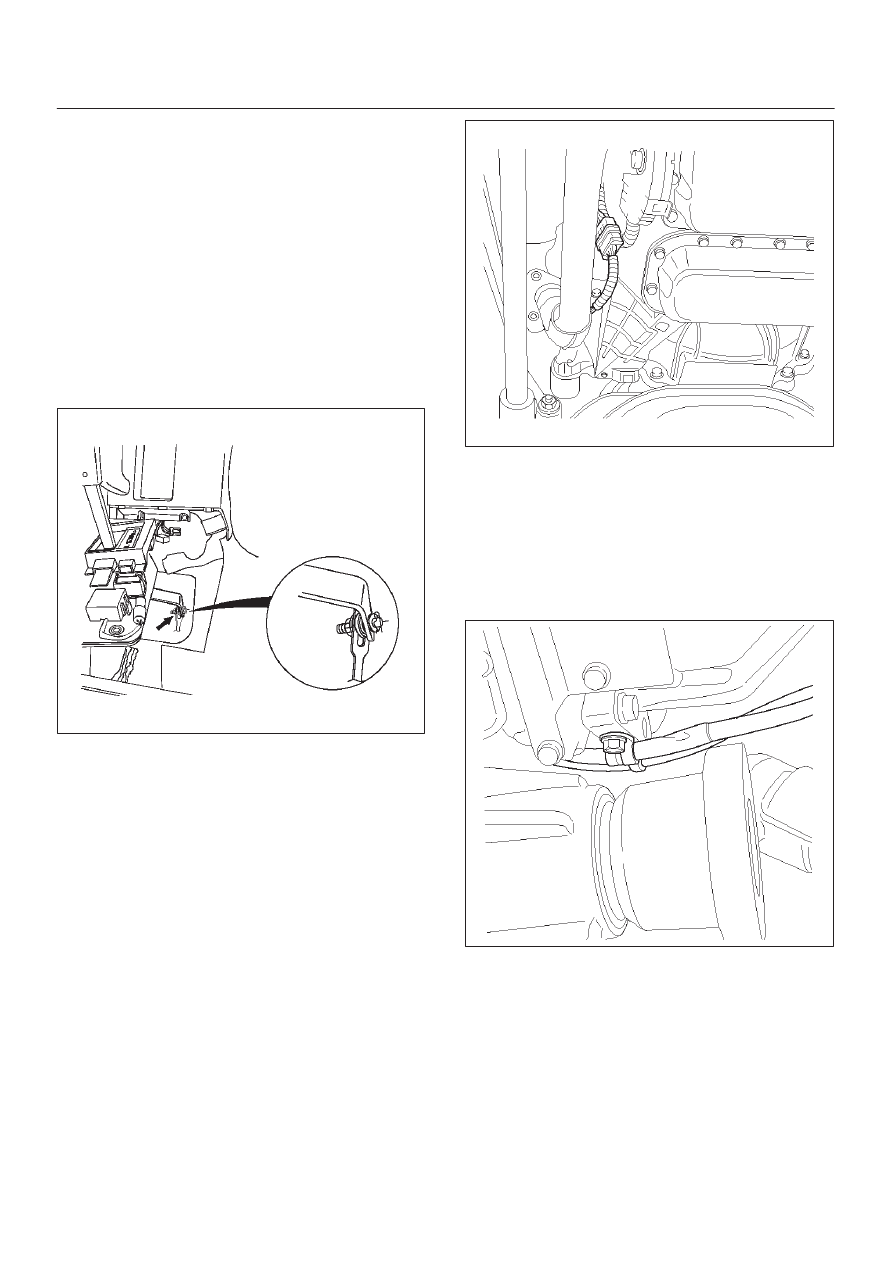
15. Disconnect two left side oxygen sensor connectors

from the transmission harness.

150RW002

16. Remove left catalytic converter assembly (11).
17. Loosen right catalytic converter nuts to exhaust

manifold.

NOTE: This will make the next steps easier.

18. Disconnect transmission oil cooler pipe (13) from A/T

side.

19. Remove oil pipe clamp  from torque converter

housing bracket.

253RY001

20. Loosen oil pipe clamp bolt at the engine mount side.
21. Remove starter (14).

7A–33

AUTOMATIC TRANSMISSION (4L30–E)

22. Disconnect fuel pipe clamp brackets from

transmission side.
Fuel hose connector removal procedure
If removal of the fuel hose connector is required for
transmission servicing and/or replacement, follow the
steps below.

141R200001

NOTE:

D

An O-ring is used as a seal between the fuel pipe and
the connector. Take care not to damage the contact
surfaces during the removal procedure. Do not allow
the surface to become contaminated with dirt or other
foreign material.

D

Perform the entire removal procedure with your
hands. Do not use tools.
1. Separating the connector and fuel pipe

1. Clean the fuel pipe and connector to remove

mud and other dirt.

2. Pull the black plastic piece toward the

connector. Hold the piece near the connector.
Pull the connector from the fuel pipe.

If the connector and fuel pipe are stuck togeth-
er, jiggle the connector back and forth to loosen
the connector. Do not yank the connector from
the fuel pipe.

141RY00002

141RY00003

7A–34

AUTOMATIC TRANSMISSION (4L30–E)

3. Tie a vinyl bag around the connector and fuel

pipe to protect them from dirt.

141RY00004

2. Joining the connector and fuel hose

1. Remove the vinyl bag from the connector and

fuel hose. Check that the contact surfaces are
undamaged and free of dirt and other foreign
material. Clean if necessary.

2. Align the axis of the fuel pipe and connector.

Push the connector into the fuel pipe until a
distinct click is heard.

141RY00005

3. Gently pull on the connector to check that it is

securely latched.

141RY00006

23. Disconnect transmission harness connectors (15)

from transmission, transfer, and right catalytic
converter.

24. Remove under covers (3 pieces) (16) from

transmission case.

25. Remove flex plate torque converter fixing bolts (6

pieces) (17) by turning crankshaft.

26. Support the transmission with a transmission jack,

and hoist engine with a chain block.

27. Remove engine transmission fixing bolts (18). 
28. Remove transmission assembly with transfer case

(19).

29. Remove transfer case from the transmission

assembly if necessary.

Installation

1. Slowly raise transmission jack until front of the

transmission is aligned with rear of the engine, then
install transmission assembly.

7A–35

AUTOMATIC TRANSMISSION (4L30–E)

2. Tighten engine transmission bolts, to the specified

torque.

F07RW041

3. Support transfer case with a jack, and remove the

transmission jack.

4. Install flex plate torque converter bolts (6 pieces) by

turning crankshaft.

Torque: 54 N

m (5.5 kg·m/40 Ib ft)

NOTE: Do not reuse the flex plate torque converter bolt.

240RY003

5. Install the under cover (3 pieces), and tighten the

bolts to the specified torque.

Torque: 8 N

m (0.8 kg·m/69 Ib in)

6. Install the starter, and tighten the bolts to the specified

torque.

Torque: 40 N

m (4.1 kg·m/30 Ib ft)

7. Connect transmission harness connectors to

transmission, transfer, and right catalytic converter.

8. Connect fuel pipe brackets to transmission side.

NOTE: See “NOTE” of removal steps.


Content   ..  683  684  685  686   ..