Infiniti QX56 (Z62). Manual - part 234
CHG
ALTERNATOR
CHG-25
< REMOVAL AND INSTALLATION >
C
D
E
F
G
H
I
J
K
L
B
A
O
P
N
REMOVAL AND INSTALLATION
ALTERNATOR
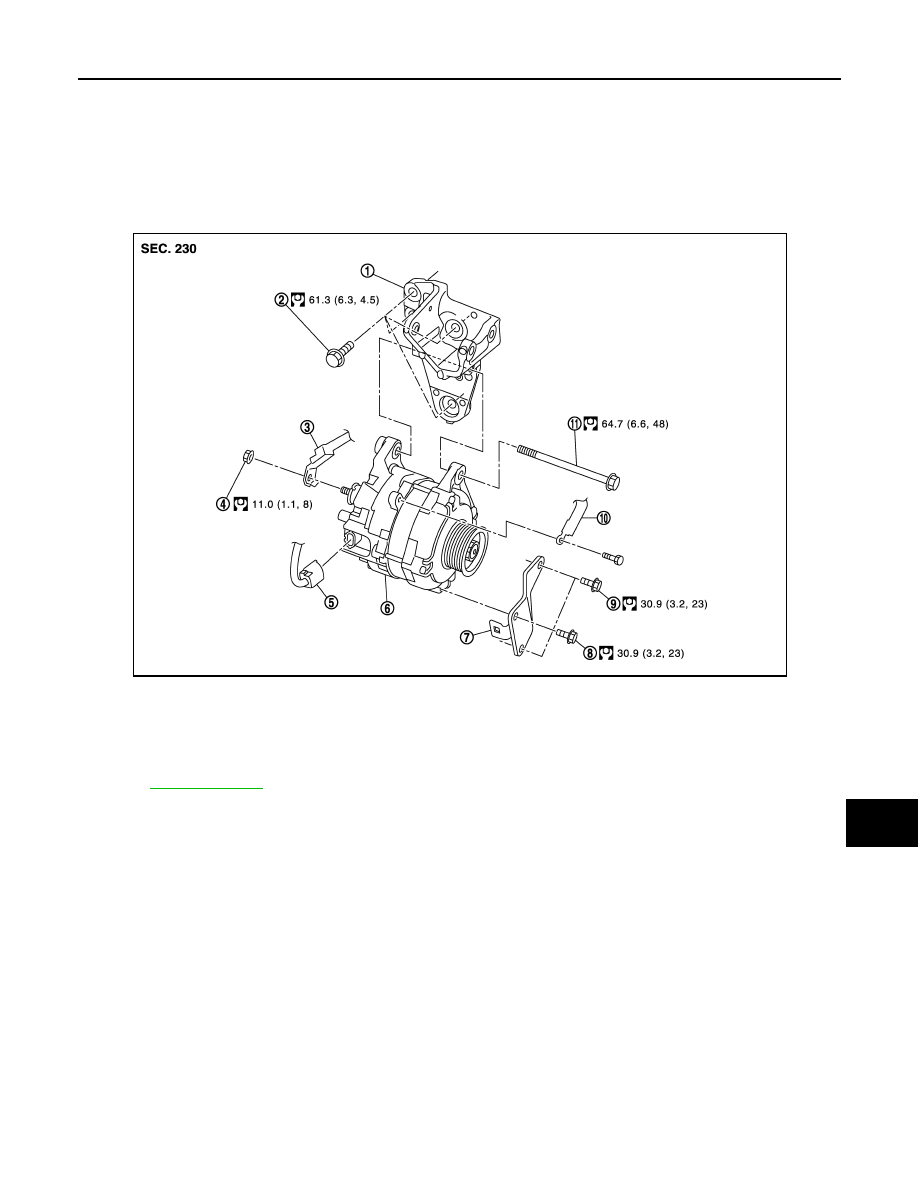
Exploded View
INFOID:0000000006274877
REMOVAL
DISASSEMBLY
1.
Alternator bracket
2.
Alternator bracket mounting bolt
3.
“B” terminal harness
4.
“B” terminal nut
5.
Alternator connector
6.
Alternator
7.
Alternator stay
8.
Alternator mounting bolt (lower)
9.
Alternator stay mounting bolt
10. Ground harness
11.
Alternator mounting bolt (upper)
Refer to
JMMIA0361GB