Infiniti QX56 (Z62). Manual - part 1345


  Index      Infiniti     Infiniti QX56 (Z62) - service repair manual 2011 year


Search            


Content   ..  1343  1344  1345  1346   ..


Infiniti QX56 (Z62). Manual - part 1345


MID SUN GEAR, REAR SUN GEAR, HIGH AND LOW REVERSE CLUTCH HUB

TM-289

< UNIT DISASSEMBLY AND ASSEMBLY >

[7AT: RE7R01B]

C

E

F

G

H

I

J

K

L

M

A

B

TM

N

O

P

8.

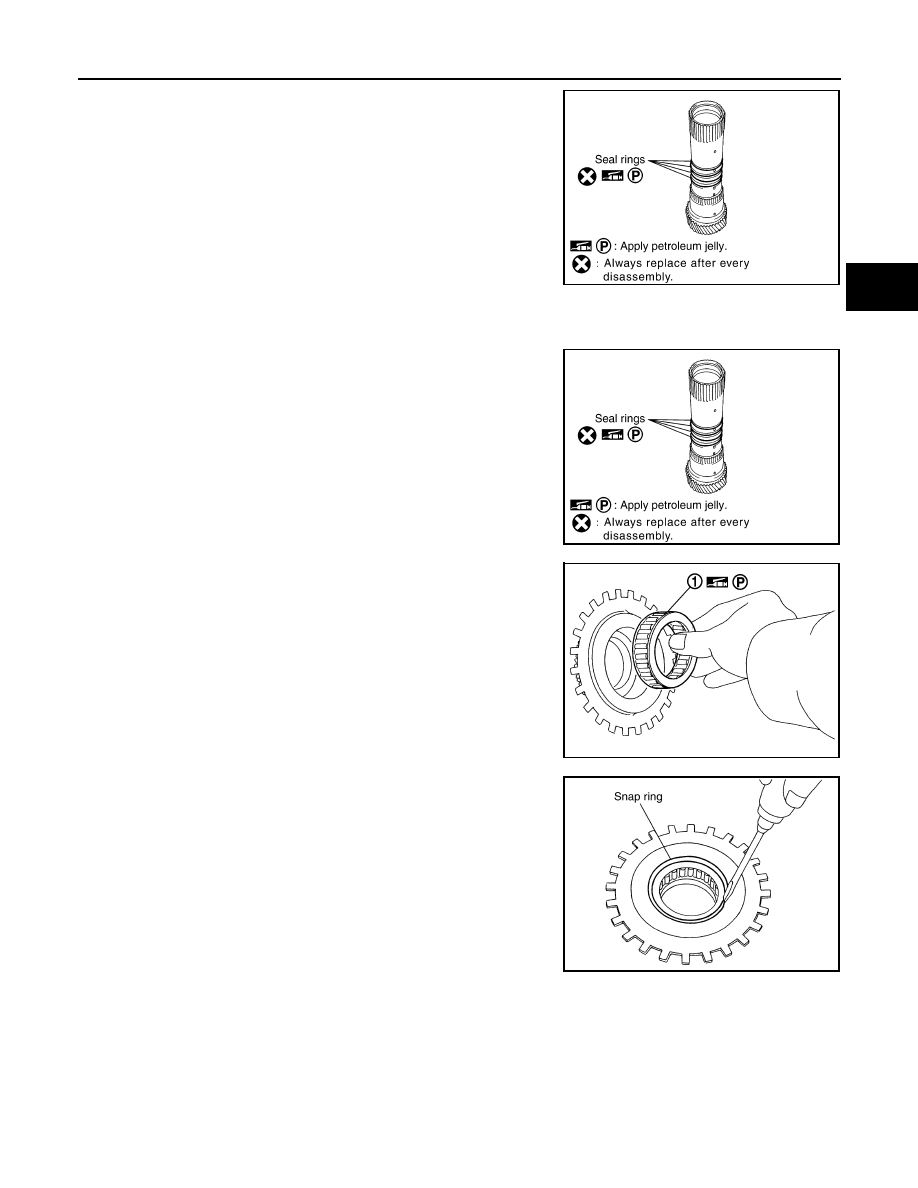
Remove seal rings from mid sun gear.

Assembly

INFOID:0000000006226934

1.

Install seal rings to mid sun gear.

2.

Install 2nd one-way clutch to rear sun gear.

3.

Install snap ring to rear sun gear using a flat-bladed screwdriver.

CAUTION:

• Be careful not to scratch rear sun gear and 2nd one-way

clutch.

• Be careful not to damage snap ring.

SCIA2861E

SCIA2861E

JSDIA1817ZZ

SCIA2859E

TM-290

< UNIT DISASSEMBLY AND ASSEMBLY >

[7AT: RE7R01B]

MID SUN GEAR, REAR SUN GEAR, HIGH AND LOW REVERSE CLUTCH HUB

4.

Install rear sun gear assembly to mid sun gear assembly.

5.

Install needle bearing to high and low reverse clutch hub.

CAUTION:

Check the direction of needle bearing. Refer to 

TM-222,

"Location of Needle Bearings and Bearing Races"

.

6.

Install high and low reverse clutch hub to mid sun gear assem-
bly.

7.

Install snap ring to mid sun gear assembly using pair of snap
ring pliers.

CAUTION:

Be careful not to expand snap ring excessively.

8.

Check operation of 2nd one-way clutch.

SCIA7018E

SCIA2857E

SCIA2856E

SCIA2855E

MID SUN GEAR, REAR SUN GEAR, HIGH AND LOW REVERSE CLUTCH HUB

TM-291

< UNIT DISASSEMBLY AND ASSEMBLY >

[7AT: RE7R01B]

C

E

F

G

H

I

J

K

L

M

A

B

TM

N

O

P

a.

Hold mid sun gear and turn rear sun gear.

b.

Check 2nd one-way clutch for correct locking and unlocking
directions.

CAUTION:

If not as shown in the figure, check installation direction of
2nd one-way clutch.

9.

Install needle bearing and bearing races to high and low reverse
clutch hub.

CAUTION:

Check the direction of needle bearing. Refer to 

TM-222,

"Location of Needle Bearings and Bearing Races"

.

Inspection

INFOID:0000000006226935

INSPECTION AFTER REMOVAL

2nd One-way Clutch

1.

Hold mid sun gear and turn rear sun gear.

2.

Check 2nd one-way clutch for correct locking and unlocking
directions. If necessary, replace 2nd one-way clutch.

High and Low Reverse Clutch Hub Snap Ring, Rear Sun Gear Snap Ring

Check for deformation, fatigue or damage. If necessary, replace the snap ring.

2nd One-way Clutch

Check frictional surface for wear or damage. If necessary, replace the 2nd one-way clutch.

Mid Sun Gear

Check for deformation, fatigue or damage. If necessary, replace the mid sun gear.

Rear Sun Gear

Check for deformation, fatigue or damage. If necessary, replace the rear sun gear.

High and Low Reverse Clutch Hub

Check for deformation, fatigue or damage. If necessary, replace the high and low reverse clutch hub.

SCIA3132E

SCIA5238E

SCIA3132E

TM-292

< UNIT DISASSEMBLY AND ASSEMBLY >

[7AT: RE7R01B]

HIGH AND LOW REVERSE CLUTCH

HIGH AND LOW REVERSE CLUTCH

Exploded View

INFOID:0000000006226936

Disassembly

INFOID:0000000006226937

1.

Remove bearing race from high and low reverse clutch drum.

2.

Remove snap ring from high and low reverse clutch drum using
a flat-bladed screwdriver.

CAUTION:

• Be careful not to scratch high and low reverse clutch

drum.

• Be careful not to damage snap ring.

3.

Remove drive plates, driven plates and retaining plate from high
and low reverse clutch drum.

1.

High and low reverse clutch drum

2.

High and low reverse clutch driven 
plate

3.

High and low reverse clutch retaining 
plate

4.

Snap ring

5.

High and low reverse clutch drive 
plate

6.

Bearing race

SCIA5239E

SCIA5215E

SCIA2868E


Content   ..  1343  1344  1345  1346   ..