Infiniti Q45. Manual - part 156


  Index      Infiniti     Infiniti Q45 - service repair manual 2006 year


Search            copyright infringement  


Content   ..  154  155  156  157   ..


Infiniti Q45. Manual - part 156


AUDIO

AV-53

C

D

E

F

G

H

I

J

L

M

A

B

AV

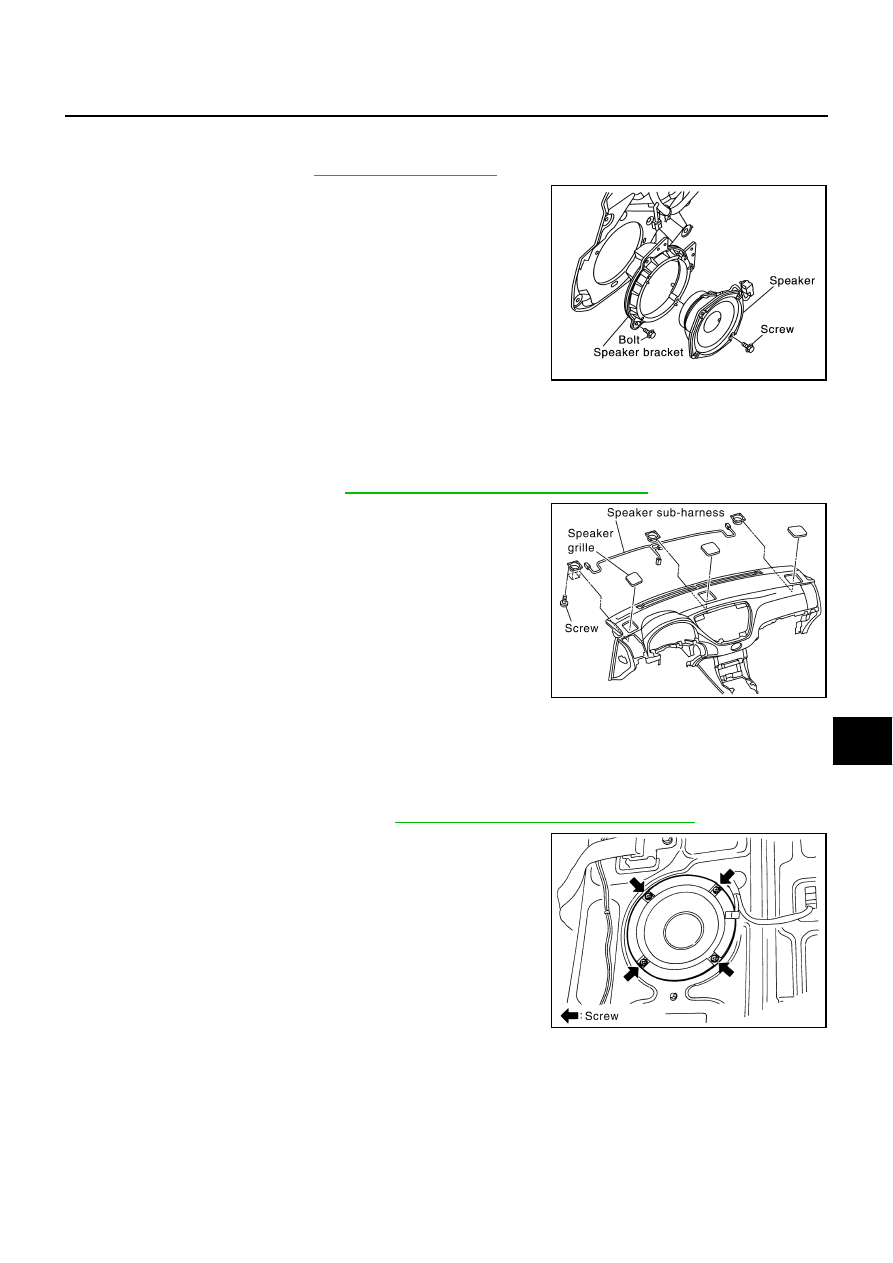
Removal and Installation of Door Speaker

NKS001I9

REMOVAL

1.

Remove door finisher. Refer to 

EI-35, "DOOR FINISHER"

 .

2.

Remove screws (3), and remove speaker.

INSTALLATION

Installation is the reverse order of removal.

Removal and Installation of Instrument Panel Speaker

NKS001IA

REMOVAL

1.

Remove instrument panel. Refer to 

IP-10, "INSTRUMENT PANEL ASSEMBLY"

 .

2.

Remove screws (4), and remove instrument panel speaker.

INSTALLATION

Installation is the reverse order of removal.

Removal and Installation of Woofer

NKS001IB

REMOVAL

1.

Remove rear parcel shelf finisher. Refer to 

EI-48, "REAR PARCEL SHELF FINISHER"

 .

2.

Remove screws (4), and remove woofer.

INSTALLATION

Installation is the reverse order of removal.

PKIA0231E

SKIA0353E

SKIA0356E

AV-54

AUDIO

Removal and Installation of BOSE Speaker  Amp.

NKS001IC

REMOVAL

1.

Remove trunk front finisher. Refer to 

EI-60, "TRUNK ROOM TRIM & TRUNK LID FINISHER"

 .

2.

Remove rear parcel shelf finisher. Refer to 

EI-48, "REAR PARCEL SHELF FINISHER"

 .

3.

Remove screws (4), and remove BOSE speaker amp. from the
trunk room side.

INSTALLATION

Installation is the reverse order of removal.

Removal and Installation of AudioPilot

®

  Microphone

NKS001ID

REMOVAL

1.

Remove cluster lid C. Refer to 

IP-10, "INSTRUMENT PANEL ASSEMBLY"

 .

2.

Remove clock. Refer to 

DI-227, "Removal and Installation"

 .

3.

Disconnect AudioPilot

®

  microphone connector.

4.

Remove screws (2), and remove AudioPilot

®

  microphone.

INSTALLATION

Installation is the reverse order of removal.

Removal and Installation of Steering Wheel Switch

NKS001IE

Refer to 

SRS-40, "DRIVER AIR BAG MODULE"

 .

Removal and Installation of Multifunction Switch

NKS002KF

Refer to 

IP-10, "INSTRUMENT PANEL ASSEMBLY"

 .

SKIA0357E

SKIB0427E

AUDIO

AV-55

C

D

E

F

G

H

I

J

L

M

A

B

AV

Removal and Installation of Rear Control Switch

NKS001IF

REMOVAL

1.

Remove tray box from the center armrest. Refer to 

SE-191, "REAR SEAT"

 .

2.

Remove rear control switch from tray box.

INSTALLATION

Installation is the reverse order of removal.

Removal and Installation of Rear Control Cancel Switch

NKS001IG

REMOVAL

1.

Remove front interior lamp. Refer to 

LT-143, "FRONT INTERIOR LAMP"

 .

2.

Remove rear control cancel switch from front interior lamp.

INSTALLATION

Installation is the reverse order of removal.

SKIA0390E

SKIA3551E

AV-56

AUDIO

Removal and Installation of Satellite Radio Tuner

NKS002JT

REMOVAL

: Vehicle front

1.

Remove trunk side finisher (left). Refer to 

EI-60, "TRUNK ROOM TRIM & TRUNK LID FINISHER"

 .

2.

Remove screws (A), and remove satellite radio tuner (1) and
active damper suspension control unit (2) from vehicle.

3.

Remove satellite radio tuner from bracket.

INSTALLATION

Installation is the reverse order of removal.

Removal and Installation of Satellite Radio Antenna

NKS002JU

REMOVAL

: Vehicle front

1.

Remove head lining. Refer to 

EI-58, "HEADLINING"

 .

2.

Remove nut (A), and then disconnect connector (1).

3.

Remove satellite radio antenna.

INSTALLATION

Installation is the reverse order of removal.

SKIB7598E

SKIB7599E

Roof antenna mounting nut

: 6.5 N·m (0.66 kg-m, 58 in-lb)


Content   ..  154  155  156  157   ..