Infiniti Q45. Manual - part 140
REFRIGERANT LINES
ATC-155
C
D
E
F
G
H
I
K
L
M
A
B
ATC
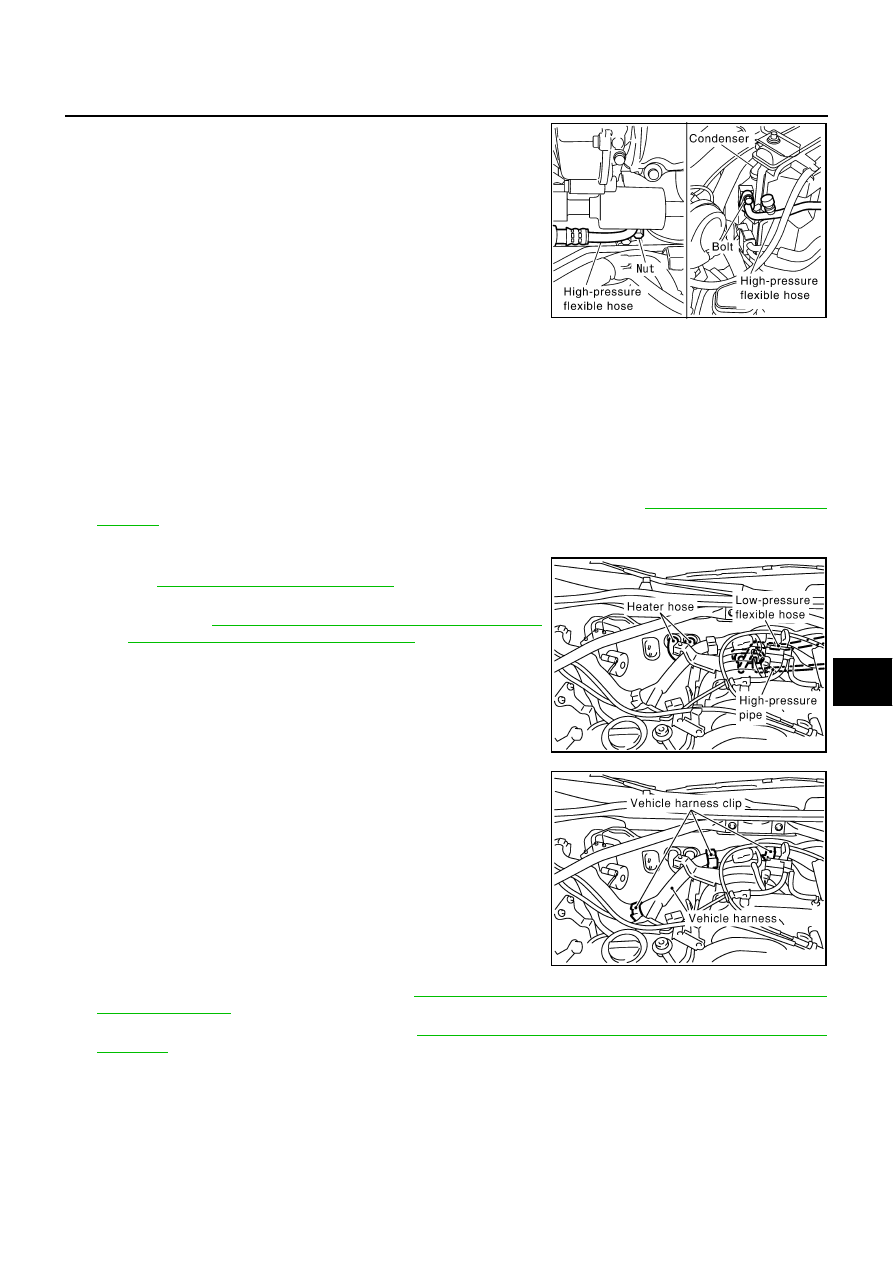
5.
Remove mounting bolt and nut, and then remove high-pressure
flexible hose.
CAUTION:
Cap or wrap the joint of the pipe with a suitable material
such as vinyl tape to avoid the entry of air.
INSTALLATION
Installation is basically the reverse order of removal.
CAUTION:
●
Replace O-rings of high-pressure flexible hose with new ones, and then apply compressor oil to it
when installing it.
●
When recharging refrigerant, check for leaks.
Removal and Installation of High-Pressure Pipe
NJS0009N
REMOVAL
1.
Remove engine cover and air cleaner cover, using power tools. Refer to
2.
Use a refrigerant collecting equipment (for HFC-134a) to discharge the refrigerant.
3.
Drain coolant from cooling system and disconnect heater hoses.
Refer to
CO-8, "Changing Engine Coolant"
.
4.
Remove tower bar, air cleaner assembly, air duct and air inlet
pipe. Refer to
FSU-5, "FRONT SUSPENSION ASSEMBLY"
and
EM-17, "AIR CLEANER AND AIR DUCT"
.
5.
Remove vehicle harness from clip.
6.
Remove low-pressure flexible hose. Refer to
ATC-153, "Removal and Installation of Low-Pressure Flexi-
7.
Remove high-pressure flexible hose. Refer to
ATC-154, "Removal and Installation of High-Pressure Flex-
.
RJIA1323E
RJIA0318E
RJIA0328E