Infiniti F50. Manual - part 153


  Index      Infiniti     Infiniti F50 - service repair manual 2006 year


Search            


Content   ..  151  152  153  154   ..


Infiniti F50. Manual - part 153


AIR MIX DOOR MOTOR

ATC-137

C

D

E

F

G

H

I

K

L

M

A

B

ATC

AIR MIX DOOR MOTOR 

PFP:27732

Removal and Installation

EJS001YL

REMOVAL
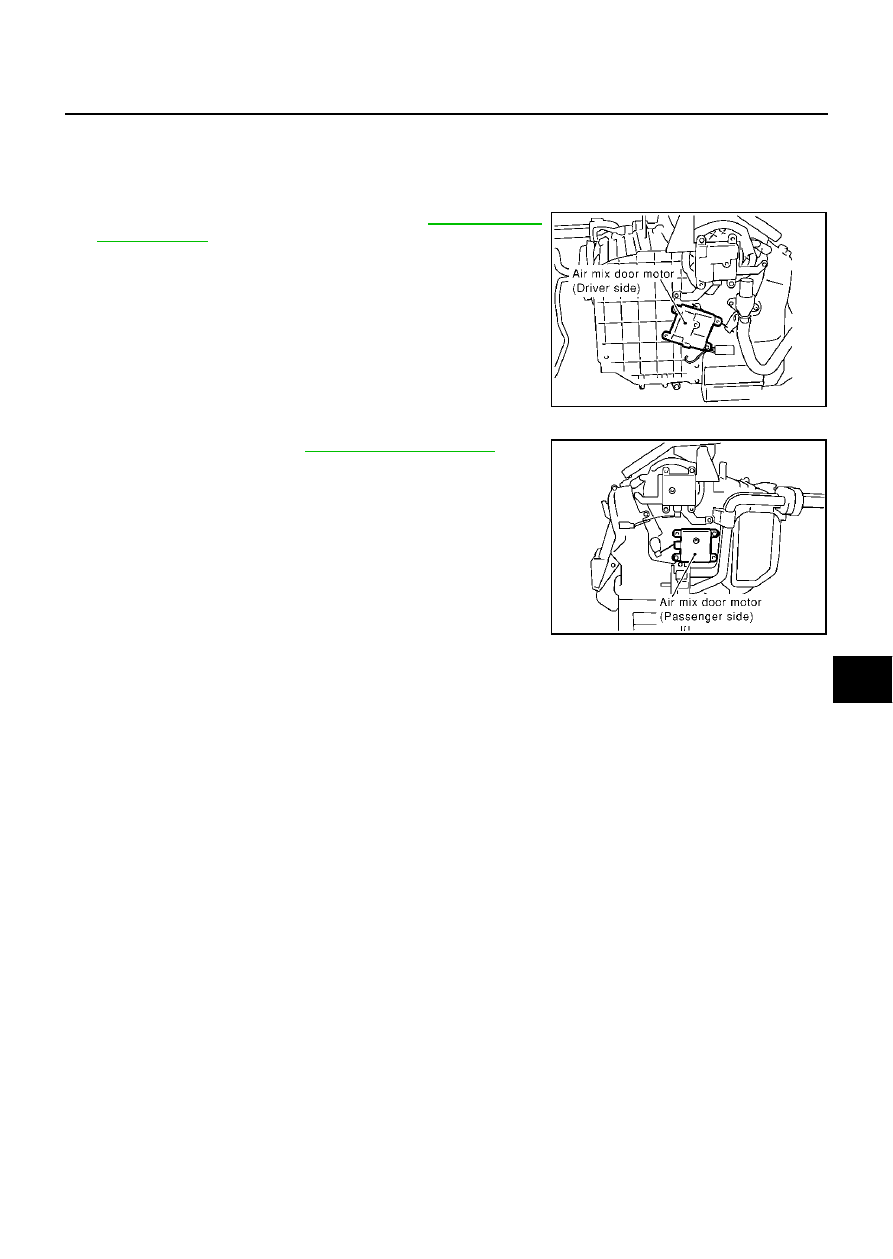
Driver Side Air Mix Door Motor

1.

Remove instrument lower driver panel. Refer to 

IP-10, "Removal

and Installation"

 .

2.

Remove air mix door rod from rod holder.

3.

Disconnect air mix door motor connector.

4.

Remove air mix door motor.

Passenger Side Air Mix Door Motor

1.

Remove blower unit. Refer to 

ATC-128, "BLOWER UNIT"

  .

2.

Remove air mix door rod from rod holder.

3.

Disconnect air mix door motor connector.

4.

Remove air mix door motor.

INSTALLATION

Installation is basically the reverse order of removal.

RJIA0288E

RJIA0287E

ATC-138

DUCTS AND GRILLES

DUCTS AND GRILLES

PFP:27860

Removal and Installation

EJS001YM

REMOVAL

Center Ventilator Grille

1.

Remove cluster lid C. Refer to 

IP-10, "Removal and Installation"

.

2.

Remove center ventilator grille.

Side Ventilator Grille

1.

Remove instrument panel. Refer to 

IP-10, "Removal and Instal-

lation"

 .

2.

Remove side ventilator grille.

RJIA0321E

RJIA0120E

RJIA0322E

DUCTS AND GRILLES

ATC-139

C

D

E

F

G

H

I

K

L

M

A

B

ATC

Rear Ventilator Grille

1.

Remove console box. Refer to 

IP-10, "Removal and Installation"

.

2.

Remove rear ventilator grille.

Rear Ventilator Side Grille

Rear Ventilator Ducts

1.

Remove console box. Refer to 

IP-14, "CONSOLE BOX ASSEM-

BLY"

 .

2.

Remove rear ventilator duct No. 2.

3.

Remove instrument panel. Refer to 

IP-10, "Removal and Instal-

lation"

 .

4.

Disconnect rear ventilator door motor connector.

5.

Remove rear ventilator duct No. 1.

RJIA0323E

RJIA0122E

RJIA0337E

RJIA0125E

ATC-140

DUCTS AND GRILLES

Rear Ventilator Side Ducts

1.

Remove front door finisher. Refer to 

EI-30, "DOOR FINISHER"

 .

2.

Remove rear ventilator side duct No. 1.

3.

Remove center pillar upper garnish. Refer to 

EI-38, "CENTER

PILLAR UPPER GARNISH"

 .

4.

Remove rear ventilator side duct No. 2.

Foot Duct

1.

Remove heater & cooling unit. Refer to 

ATC-133, "HEATER  &

COOLING UNIT ASSEMBLY"

 .

2.

Remove foot duct.

Floor Duct

1.

Remove the front seats and console box. Refer to 

IP-14, "CON-

SOLE BOX ASSEMBLY"

 .

2.

Remove the front kicking plate and the dash side finisher. 

3.

Peel back the floor trim to a point where the floor duct is visible. 

4.

Remove the floor duct No. 2 (left and right).

5.

Remove the mounting screw from the floor duct No.1.

6.

Remove the floor duct No. 1 (left and right). 

INSTALLATION

Installation is basically the reverse order of removal.

RJIA0126E

RJIA0127E

RJIA0324E

RJIA0128E


Content   ..  151  152  153  154   ..