Infiniti FX35 / FX45. Manual - part 634
ROCKER COVER
EM-53
< SERVICE INFORMATION >
[VQ35DE]
C
D
E
F
G
H
I
J
K
L
M
A
EM
N
P
O
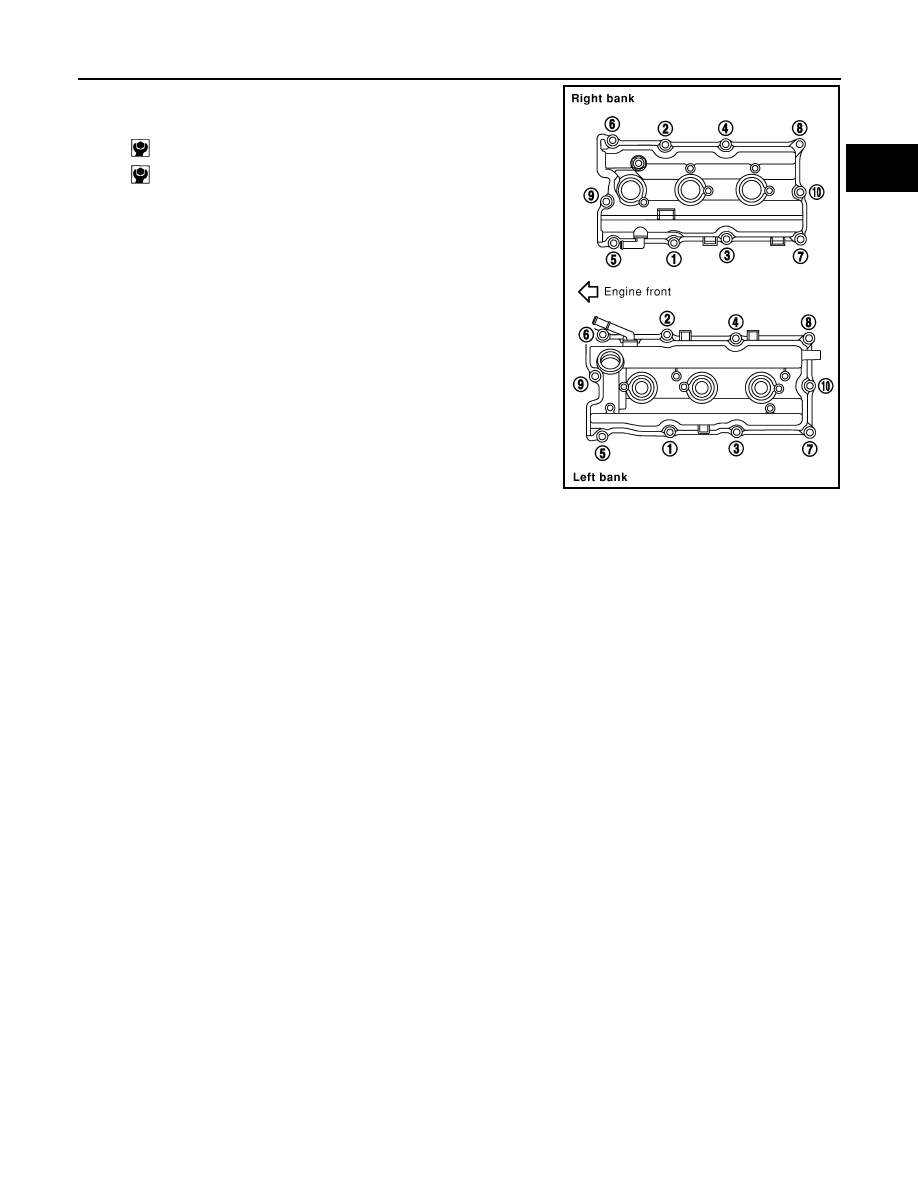
4.
Tighten bolts in two steps separately in numerical order as
shown in the figure.
5.
Install oil catcher and oil filer cap to rocker cover (left bank), if removed.
6.
Install new O-ring and PCV valve to rocker cover (right bank), if removed.
7.
Install PCV hose.
• Insert PCV hose by 25 to 30 mm (0.98 to 1.18 in) from connector end.
• When installing, be careful not to twist or come in contact with other parts.
• Install PCV hose between right and left rocker covers with its identification paint facing upward (right
rocker cover side). Refer to component figure in "Removal and Installation".
8.
Install in the reverse order of removal after this step.
1st step
: 1.96 N·m (0.20 kg-m, 17 in-lb)
2nd step
: 8.33 N·m (0.85 kg-m, 74 in-lb)
KBIA0985E