Hummer H1 (2002+). Manual - part 50
_________________________________________________________
Cooling System 4-15
®
05745159
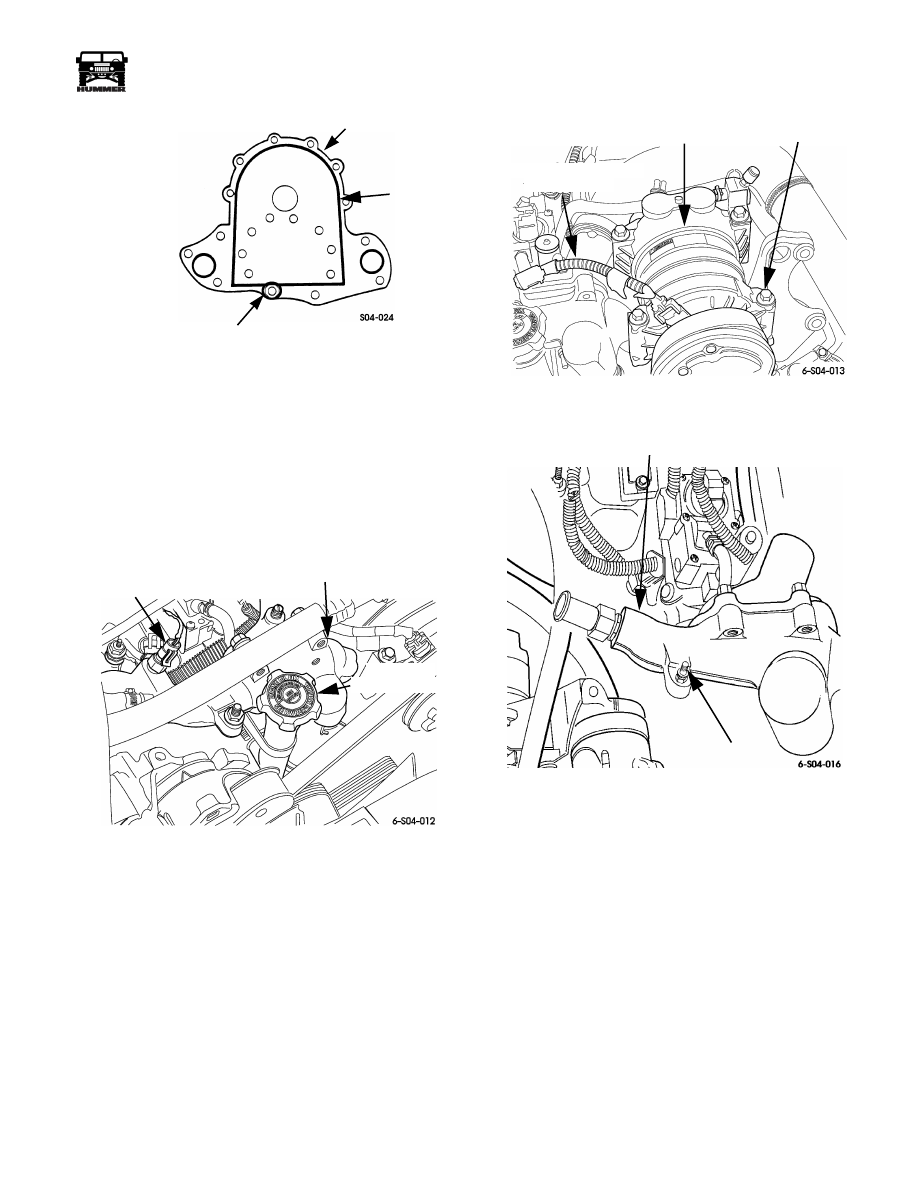
Figure 4-28: Backing Plate Sealer Application
WATER CROSSOVER SERVICE
Removal
1.
Drain engine coolant to below level of crossover.
2.
Disconnect heater, surge tank, and radiator hoses at
crossover.
3.
Disconnect coolant temperature sensor wires (Figure 4-29).
Figure 4-29: Filler Tube and Temperature
Sensor Locations
4.
Remove oil filler tube attaching nuts and remove filler
tube (Figure 4-29).
5.
Disconnect A/C compressor clutch wires (Figure 4-30).
6.
Remove compressor clutch mounting bolts. Lift
compressor out of bracket and move it aside for access to
crossover bolts and nuts.
7.
Remove water crossover attaching bolts/nuts (Figure 4-31).
8.
Remove crossover and gaskets.
9.
If crossover will be replaced, transfer air bleed valve and
coolant temperature sensor to new crossover. Also transfer
thermostats if necessary. Use Loctite PST on valve and
sensor threads to ensure proper seal.
Figure 4-30: Compressor Clutch Bolt and
Connector Location
Figure 4-31: Water Crossover Attaching Hardware
Installation
1.
Apply Permatex Ultra Black or no. 2 sealer to both sides
of crossover gaskets. Then position gaskets on cylinder
heads.
2.
Align and install crossover. Tighten crossover nuts/bolts
to 25-37 lb. ft. (34-50 N•m) torque.
3.
Install oil filler tube. Tighten attaching nuts to 13-20 lb. ft.
(18-27 N•m) torque.
4.
Connect hoses to water crossover.
5.
Install A/C compressor in bracket and tighten bolts.
6.
Connect wires to coolant temperature sensor.
7.
Refill and bleed engine cooling system.
BACKING PLATE
ENCIRCLE THIS BOLT
HOLE WITH SEALER
SEALER
BEAD
COOLANT
TEMPERATURE
SENSOR
CROSSOVER
OIL FILLER
CAP AND TUBE
A/C COMPRESSOR
COMPRESSOR
BOLT (4)
COMPRESSOR CLUTCH
CONNECTOR
WATER CROSSOVER
STUD NUT